Kubesphere - Kubernetes Platform For Cloud-Native App Management

Hey there 👋 I am Srinivas Karnati, a DevOps Engineer.
Agenda
- Introduction to KubeSphere and installation
- Cluster Management using KubeSphere console
- Multi-cloud and Multi-cluster Management
- Application Store
Introduction to KubeSphere
KubeSphere is a distributed operating system providing cloud native stack with Kubernetes as its kernel, and aims to be plug-and-play architecture for third-party applications seamless integration to boost its ecosystem.
KubeSphere is also a multi-tenant container platform with full-stack automated IT operation and streamlined DevOps workflows.
It is born for multi-cloud operation, multi-cluster deployment, multi-team cooperation and multi-tenant management, providing powerful enhancements for cluster management, observability, storage and network management, and more. It also provides better user experiences as it becomes more interactive and responsive.

- KubeSphere delivers a broad range of features while integrating with a lot of ecosystem tools around Kubernetes and offers better user experience to reduce complexity. KubeSphere allow developers and DevOps teams to use their favorite tools in a single consule and also these functionalities are loosely coupled with the platform since they are pluggable and optional.
Installing on Kubernetes
KubeSphere provides plug-and-play architecture for users, by allowing it to install on existing Kubernetes clusters. KubeSphere can be deployed on Kubernetes either hosted on public clouds or on-premises. KubeSphere interacts with the Kubernetes API to manage Kubernetes cluster resources. In other words, KubeSphere can be installed on any native Kubernetes cluster and Kubernetes distribution.
Prerequisites
KubeSphere can be deployed on public cloud and on-premises Kubernetes clusters as long as your Kubernetes cluster meets the prerequisites below.
- To install KubeSphere on Kubernetes, your Kubernetes version must be greater than > v1.19.x
- Available CPU > 1 Core and Memory > 2 G. Only x86_64 CPUs are supported, and Arm CPUs are not fully supported at present.
- A default StorageClass in your Kubernetes cluster is configured
After you make sure your Kubernetes cluster meets all the requirements, you can use kubectl to install KubeSphere.
- Use the following commands to install KubeSphere:
kubectl apply -f https://github.com/kubesphere/ks-installer/releases/download/v3.2.1/kubesphere-installer.yaml

kubectl apply -f https://github.com/kubesphere/ks-installer/releases/download/v3.2.1/cluster-configuration.yaml
- To inpect the real time installation logs, you can use:
kubectl logs -n kubesphere-system $(kubectl get pod -n kubesphere-system -l app=ks-install -o jsonpath='{.items[0].metadata.name}') -f
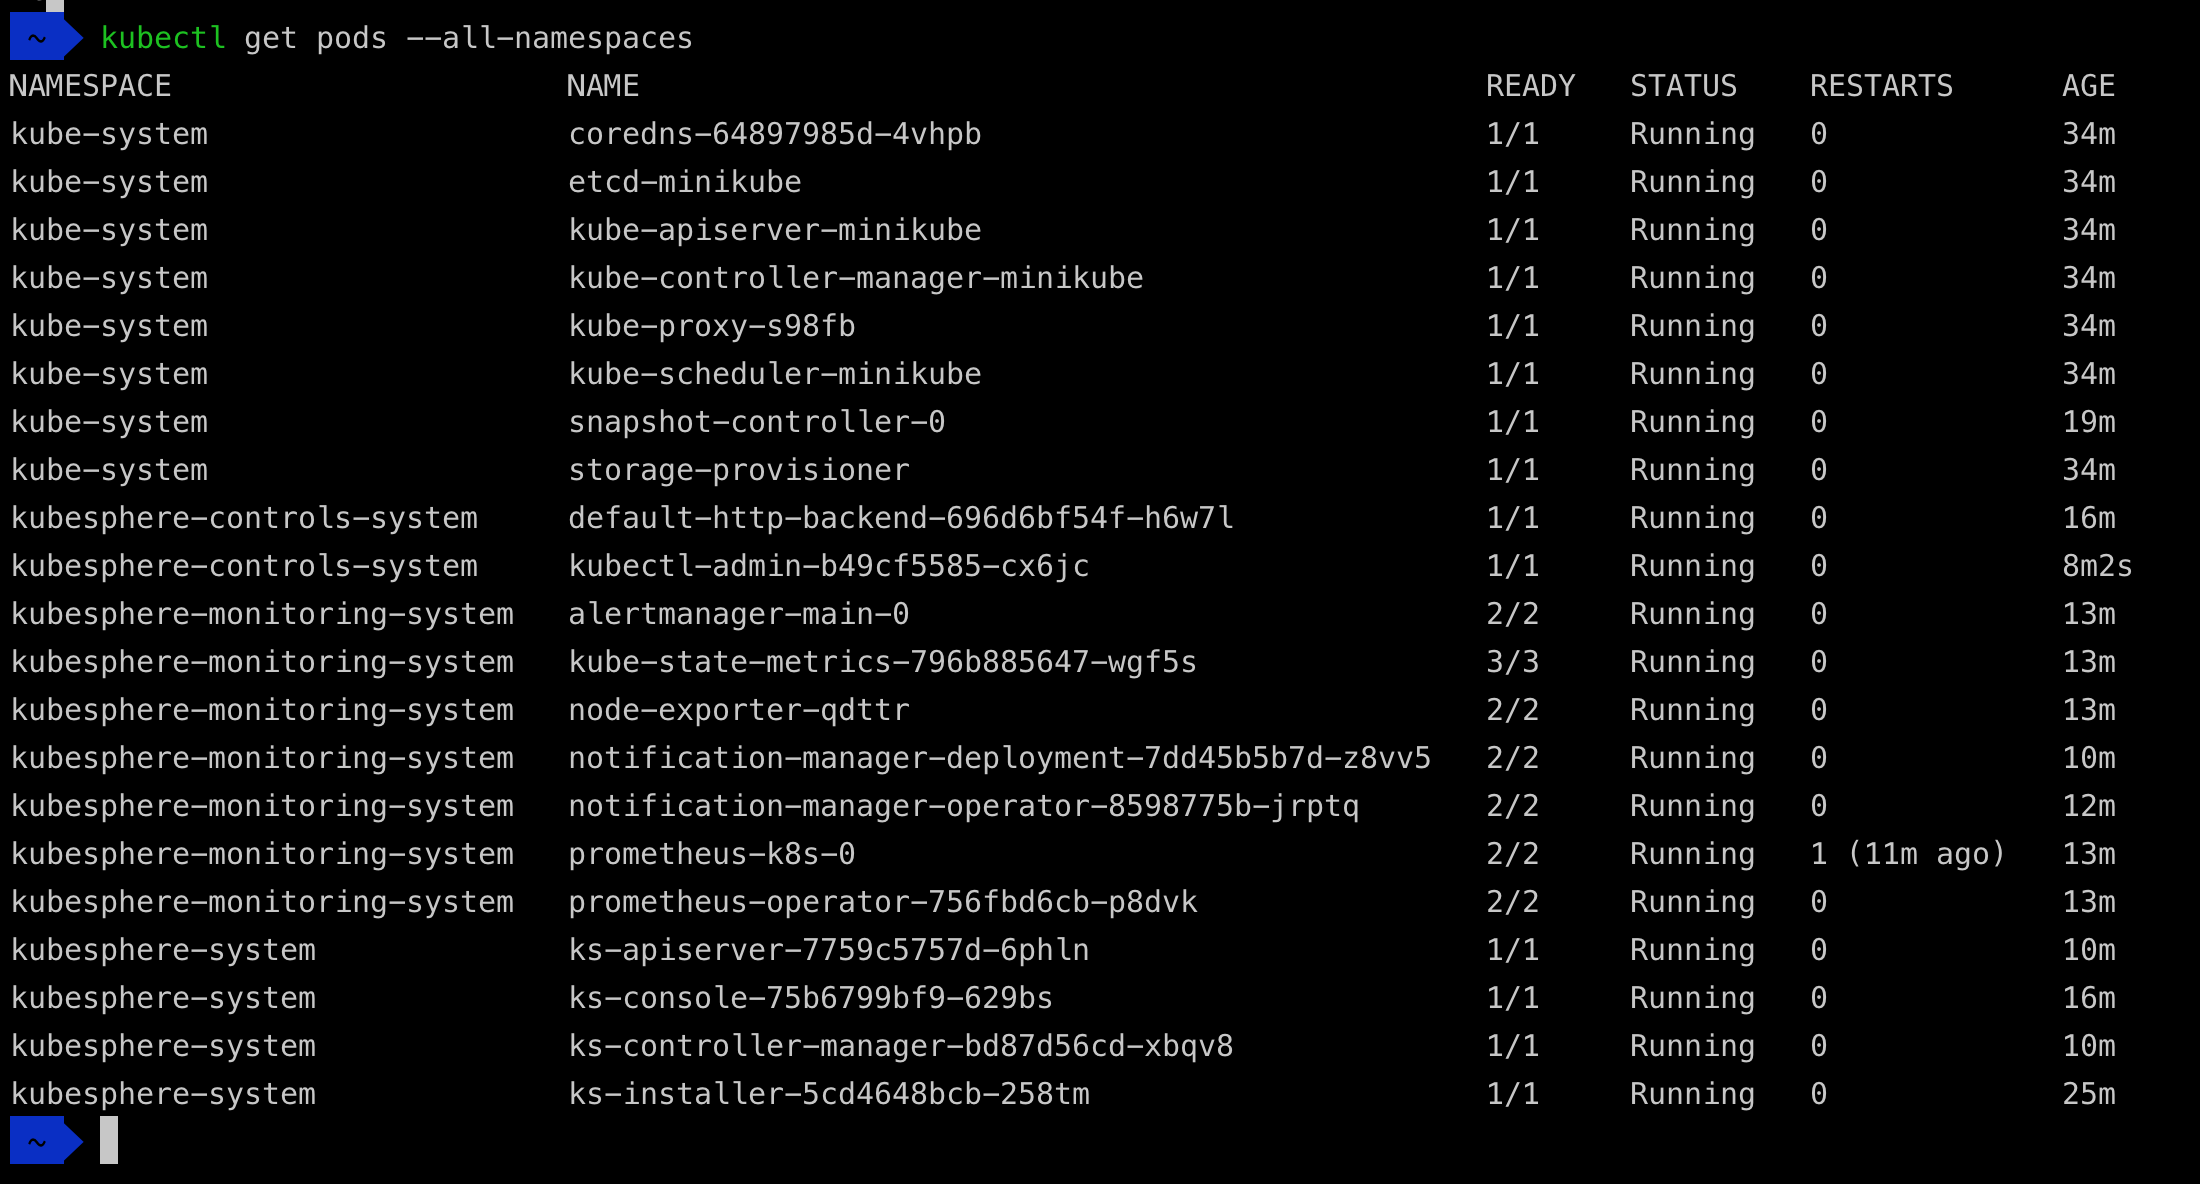
- To view all the pods that running in different namespaces use
kubectl get pod --all-namespaces
- If all pods are runnning successfully, check the console port (by default 30880) by using the following command.
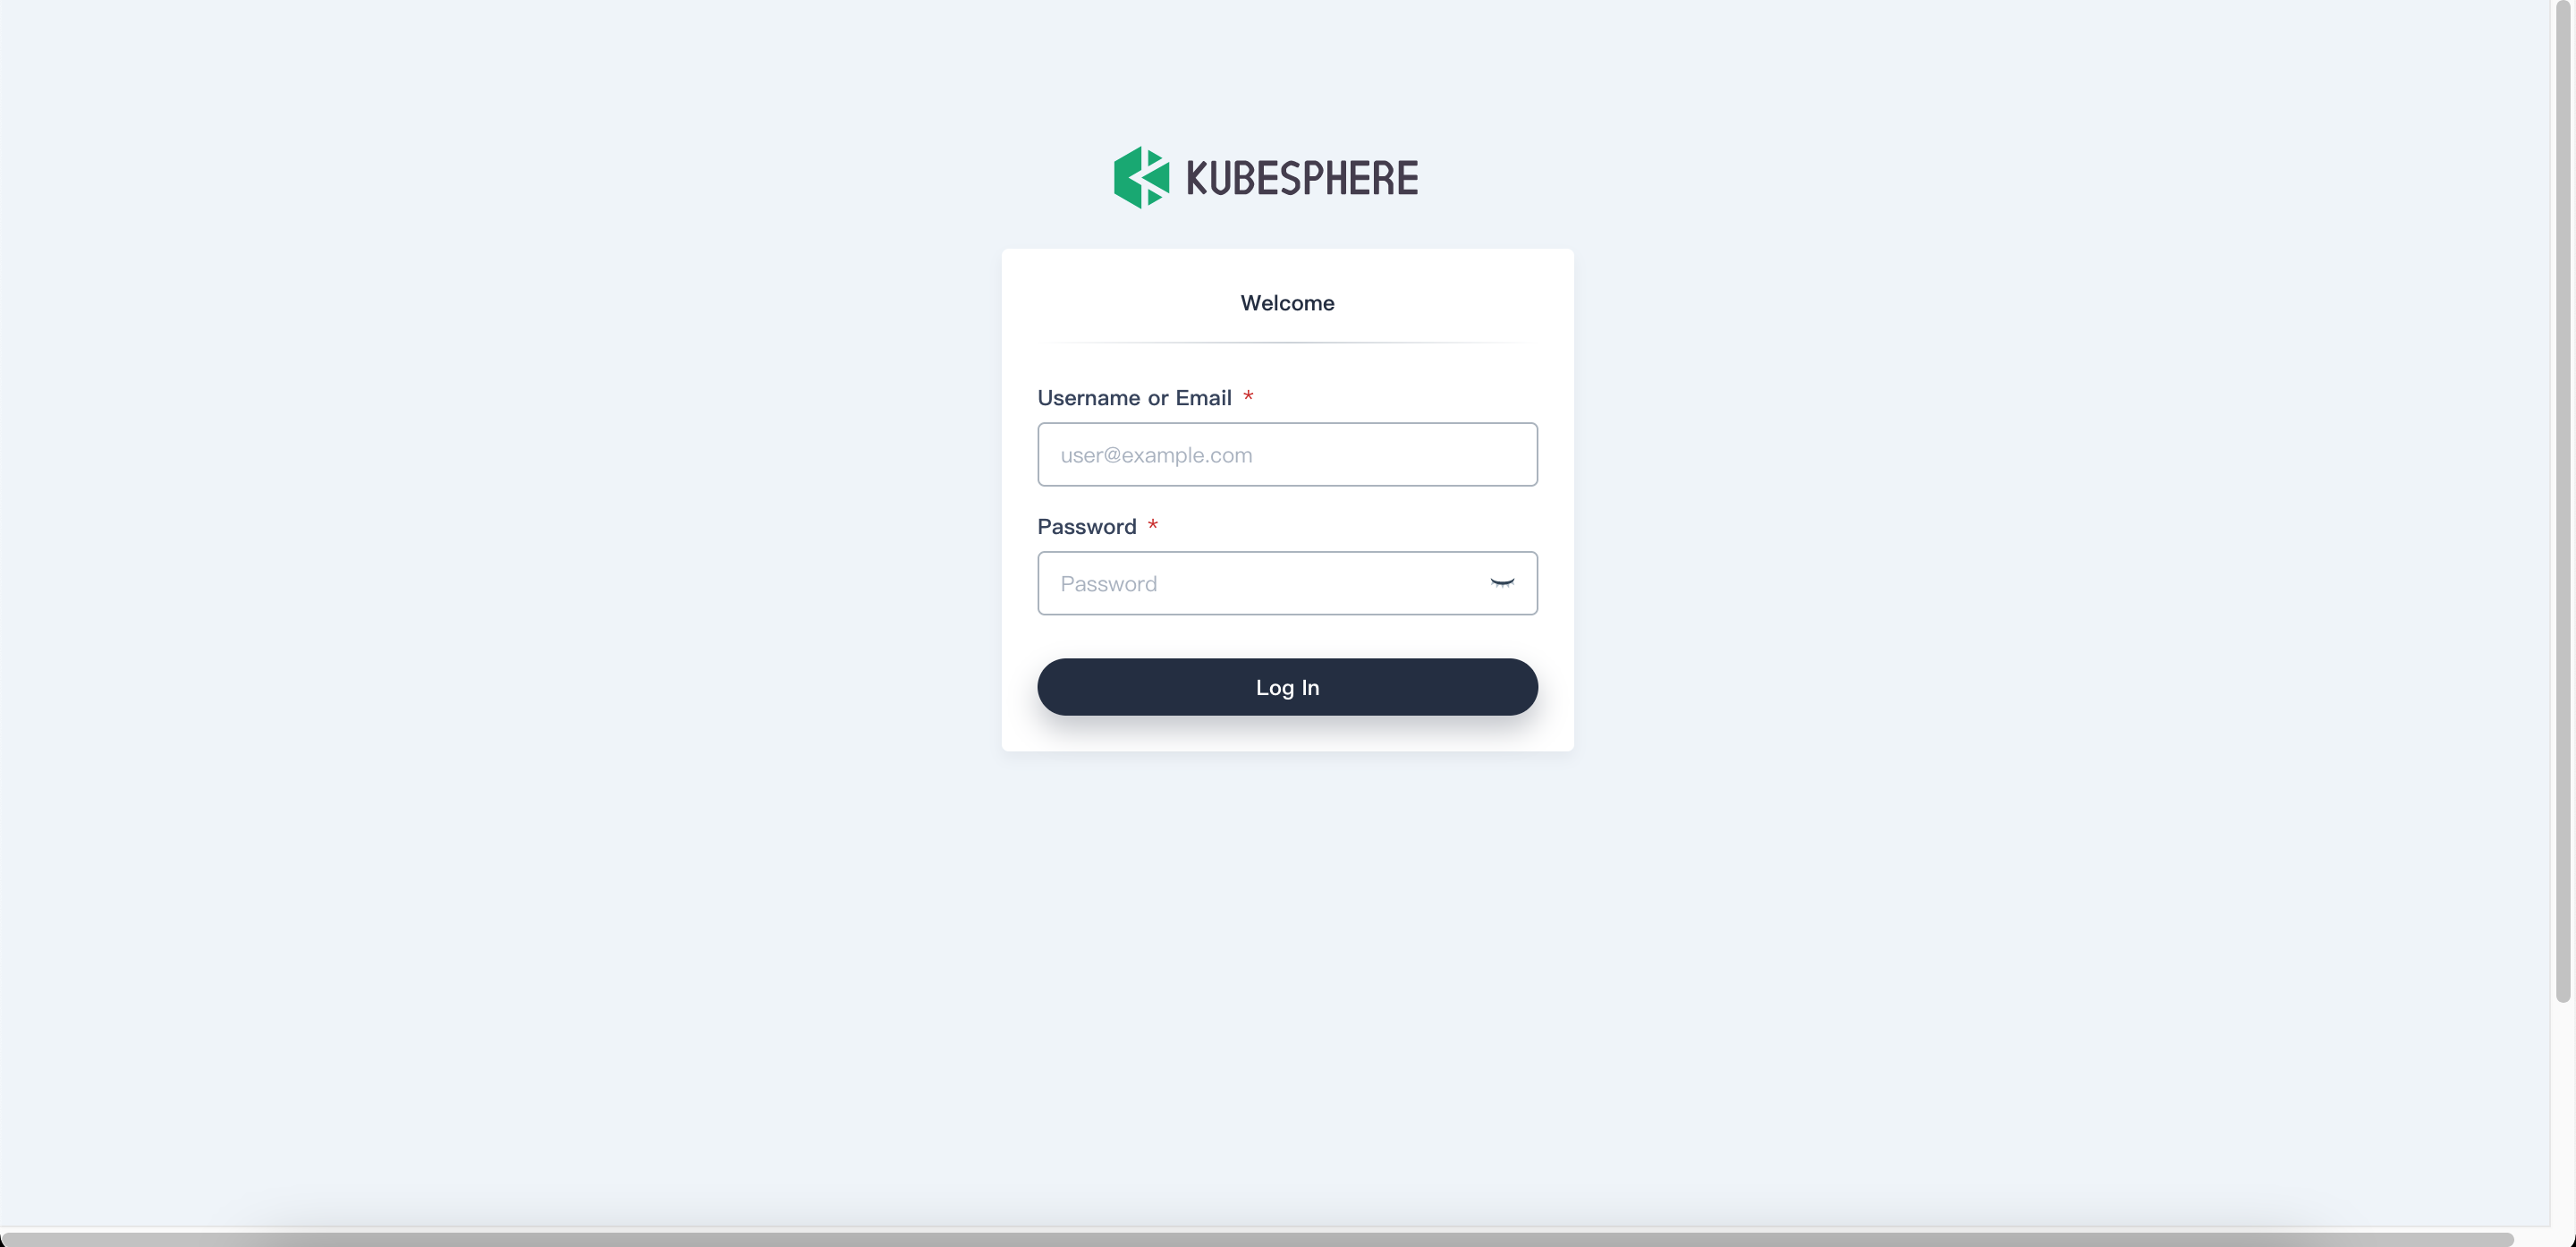
kubectl get svc/ks-console -n kubesphere-system - Make sure port 30880 is opened and access the web console through the NodePort (IP:30880) with the default account and password (admin/P@88w0rd).
Cluster Management using KubeSphere console
Using KubeSphere, you set a cluster's configurations and manage its features using the web UI or by using the inbuilt kubectl. As a admin you can be able to perfom several tasks including managing the nodes, controlling cluster visibility, monitoring cluster status, setting cluster-wide alerting and notification rules, as well as configuring storage and log collection solutions.
- The picture below shows the default cluster mangement dashboard of KubeSphere.

Node Management
A node may be a virtual or physical machine, depending on the cluster. Each node contains the services necessary to run Pods, managed by the control plane.
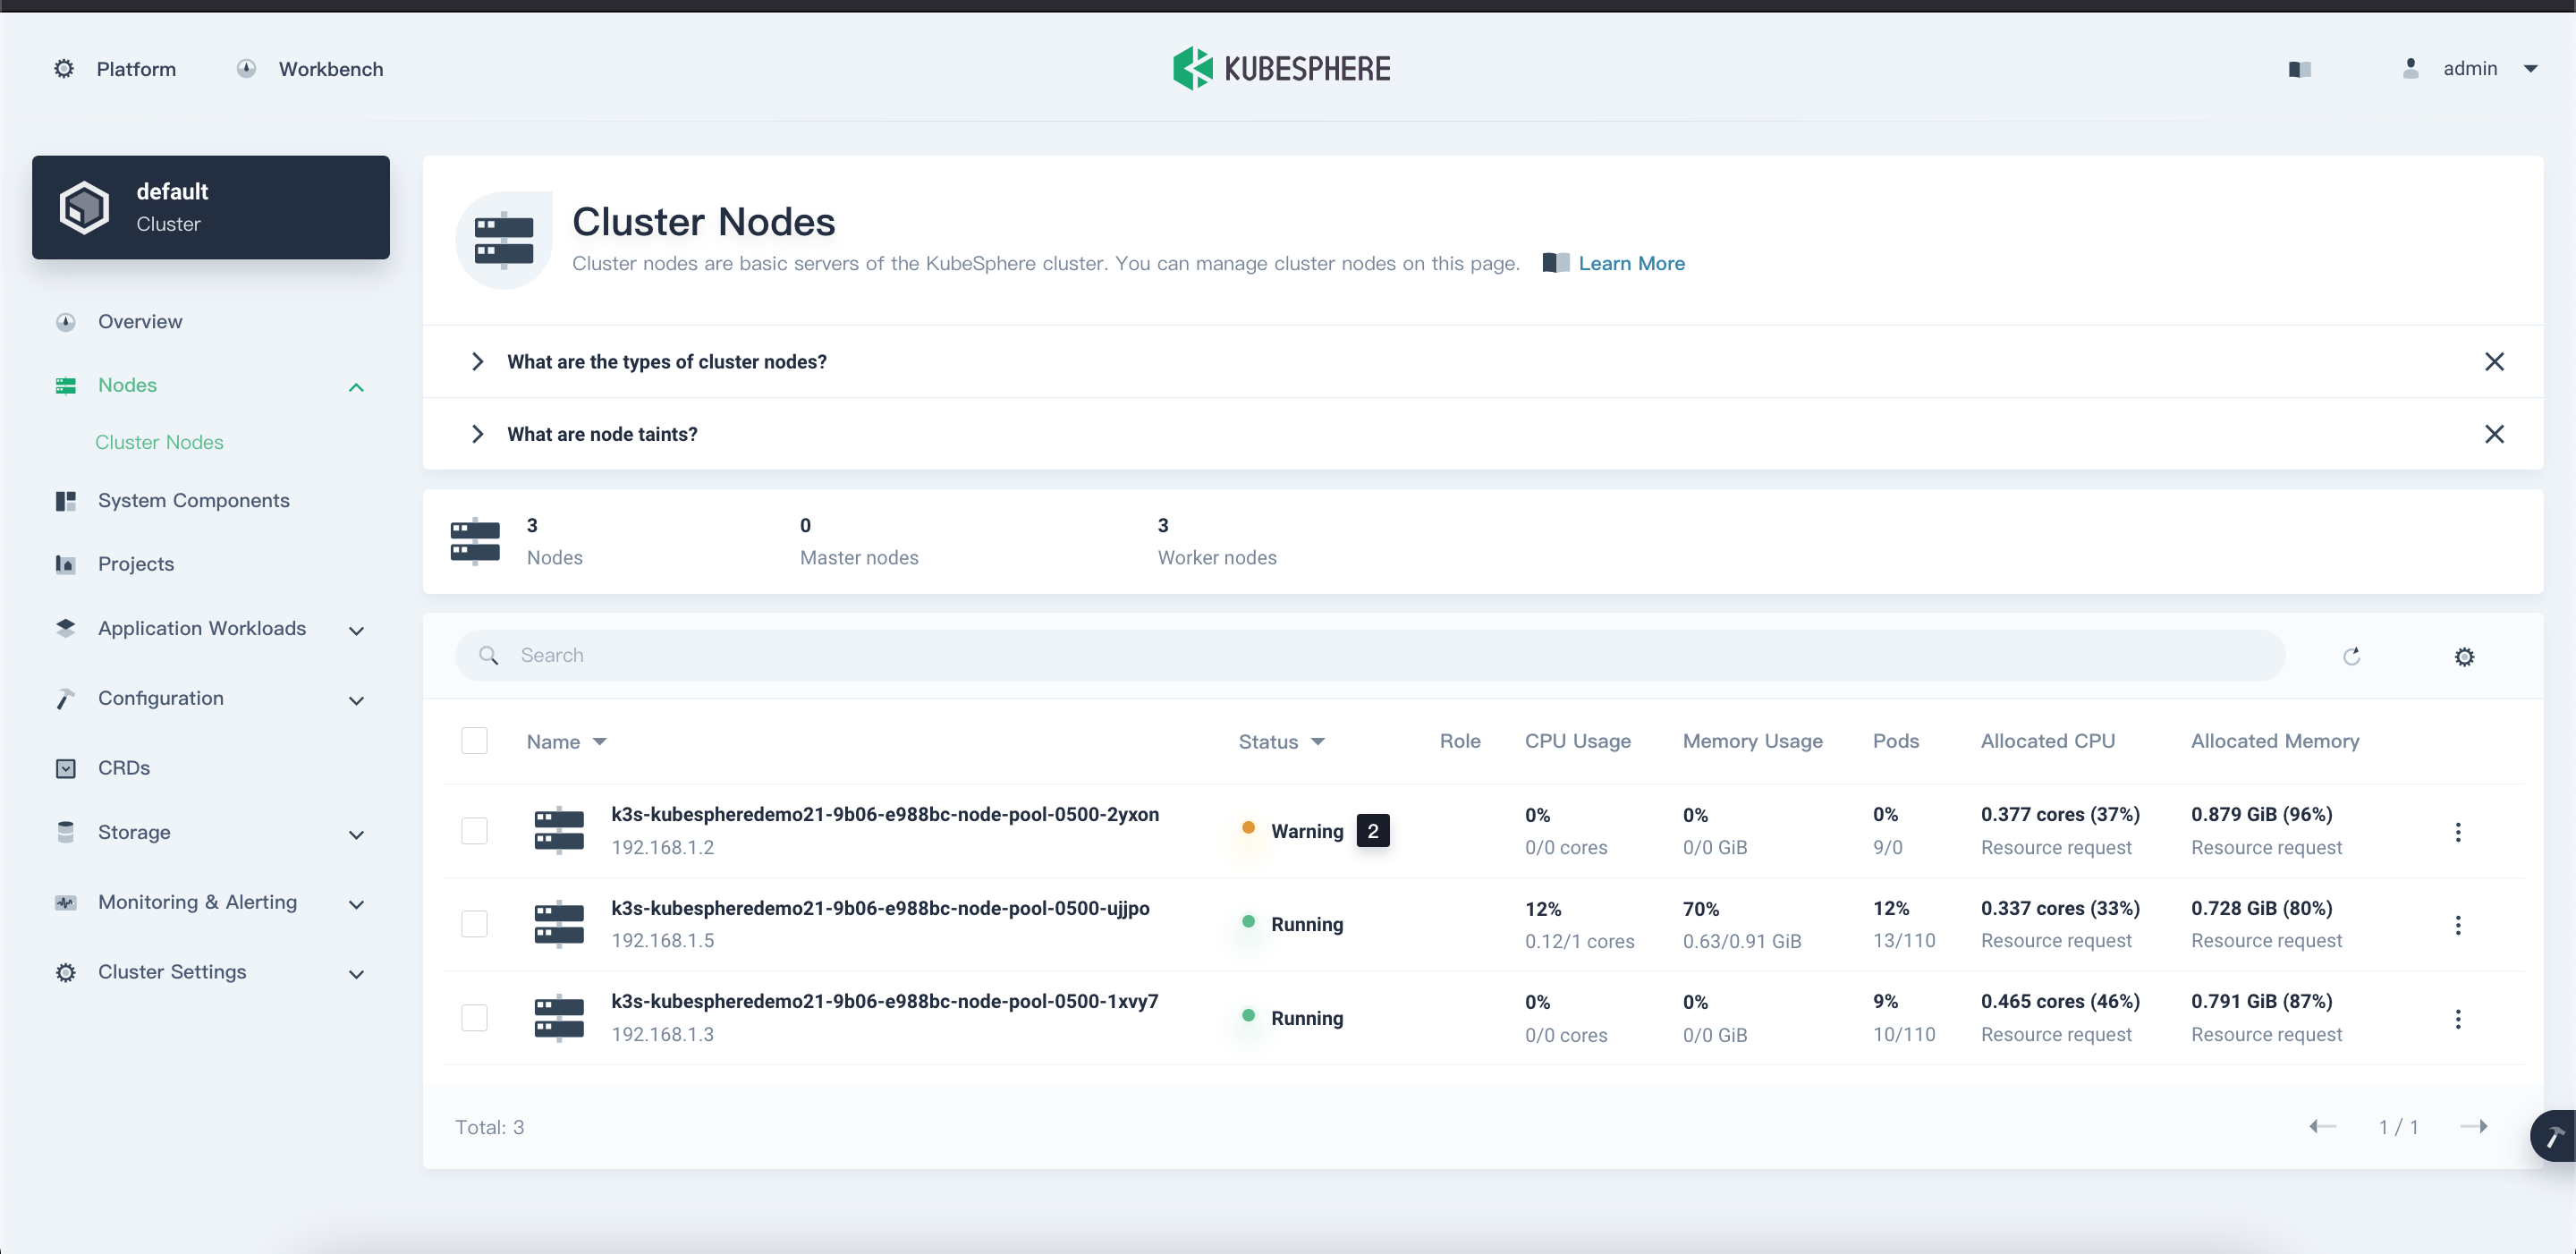
- From the left navigation, Choose Cluster Nodes under Nodes, where you can see detailed information of node status.
In the Cluster node information page, you will see the following details.
- Name: The node name and subnet IP address.
- Status: The current status of a node, indicating whether a node is available or not.
- Role: The role of a node, indicating whether a node is a worker or master.
- CPU Usage: The real-time CPU usage of a node.
- Memory Usage: The real-time memory usage of a node.
- Pods: The real-time usage of Pods on a node.
- Allocated CPU: This metric is calculated based on the total CPU requests of Pods on a node. It represents the amount of CPU reserved for workloads on this node
- Allocated Memory: This metric is calculated based on the total memory requests of Pods on a node. It represents the amount of memory reserved for workloads on this node.
To see more details about the node, click on a Node.
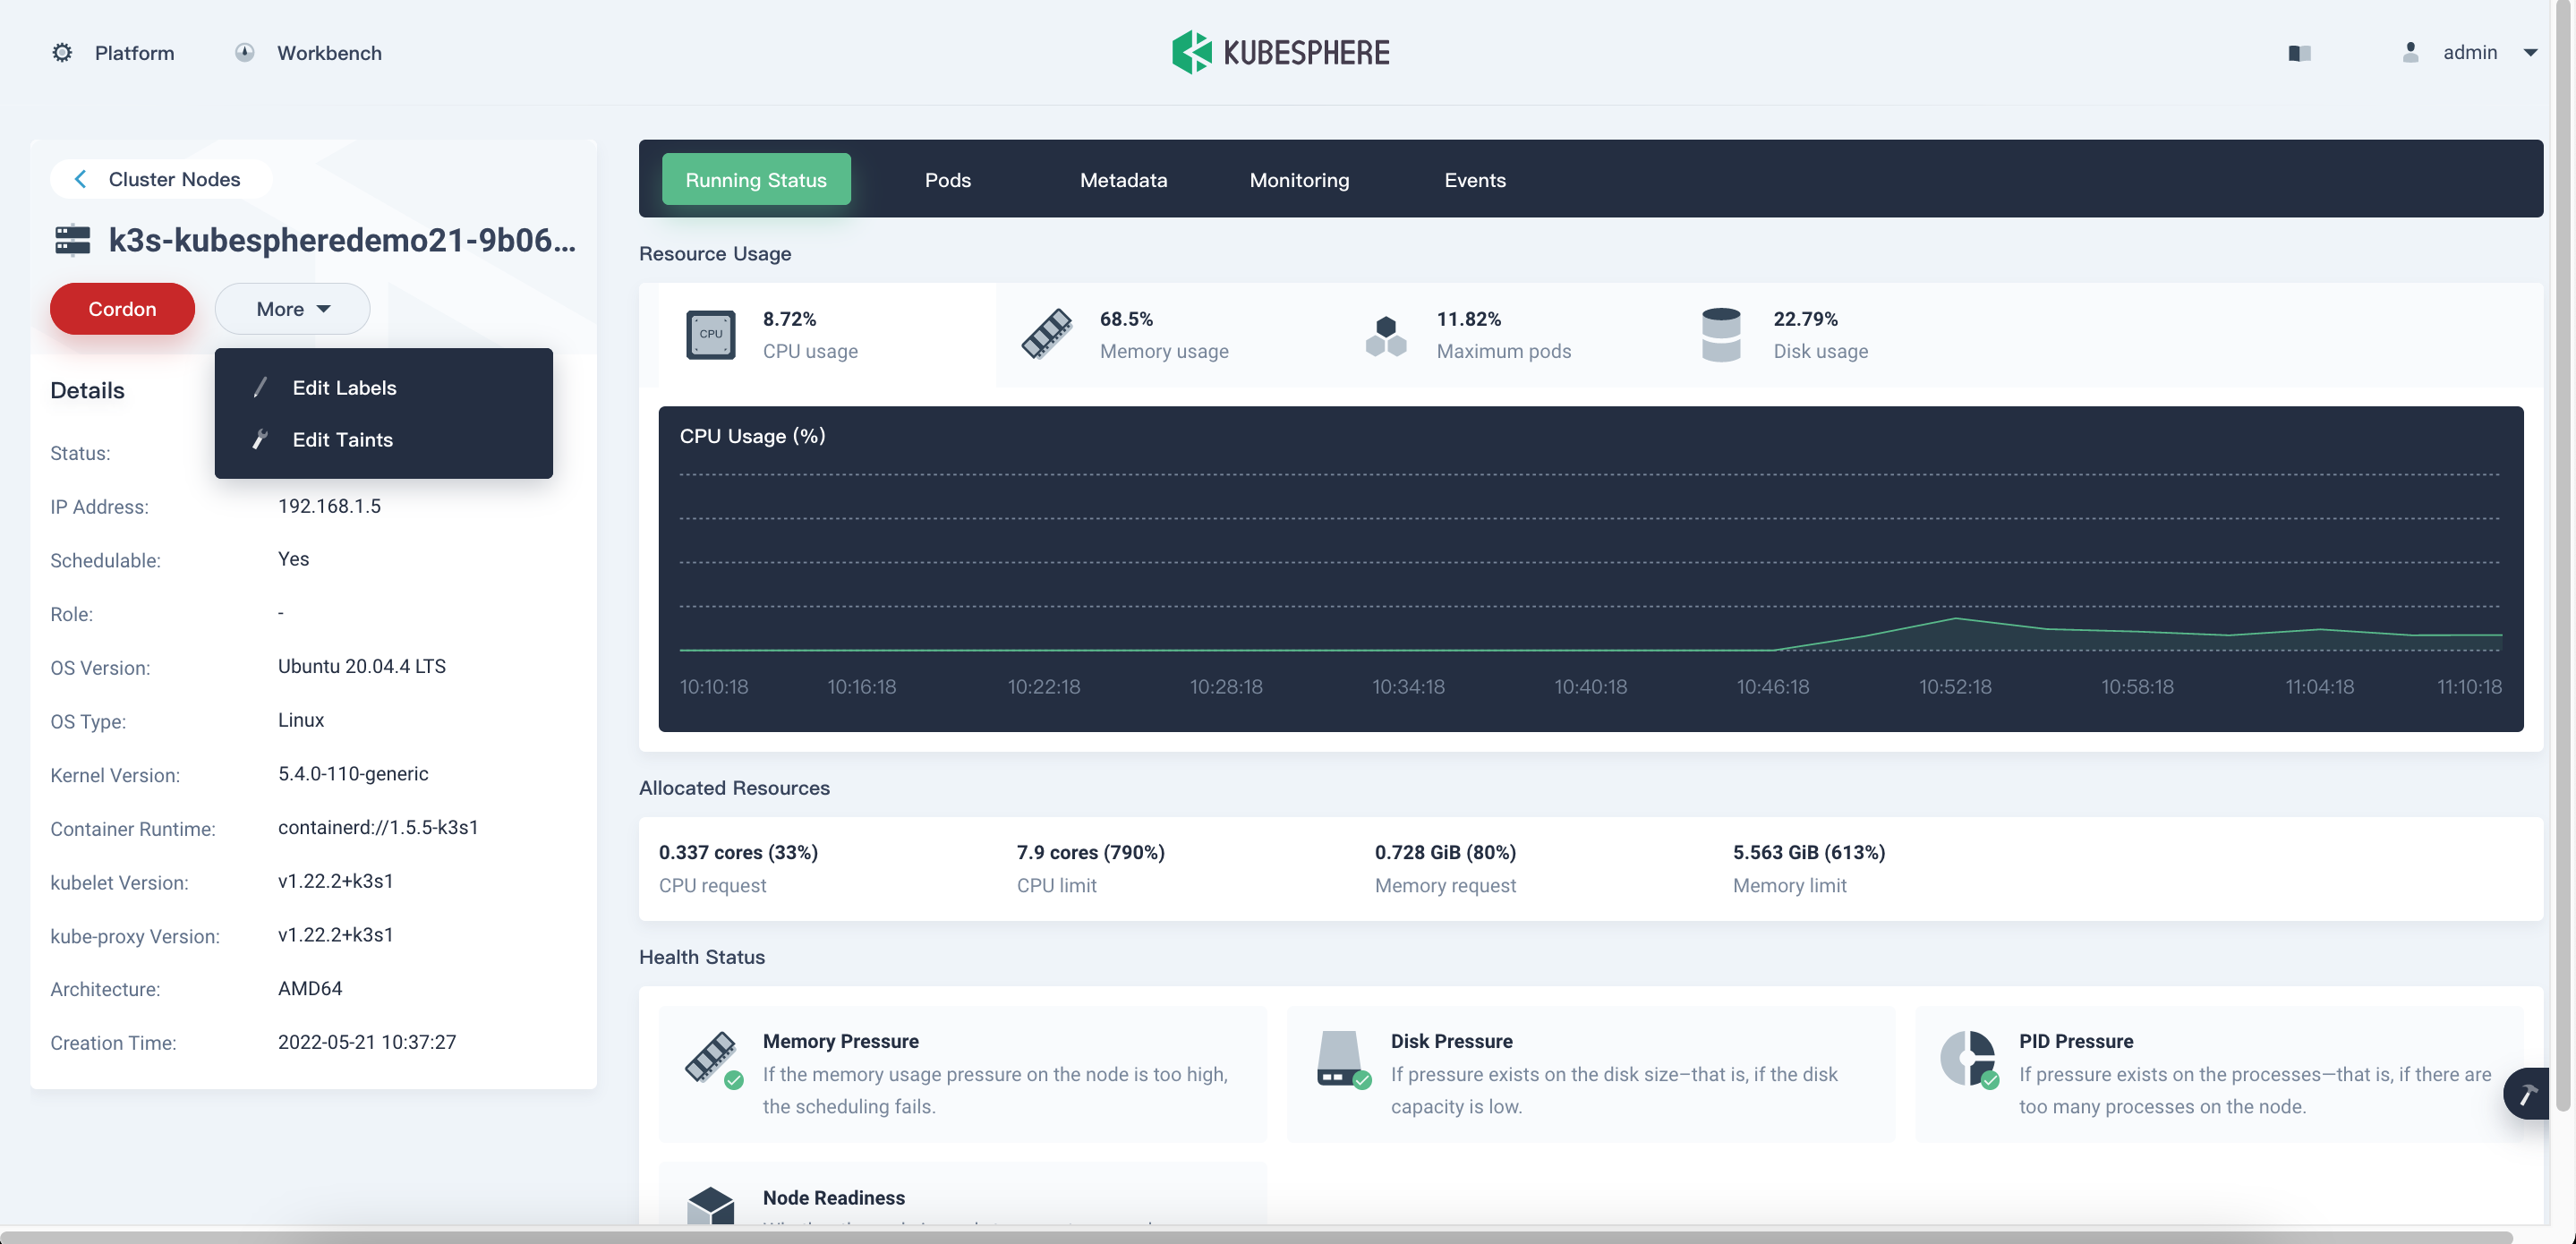
- Cardon/Uncardon: Cordon will mark the node as unschedulable. Uncordon will mark the node as schedulable.
- Labels: Node labels can be very useful when you want to assign Pods to specific nodes.
- Taints: Taints allow a node to repel a set of pods. You add or remove node taints on the node detail page. To add or delete taints, click More and select Edit Taints from the drop-down menu.
- You can also see the Runnin status of Node, Pods in it, Montior the node, metadata from this page.
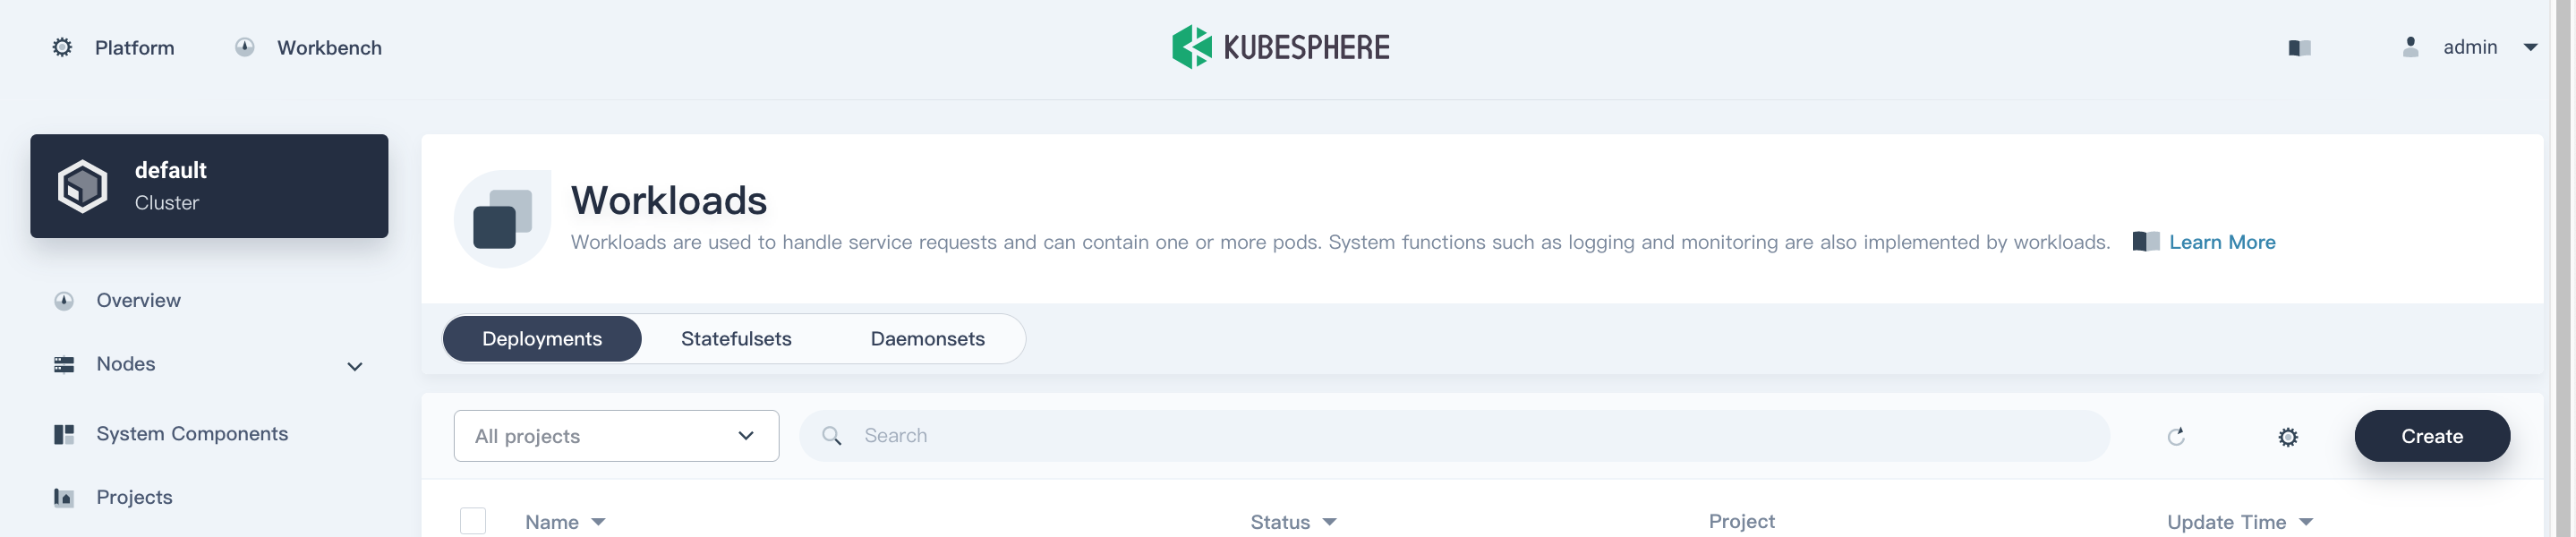
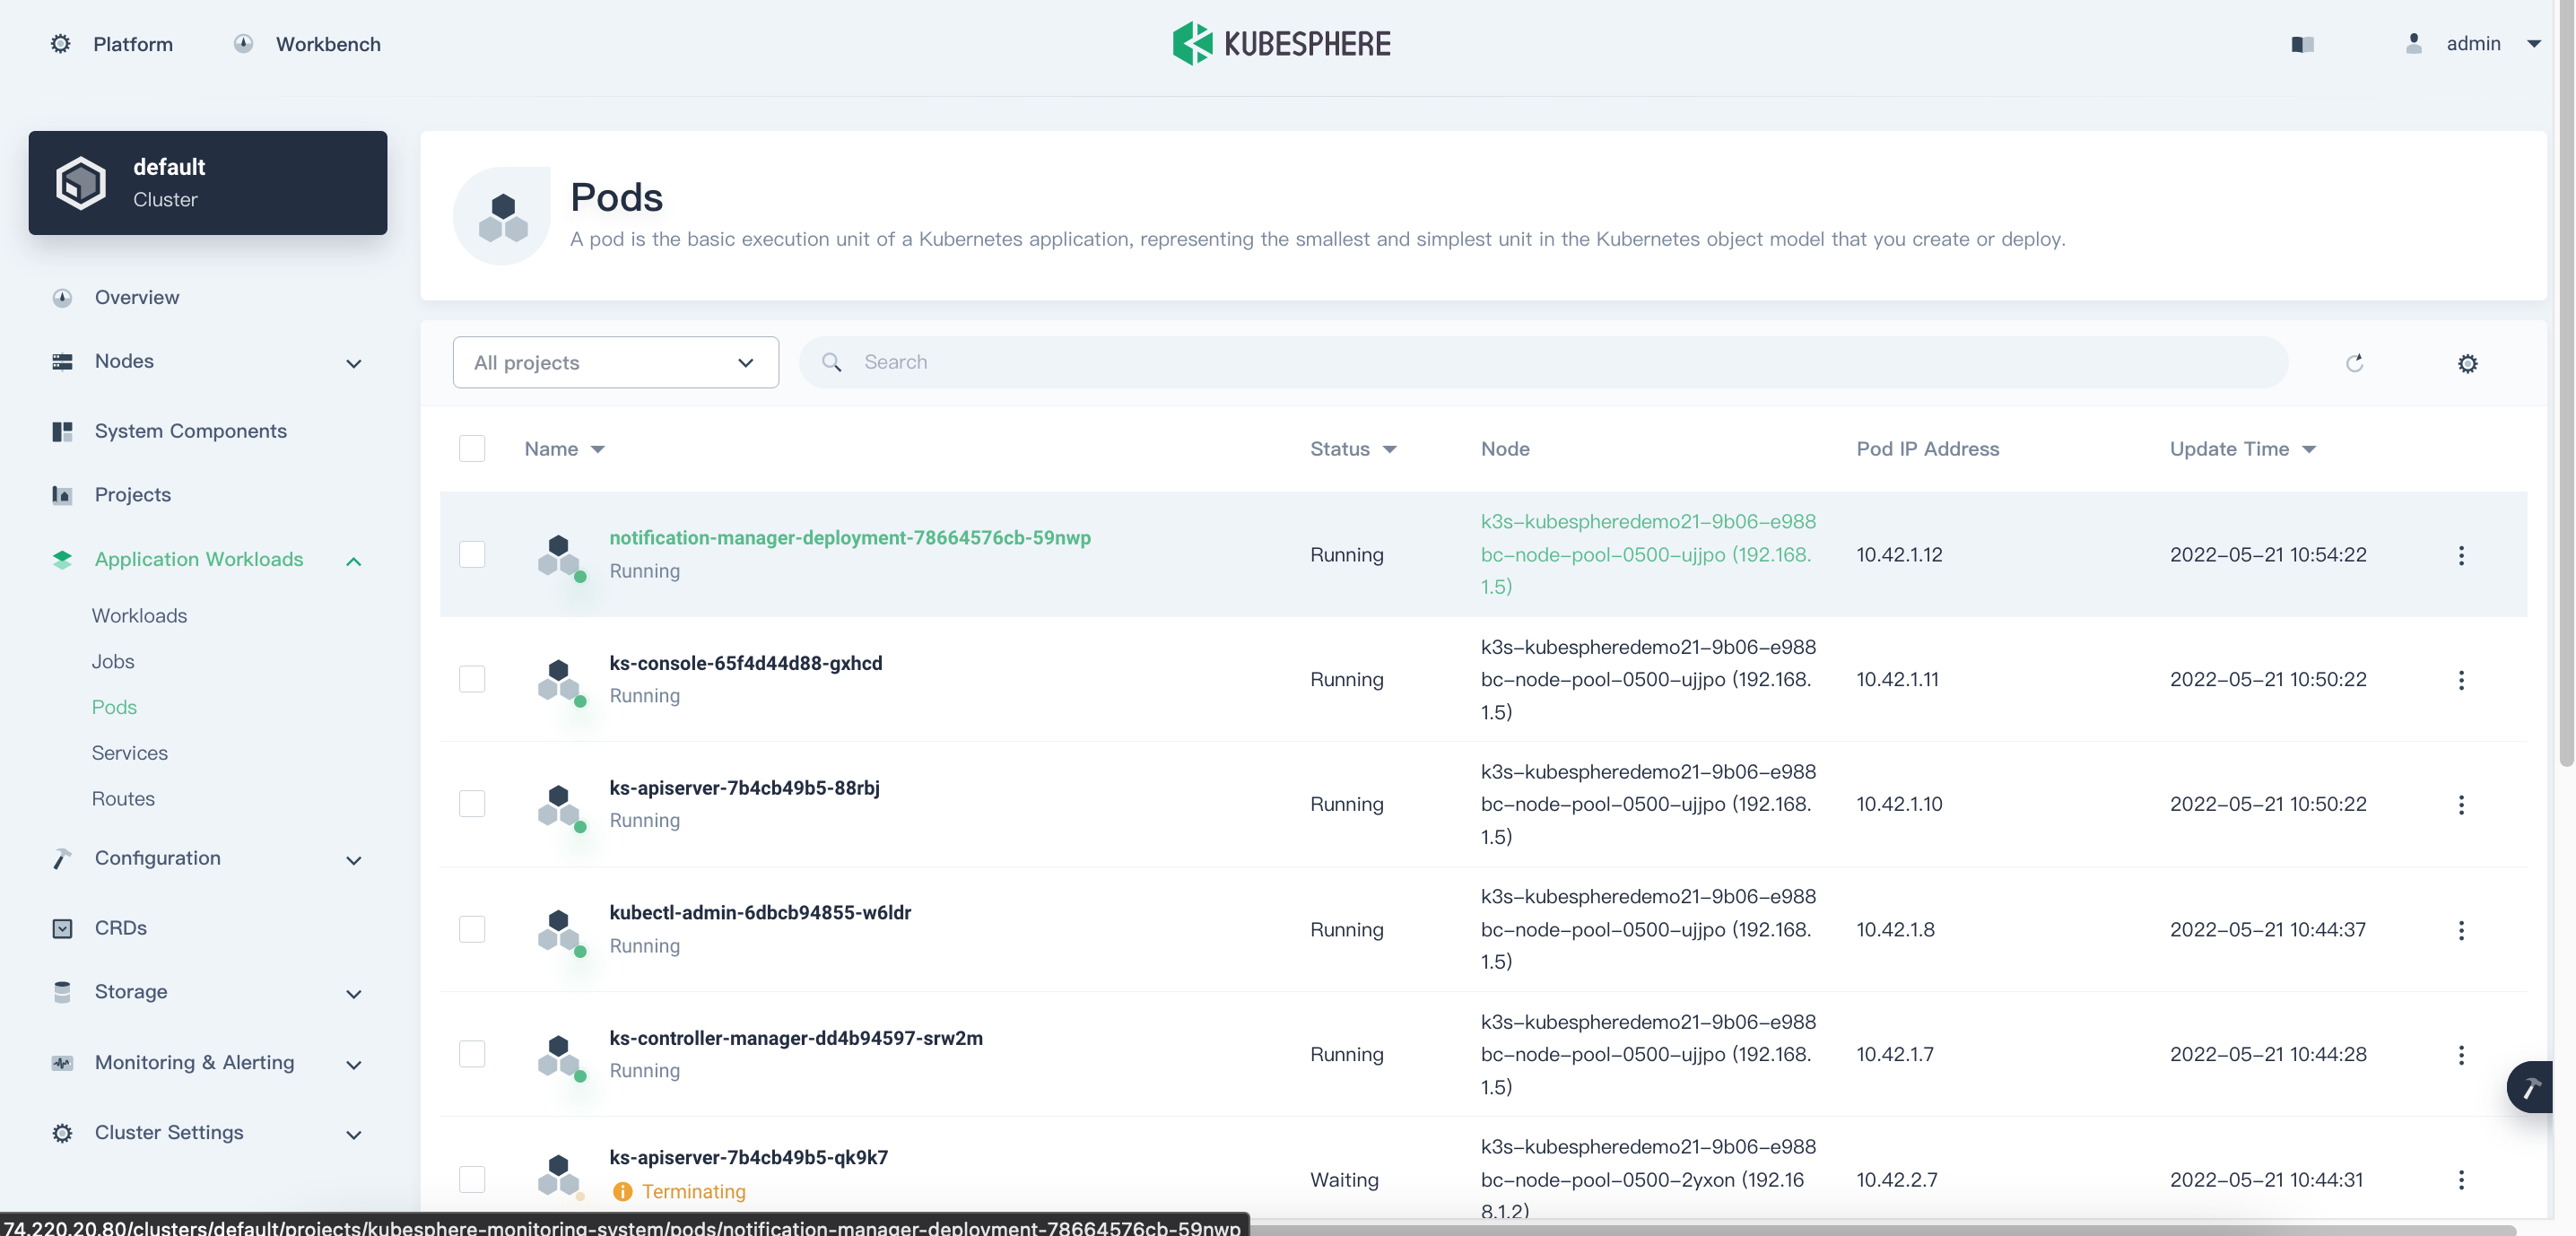
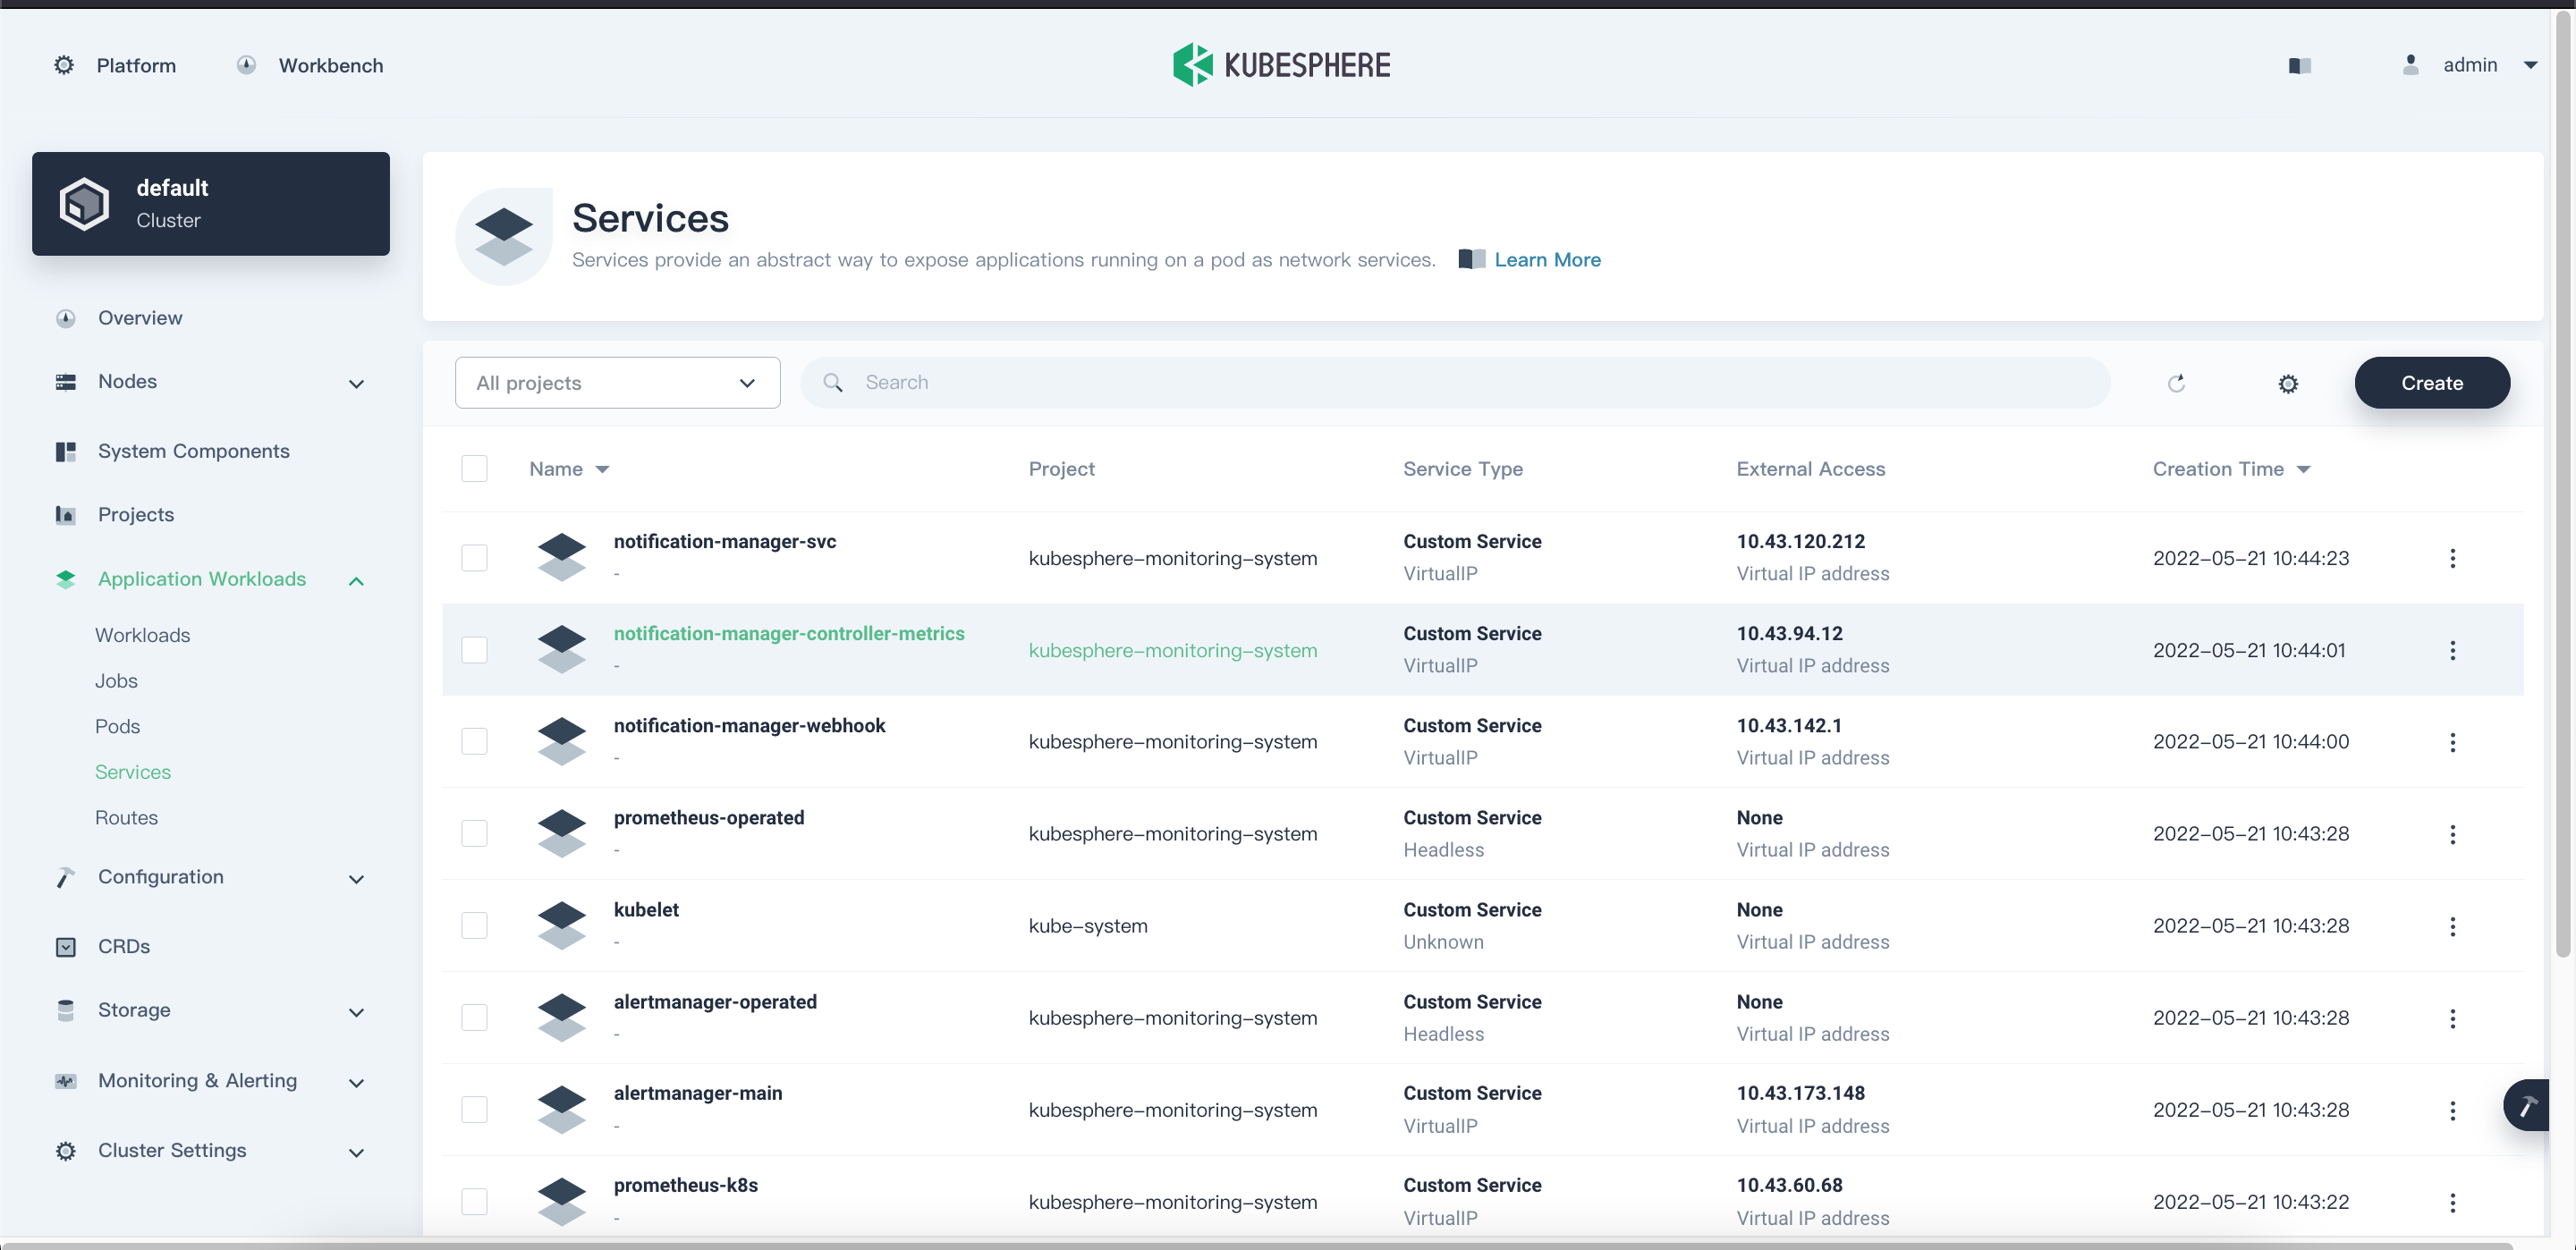
Application workloads management
- In the Application wortkloads section in the navigation, you will see the following details.
- Workloads: In the workloads section, you will be able to manage the Deployment, Statefulsets, Deamonsets. You can create and manage them using the Console.
- Pods: KubeSphere provides the Pods section where you will be able see all the Pods that are in you cluster and you can manage them by clicking on the corresponding pod.
- Service is an abstract way to expose an application running on a set of Pods as a network service. Namely, a Service groups endpoints of these Pods into a single resource, which can be accessed through different ways. You can also create/manage the services.
Cluster Status Monitoring
- KubeSphere provides monitoring of related metrics such as CPU, memory, network, and disk of the cluster.
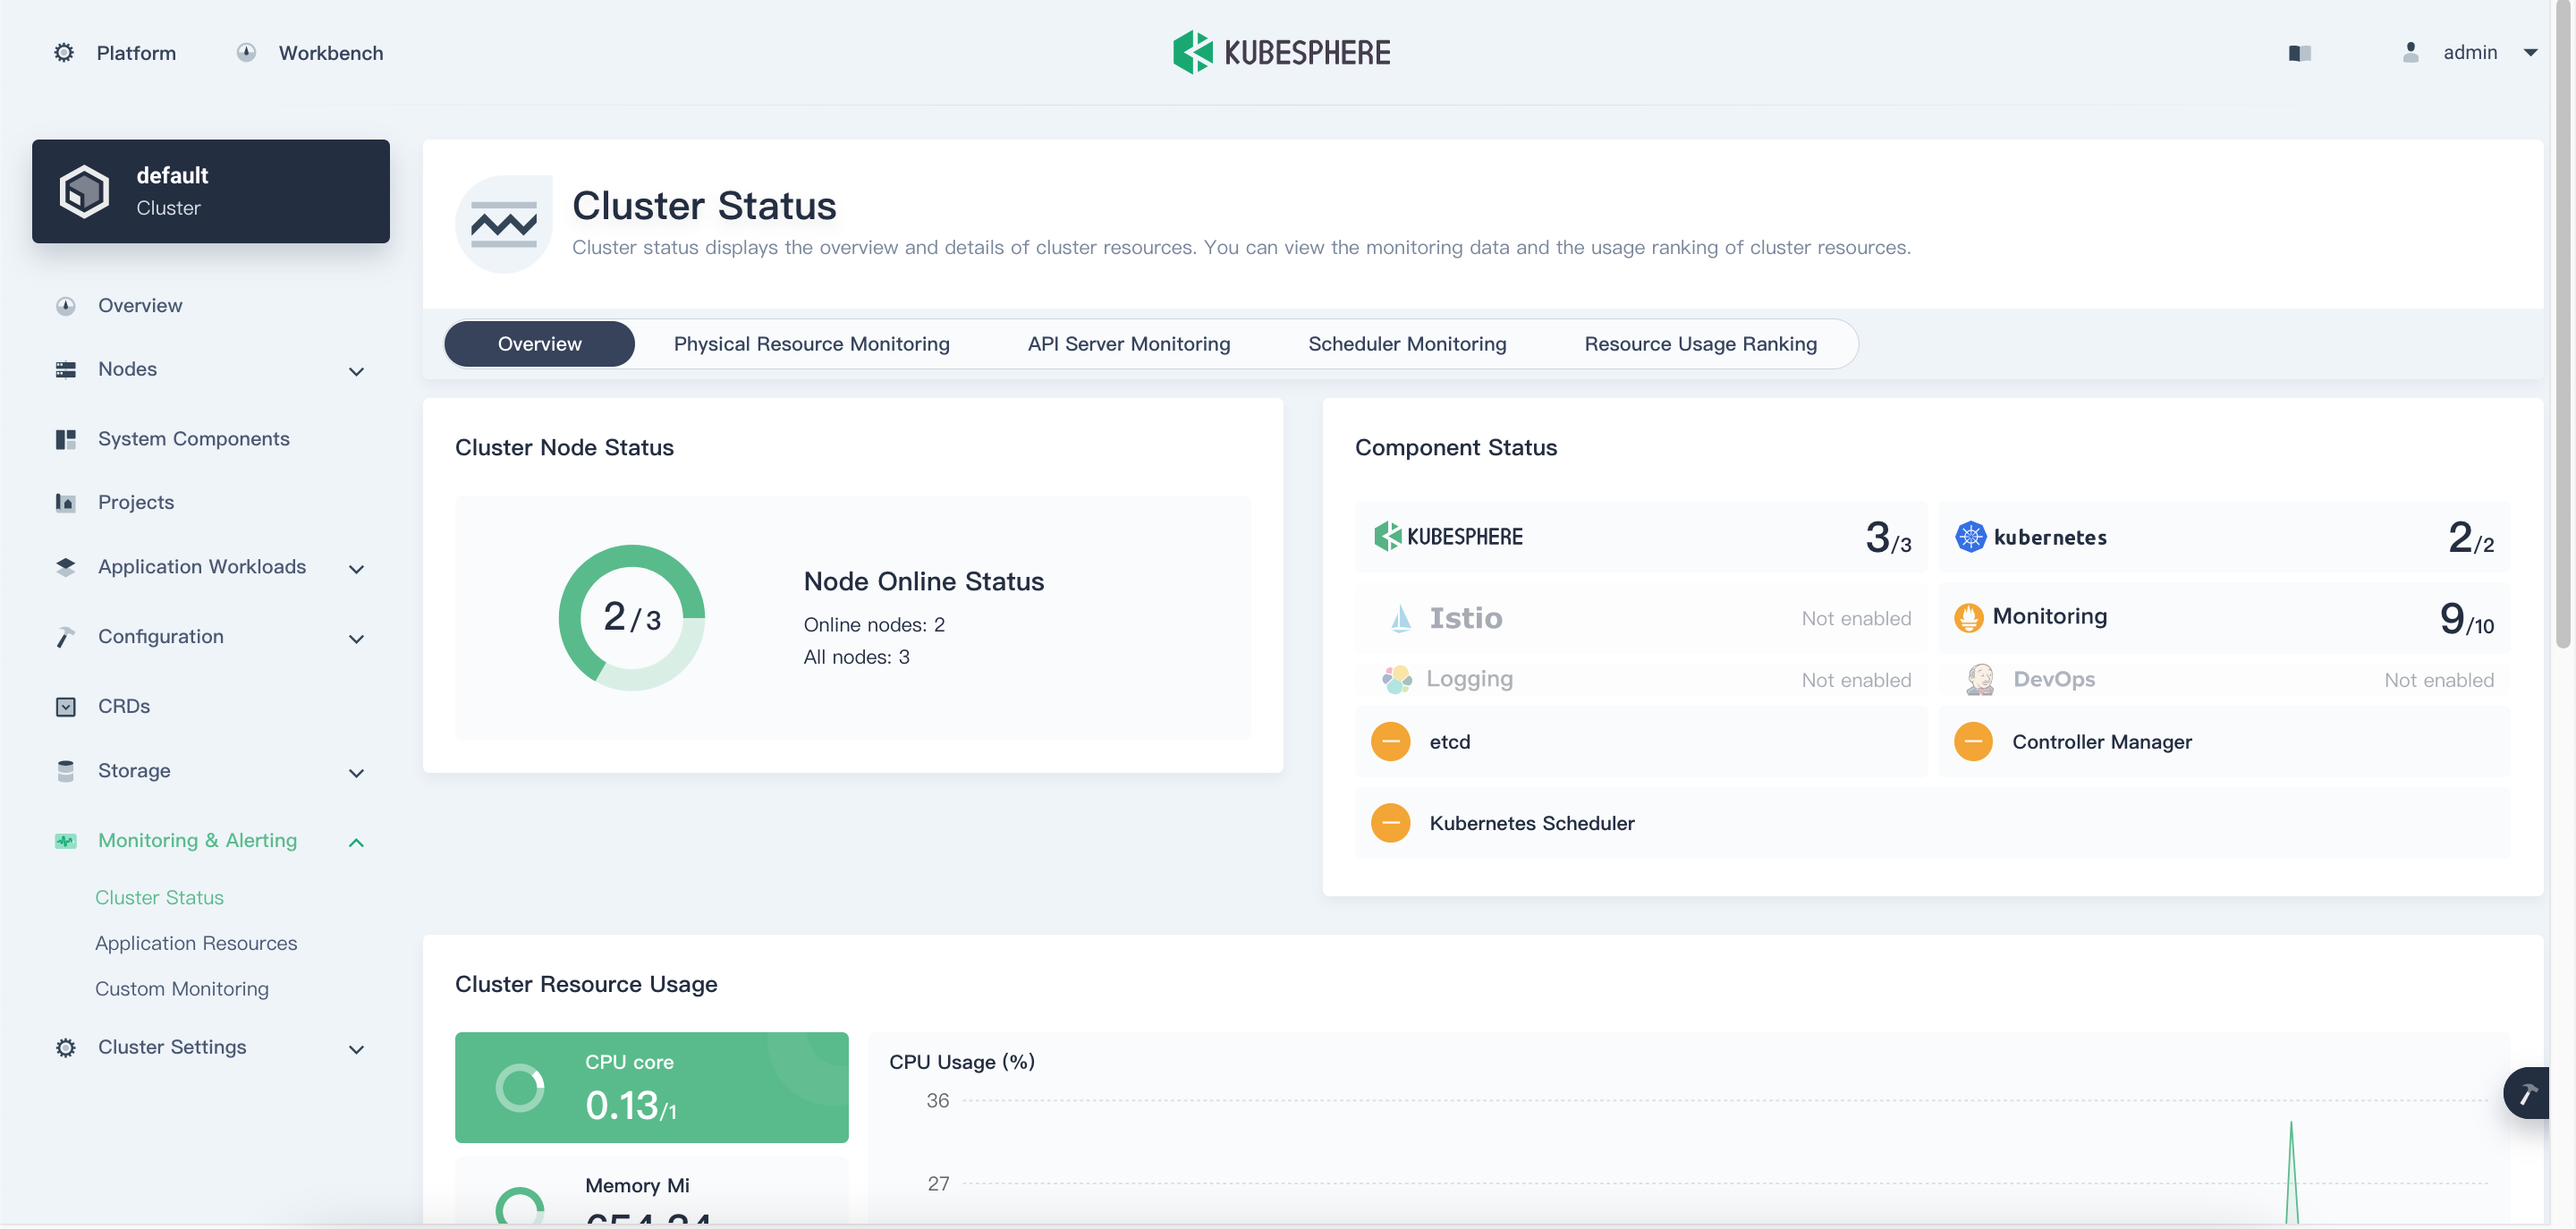
- Choose Cluster Status under Monitoring & Alerting to see the overview of cluster status monitoring, including Cluster Node Status, Component Status, Cluster Resource Usage, and Service Component Monitoring.
- Physical Resource Monitoring help users to observe their physical resources . KubeSphere allows users to view cluster monitoring data within the last 7 days, including CPU Usage, Memory Usage, Average CPU Load (1 minute/5 minutes/15 minutes), Disk Usage, Inode Usage, Disk Throughput (read/write), IOPS (read/write), Network Bandwidth, and Pod Status.
- API Server Monitoring: API server is interaction hub of Cluster. This section in kubesphere console helps users to observe the Request Latency and Request per second metrics of API server,
- Scheduler montioring: Scheduler monitors the pods and determines which nodes these new pods run on. The Scheduler monitoring section provides details such as Scheduling Latency, Attempt Rate, Attempt Frequency.
- Resource Usage Ranking You can sort nodes in ascending and descending order by indicators such as CPU usage, average CPU load, memory usage, disk usage, inode usage, and Pod usage. This enables administrators to quickly find potential problems or identify a node's insufficient resources.
Multi-cloud and Multi-cluster Management
- KubeSphere is developed to address multi-cluster and multi-cloud management challenges. It provides users with a unified control plane to distribute applications and its replicas to multiple clusters that are deployed in Cloud or on-premises.
- In the installation part, we've installed Kubesphere on Minikube. In this section, we will try to use Kubesphere to with cloud hosted kubenetes and also we will look into Multi cluster/multi cloud management ( we use CIVO and AKS).
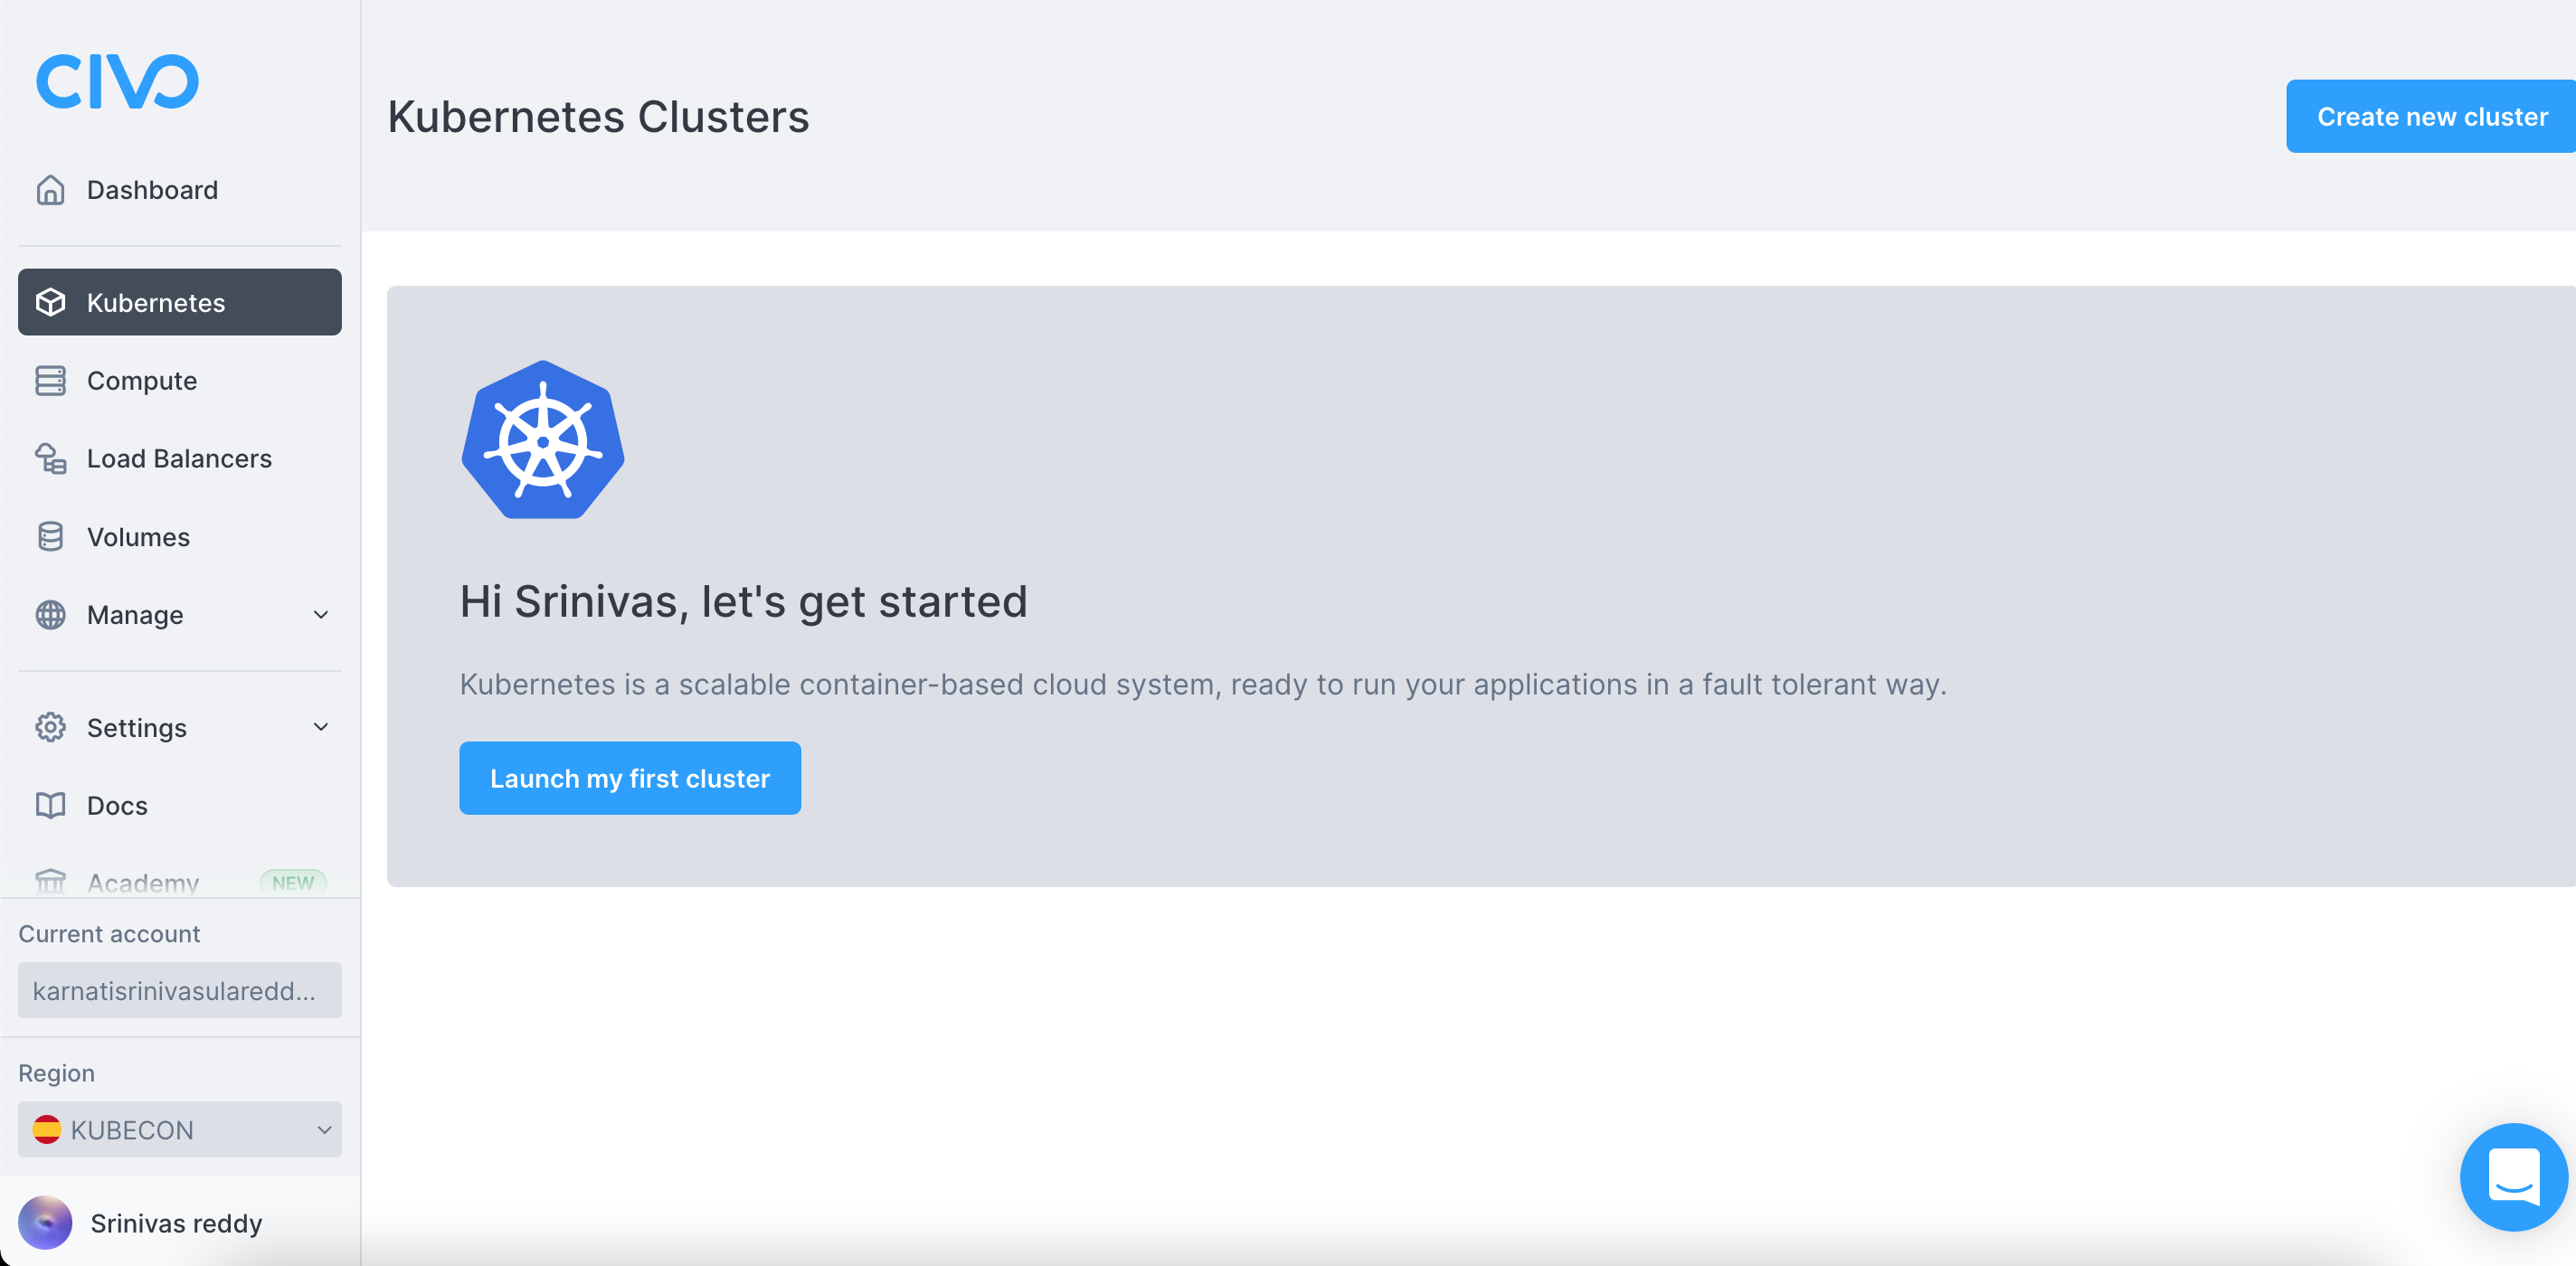
Deploying KubeSphere on Civo
- Login to your Civo account, you will be launced to the Dashboard overview. Navigate to the Kubernetes tab on the left side bar. You should see something similar to this screenshot:
- Select "Create new cluster" / "launch my first cluster" , Fill the required information.

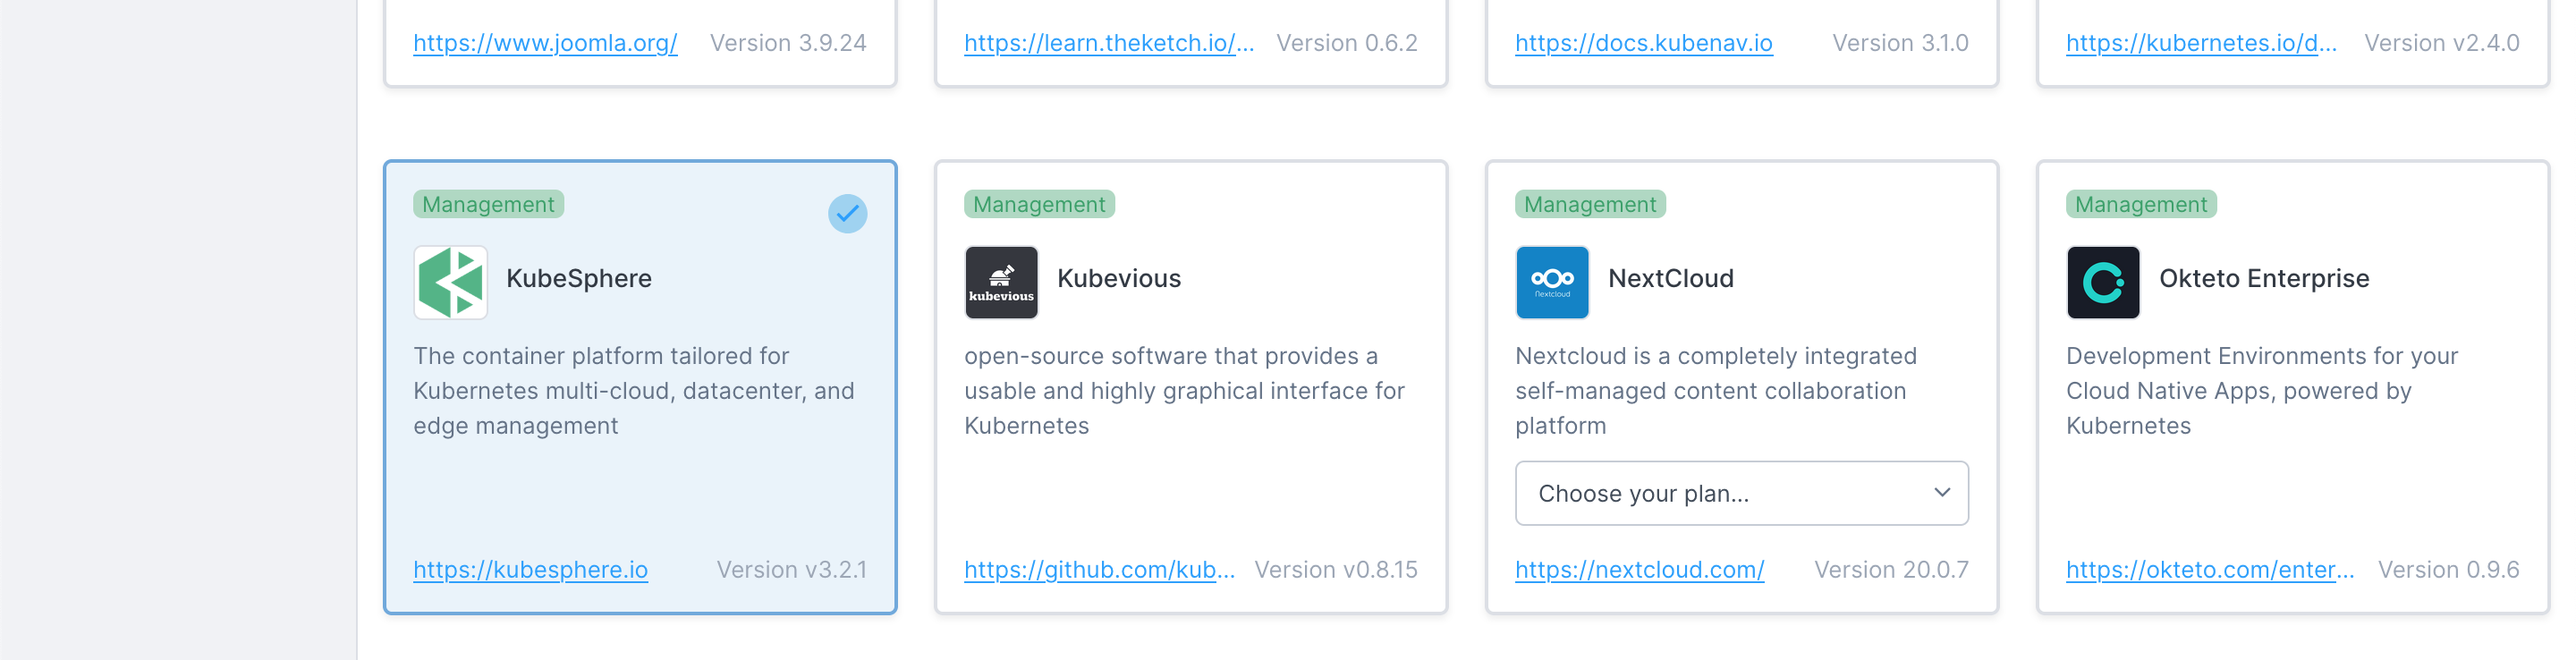
- In Civo, we can select the applications that we want to have pre-installed in our cluster.
- In the Marketplace, select the 'Management' tab, click 'KubeSphere', and then click Install Apps at the bottom of the page.
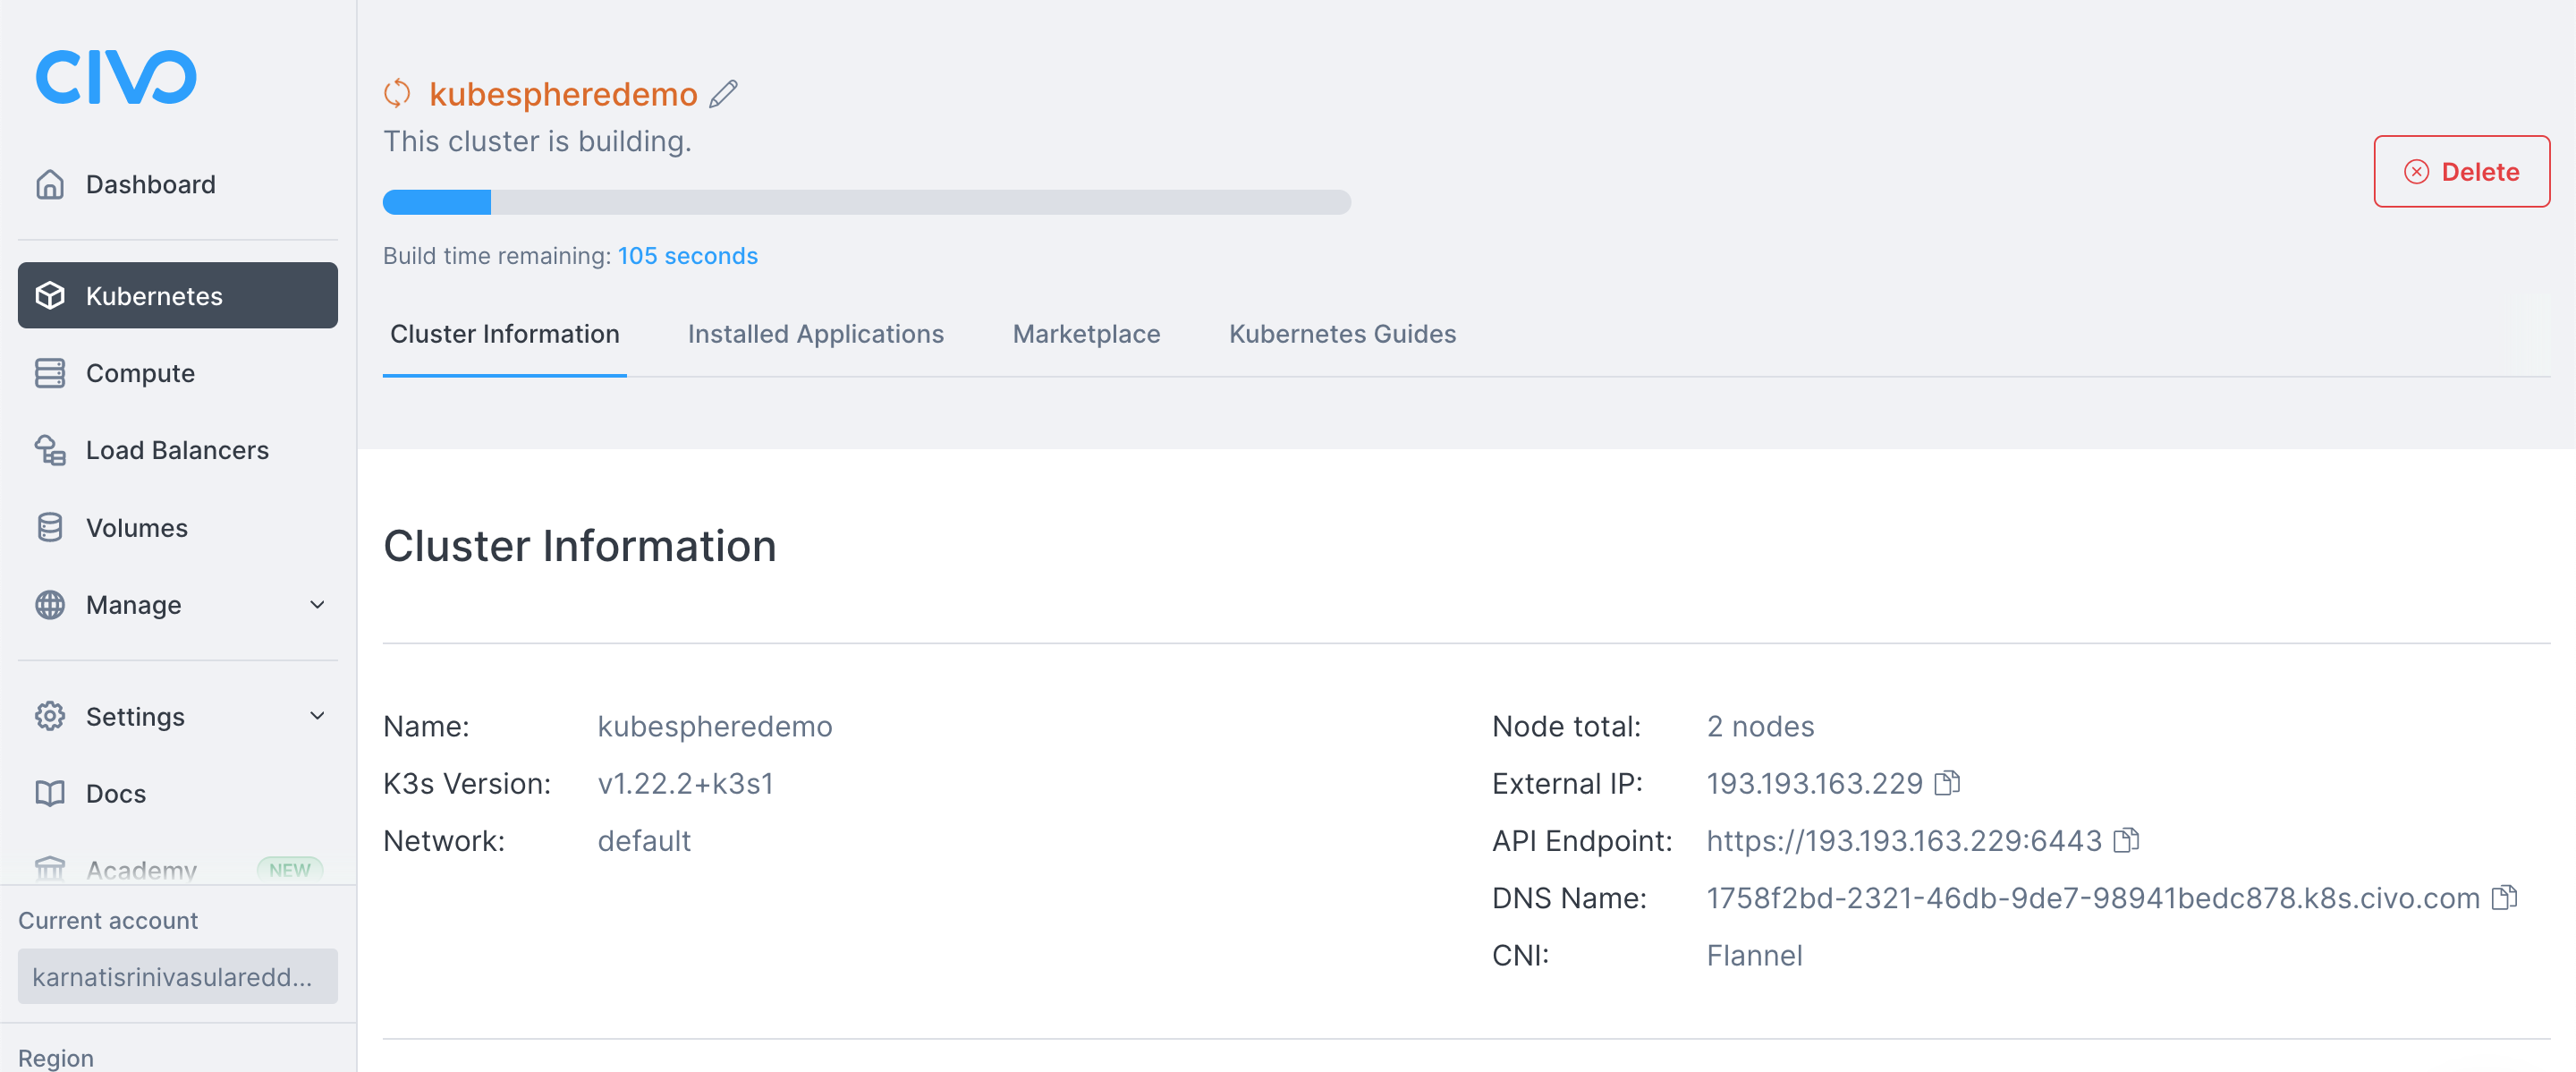
- Click on “Create Cluster” to create your Civo Kubernetes Cluster. Civo by default provides an external IP that you can see on the Cluster information.
- Access the KubeSphere web console at :30880 with the default user and password (admin/P@88w0rd). You need to open your port 30880.
Deploying KubeSphere on AKS
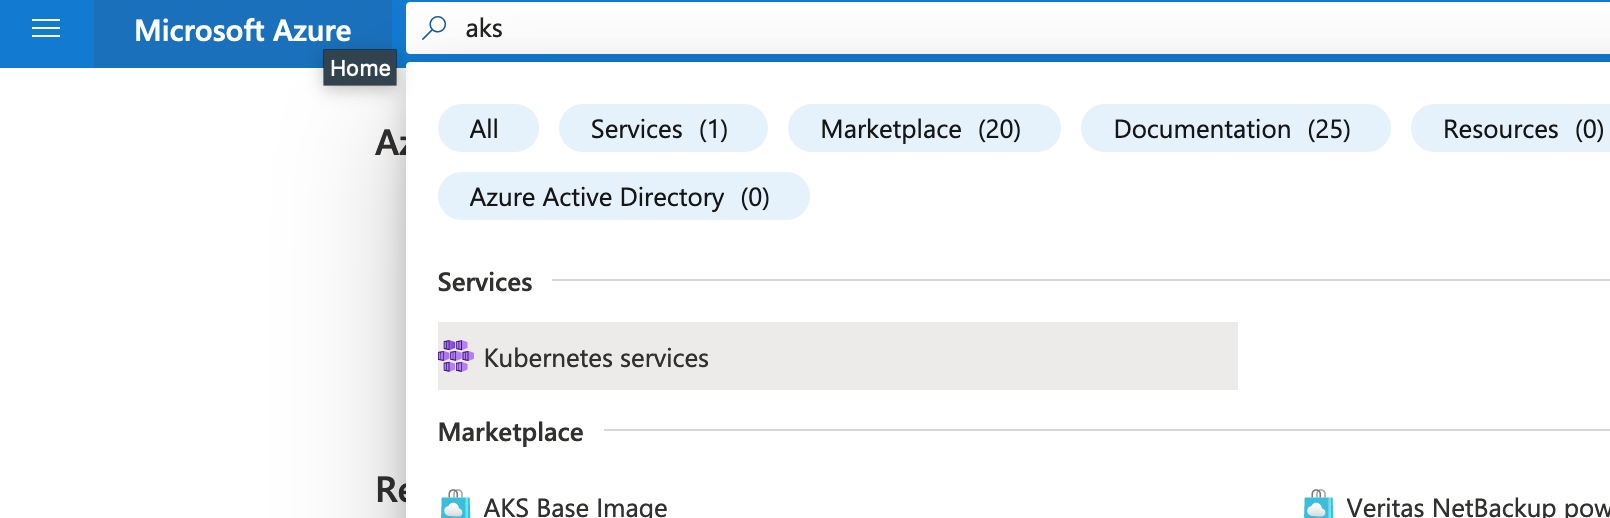
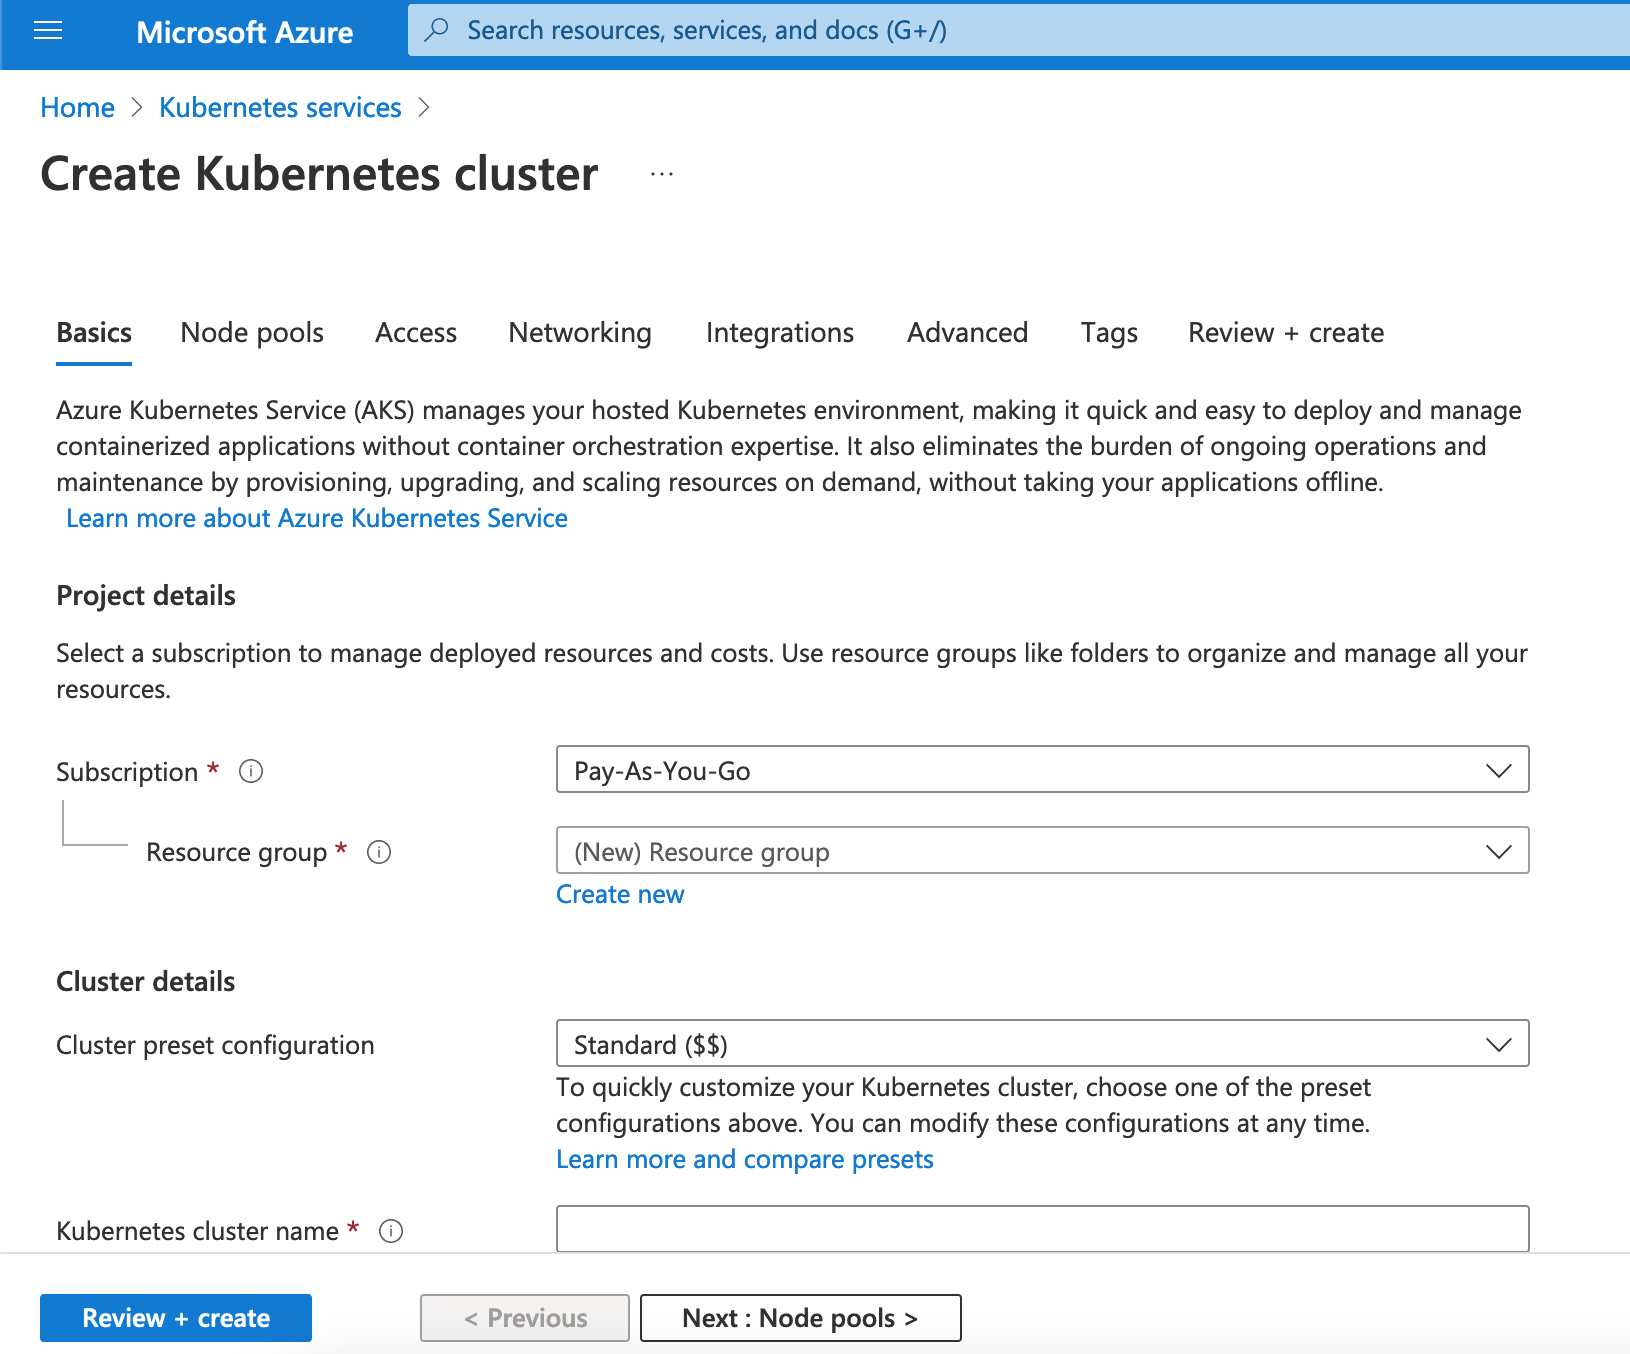
- Login to your Azure Portal, Search for AKS
- Create your Cluster, by providing all the required information.
- Access your AKS Cluster using Cloud Shell or using Azure CLI. Once you are able to AKS cluster, install kubesphere using the installation method mentioned above.
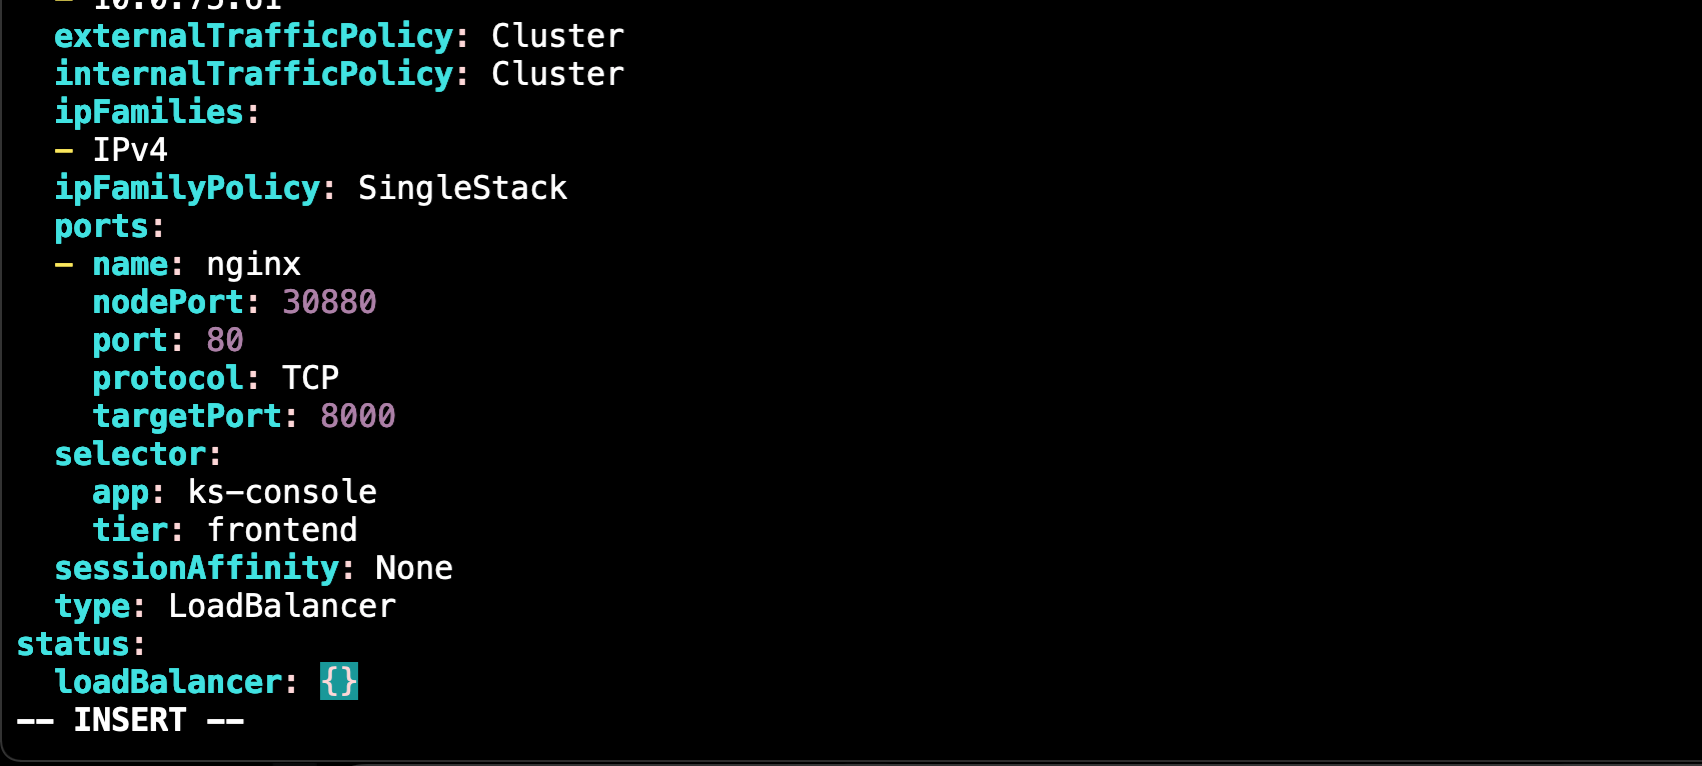
- To access Kubesphere console from an external IP address, you need to change the service type to LoadBalancer. Use the following to edit the
type: NodePorttoLoadBalancer:kubectl edit service ks-console -n kubesphere-system - Find the following section and change the type to LoadBalancer.
- After saving, you can view the external IP by using the following command. Use the IP address to access the KubeSphere Console.
kubectl get svc/ks-console -n kubesphere-system
`
Now that we have two clusters deployed at two hosted clouds, Let's try to add them into KubeSphere and manage the clusters.
Before you use KubeSphere to management multiple clusters, you need to create a host cluster. The host cluster, essentially, is a KubeSphere cluster with the multi-cluster feature enabled. It provides you with the control plane for unified management of member clusters, also known as member cluster.
Let us make our AKS Cluster as Host Cluster.
Host Cluster (AKS)
- A host cluster provides you with the central control plane and you can only define one host cluster
If you already Kubesphere already installed in your cluster, you can set the value of clusterRole to host by editing the cluster configuration.
Use the web console:
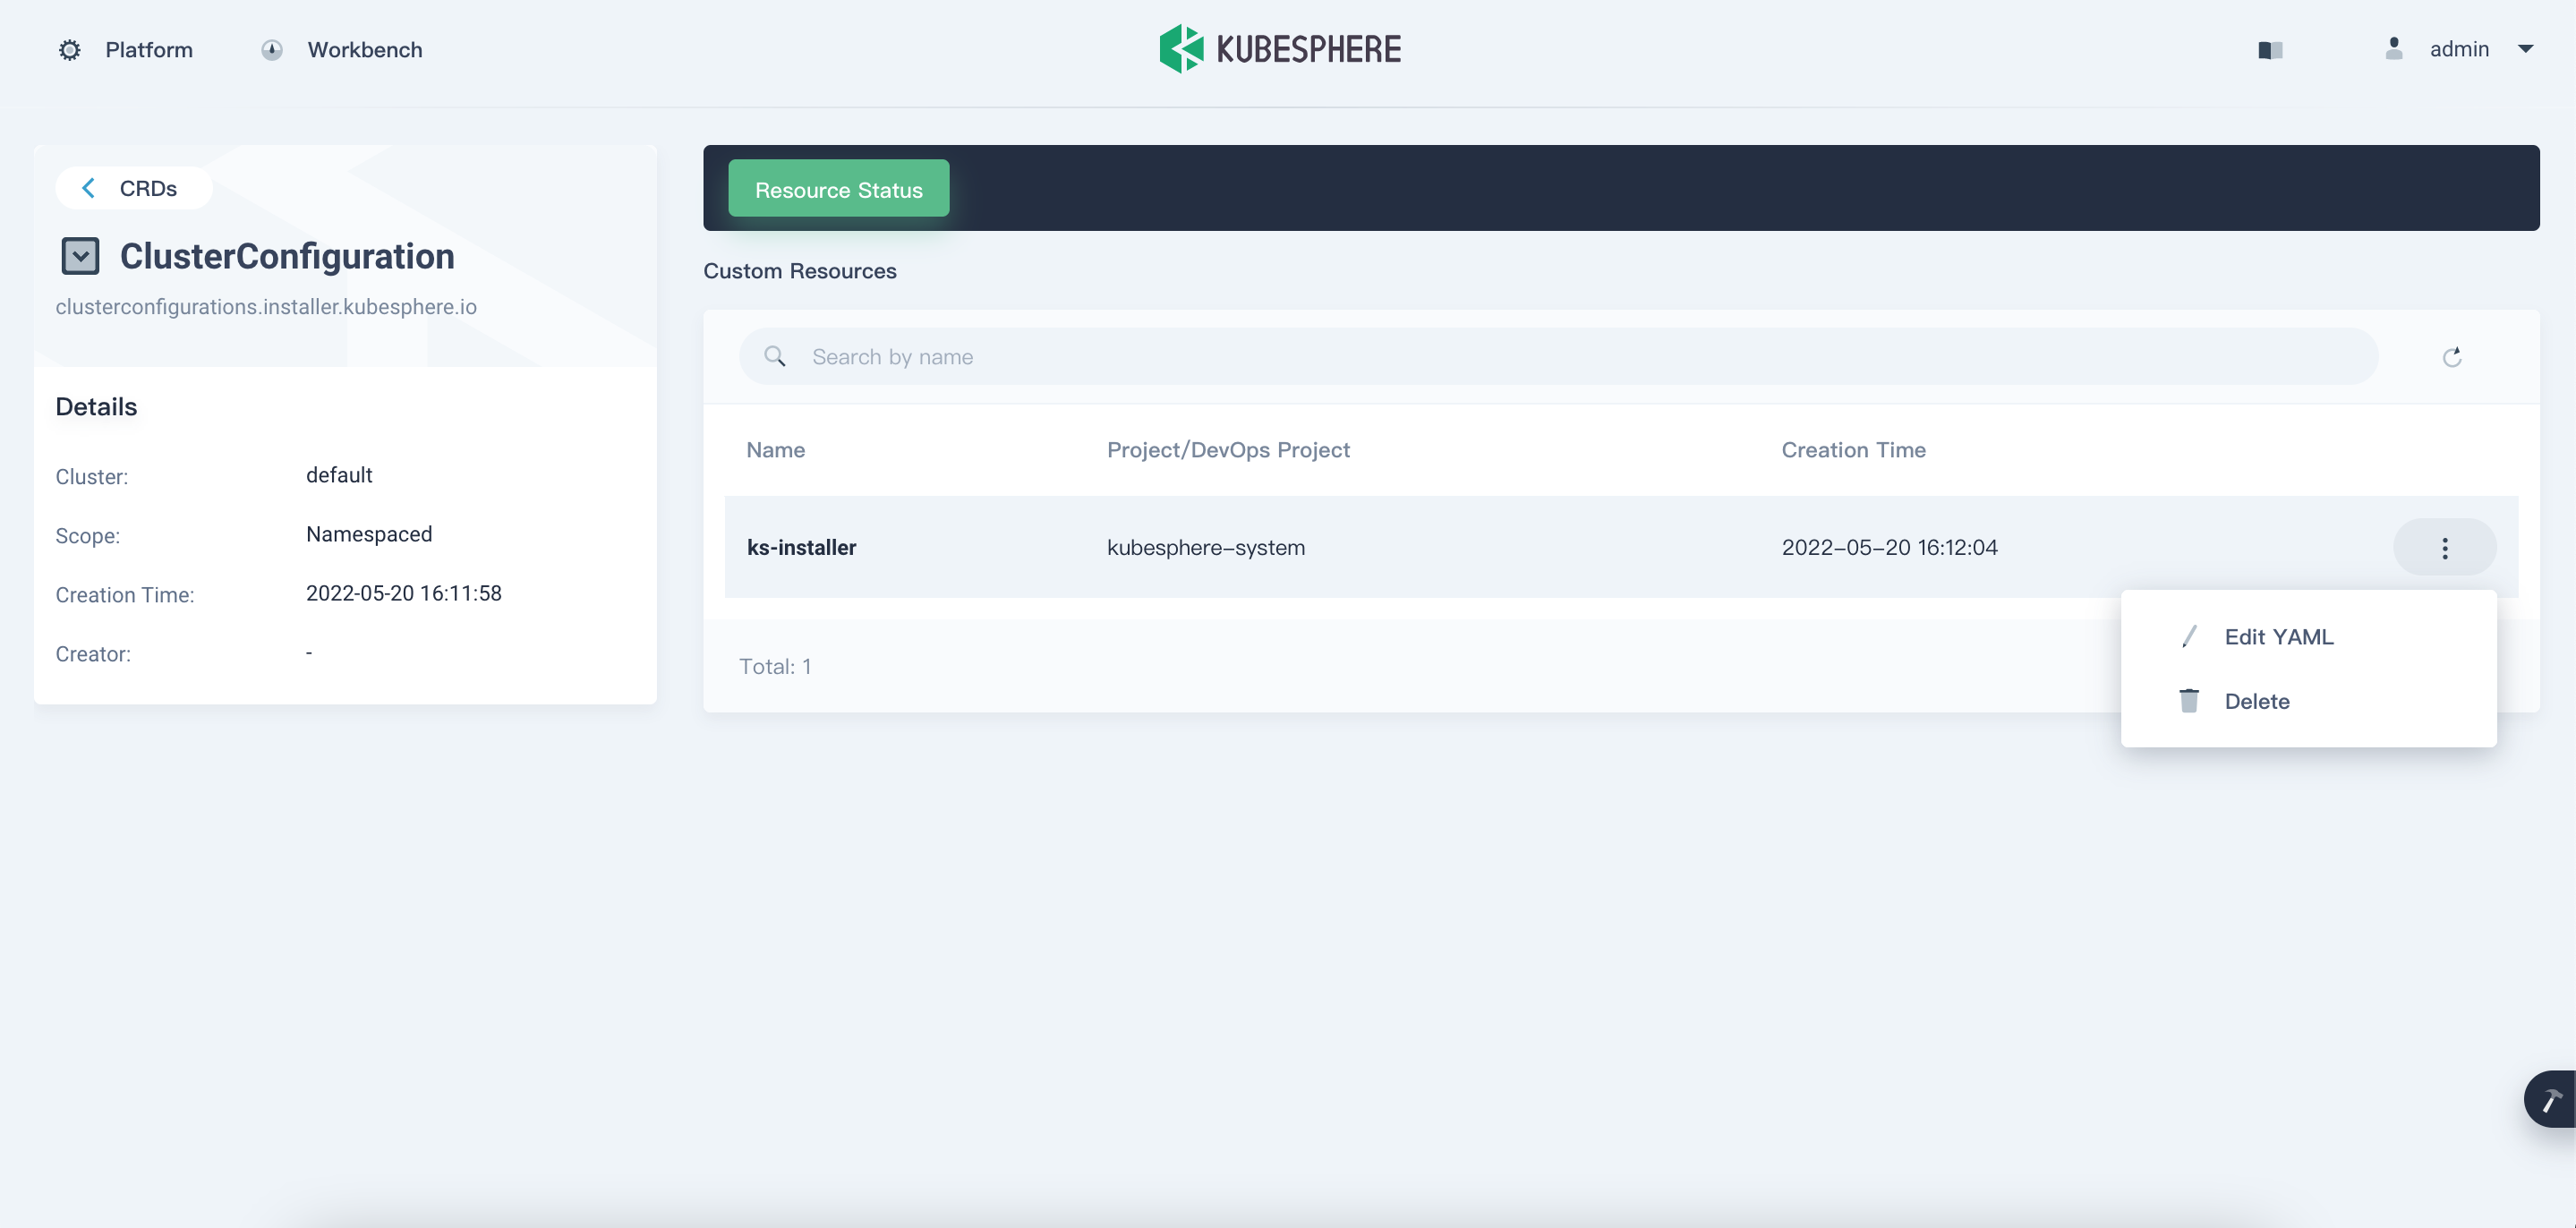
Use the admin account to log in to the console and go to CRDs on the Cluster Management page. Search for ClusterConfiguration and go to its detail page. Edit the YAML of ks-installer,
- Or use kubectl
kubectl edit cc ks-installer -n kubesphere-system
- In the YAML file of ks-installer, navigate to multicluster, set the value of clusterRole to host, then click OK (if you use the web console) and also provide your host a name.
multicluster:
  clusterRole: host
  hostClusterName: MyHostAKS
- Wait for sometime for the changes to reflect.
Member cluster (CIVO)
- In order to manage the member cluster from the host cluster, you need to make
jwtSecretthe same between them. Therefore, get it first by executing the following command on the host cluster.kubectl -n kubesphere-system get cm kubesphere-config -o yaml | grep -v "apiVersion" | grep jwtSecret - You will an outpur similar to this:
jwtSecret: "ovyUAW7bEWcUWvC4m4kMq9ZTkTz2cLxg If you already Kubesphere already installed in your cluster, you can set the value of clusterRole to member by editing the cluster configuration.
Use the web console:
Use the admin account to log in to the console and go to CRDs on the Cluster Management page. Search for ClusterConfiguration and go to its detail page. Edit the YAML of ks-installer,
Or Use Kubectl:
kubectl edit cc ks-installer -n kubesphere-system
- In the YAML file of ks-installer, enter your corresponding jwtSecret which you got from previous command. and make the cluster role as member.
authentication: jwtSecret: ""ovyUAW7bEWcUWvC4m4kMq9ZTkTz2cLxg" //// multicluster: clusterRole: member - Wait for sometime for the changes to reflect.
Import the Clusters
- Log in to the KubeSphere console as admin and click Add Cluster on the Cluster Management page.

- Enter the basic information of the cluster to be imported on the Import Cluster page. Click on Next
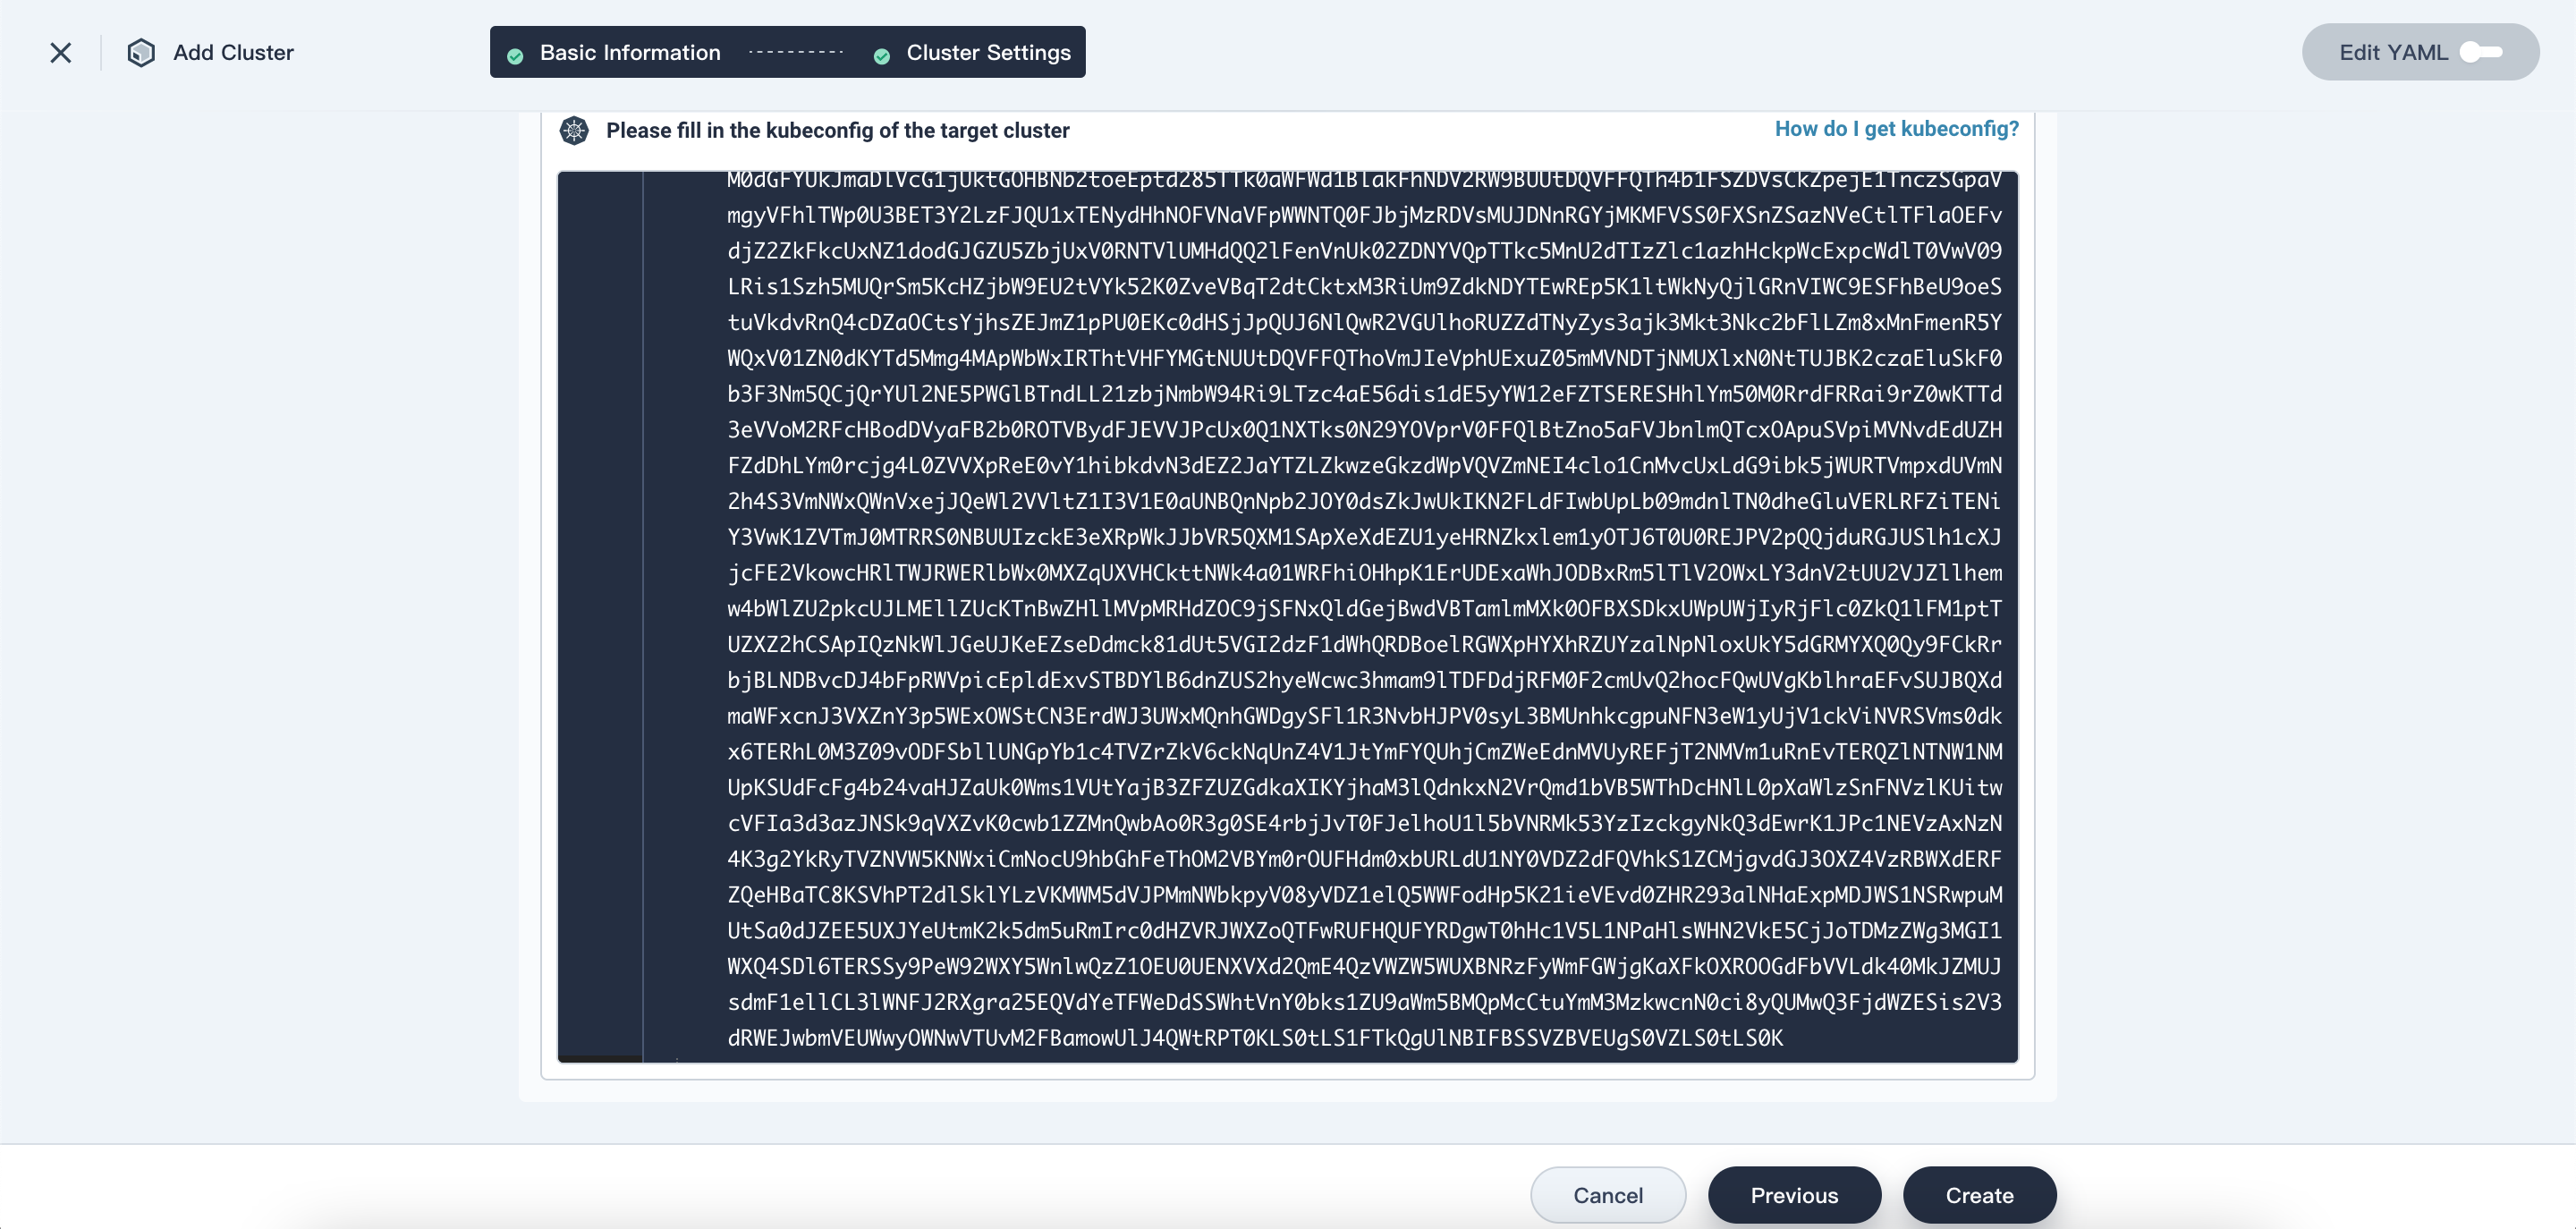
- In Connection Method, select Direct connection, and copy the kubeconfig of the cluster and paste it into the box.
- Click Create and wait for cluster initialization to finish.
- Repeat the same process for all your clusters.
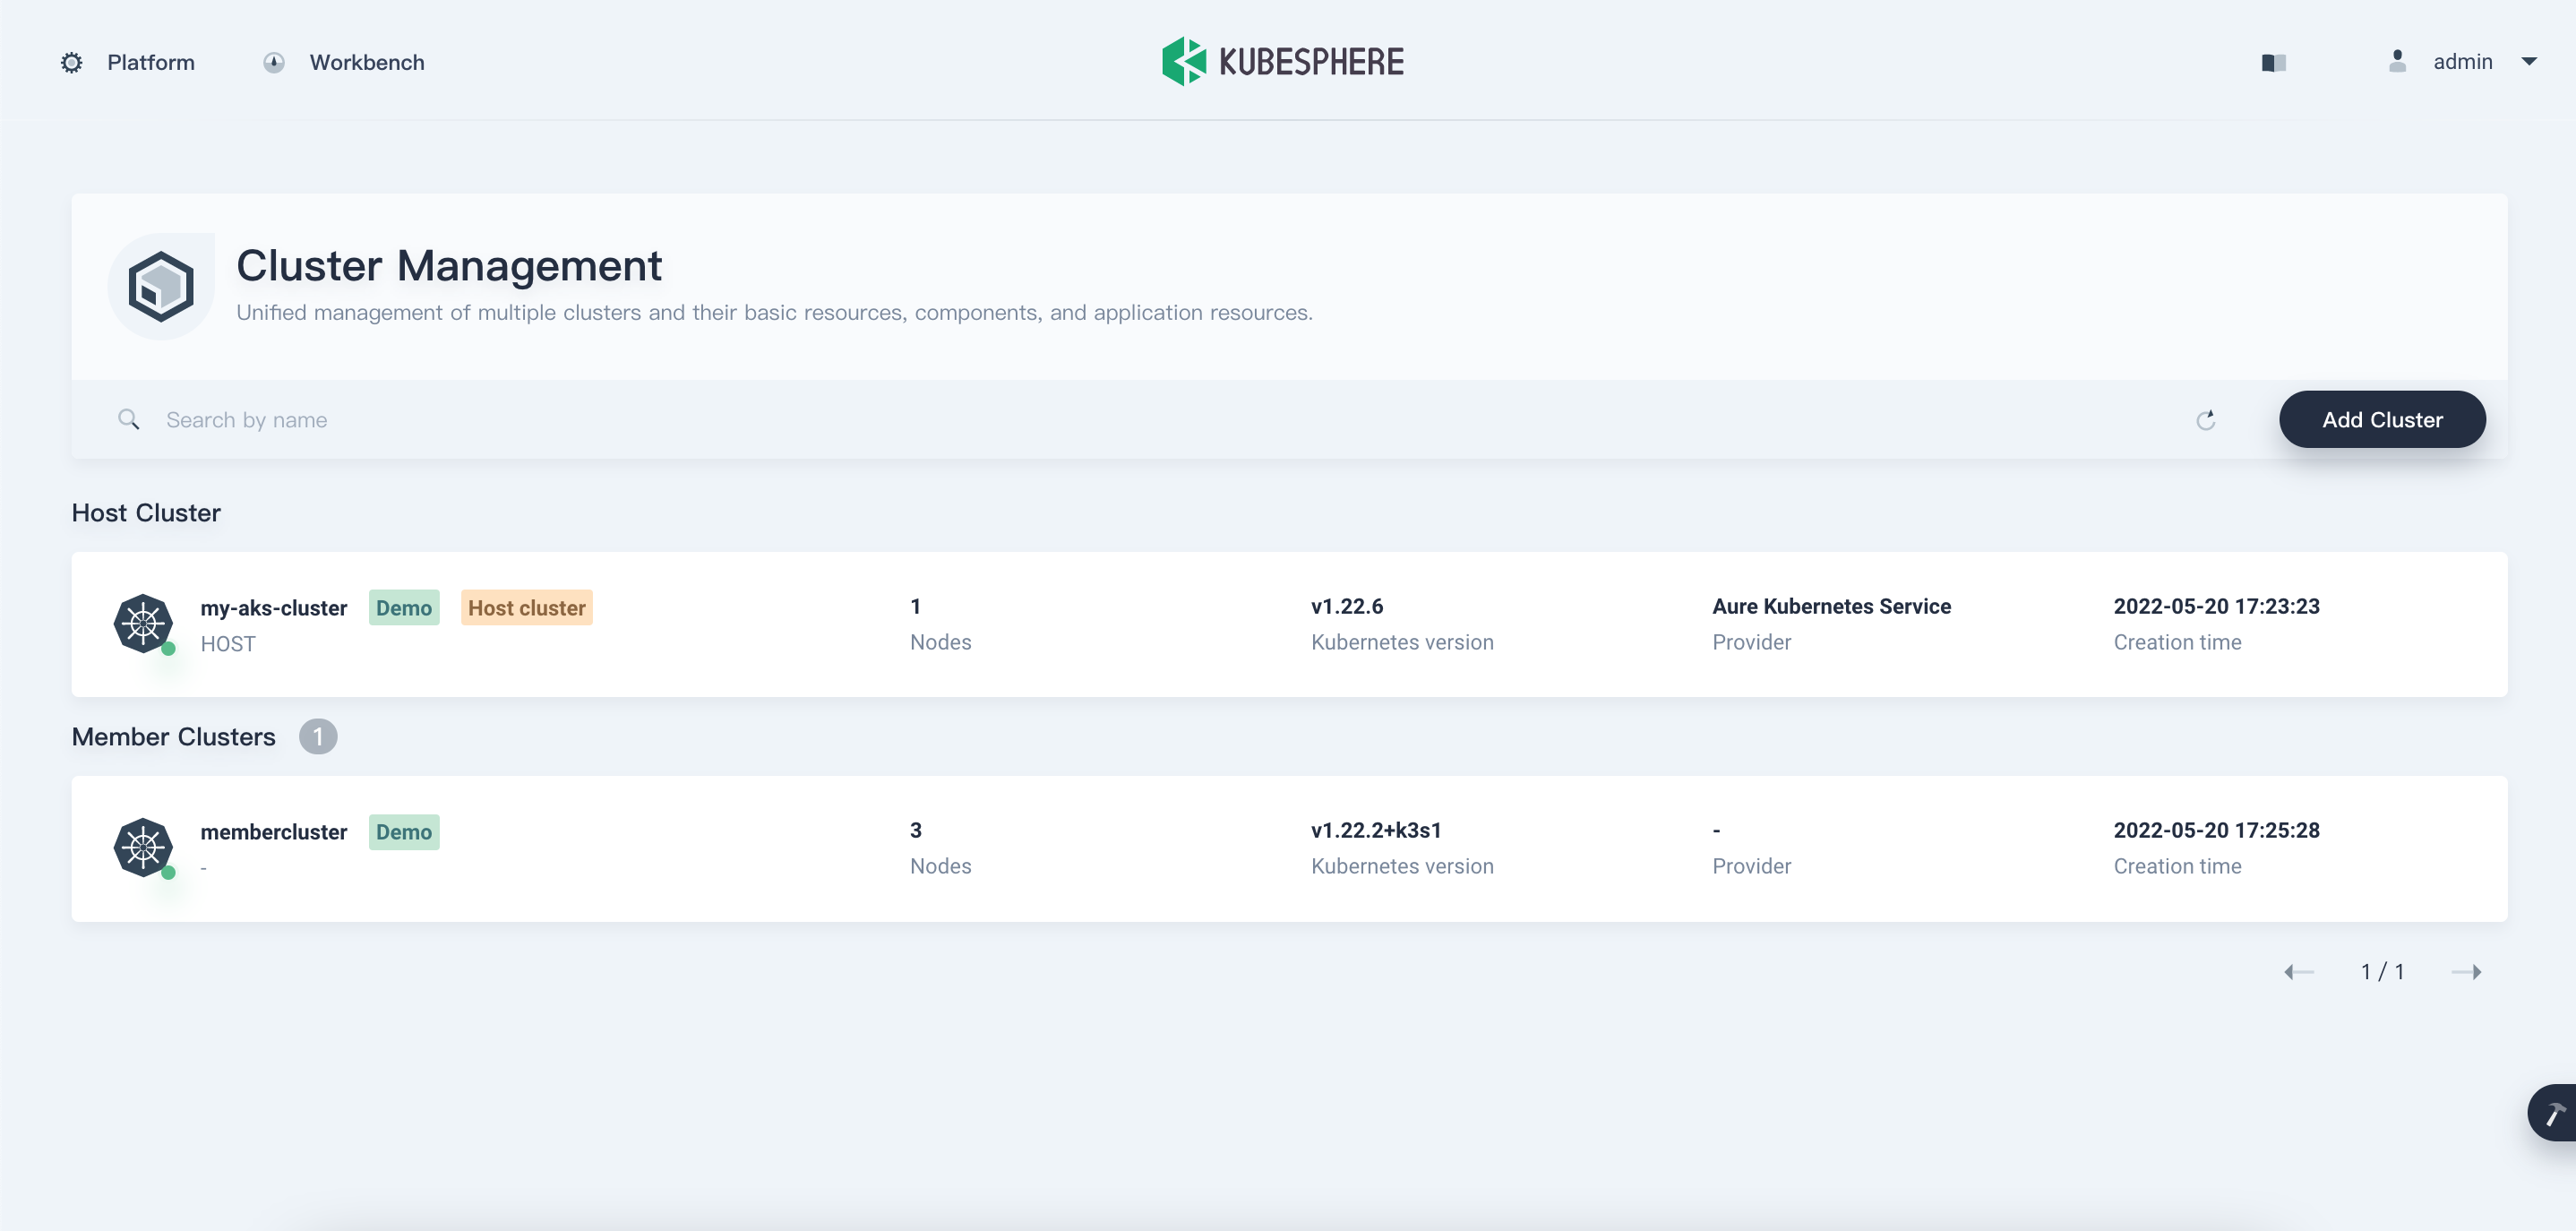
As you can see now I can manage my both clusters which are two different cloud hosted Clusters at one place, Isn't it awesome?
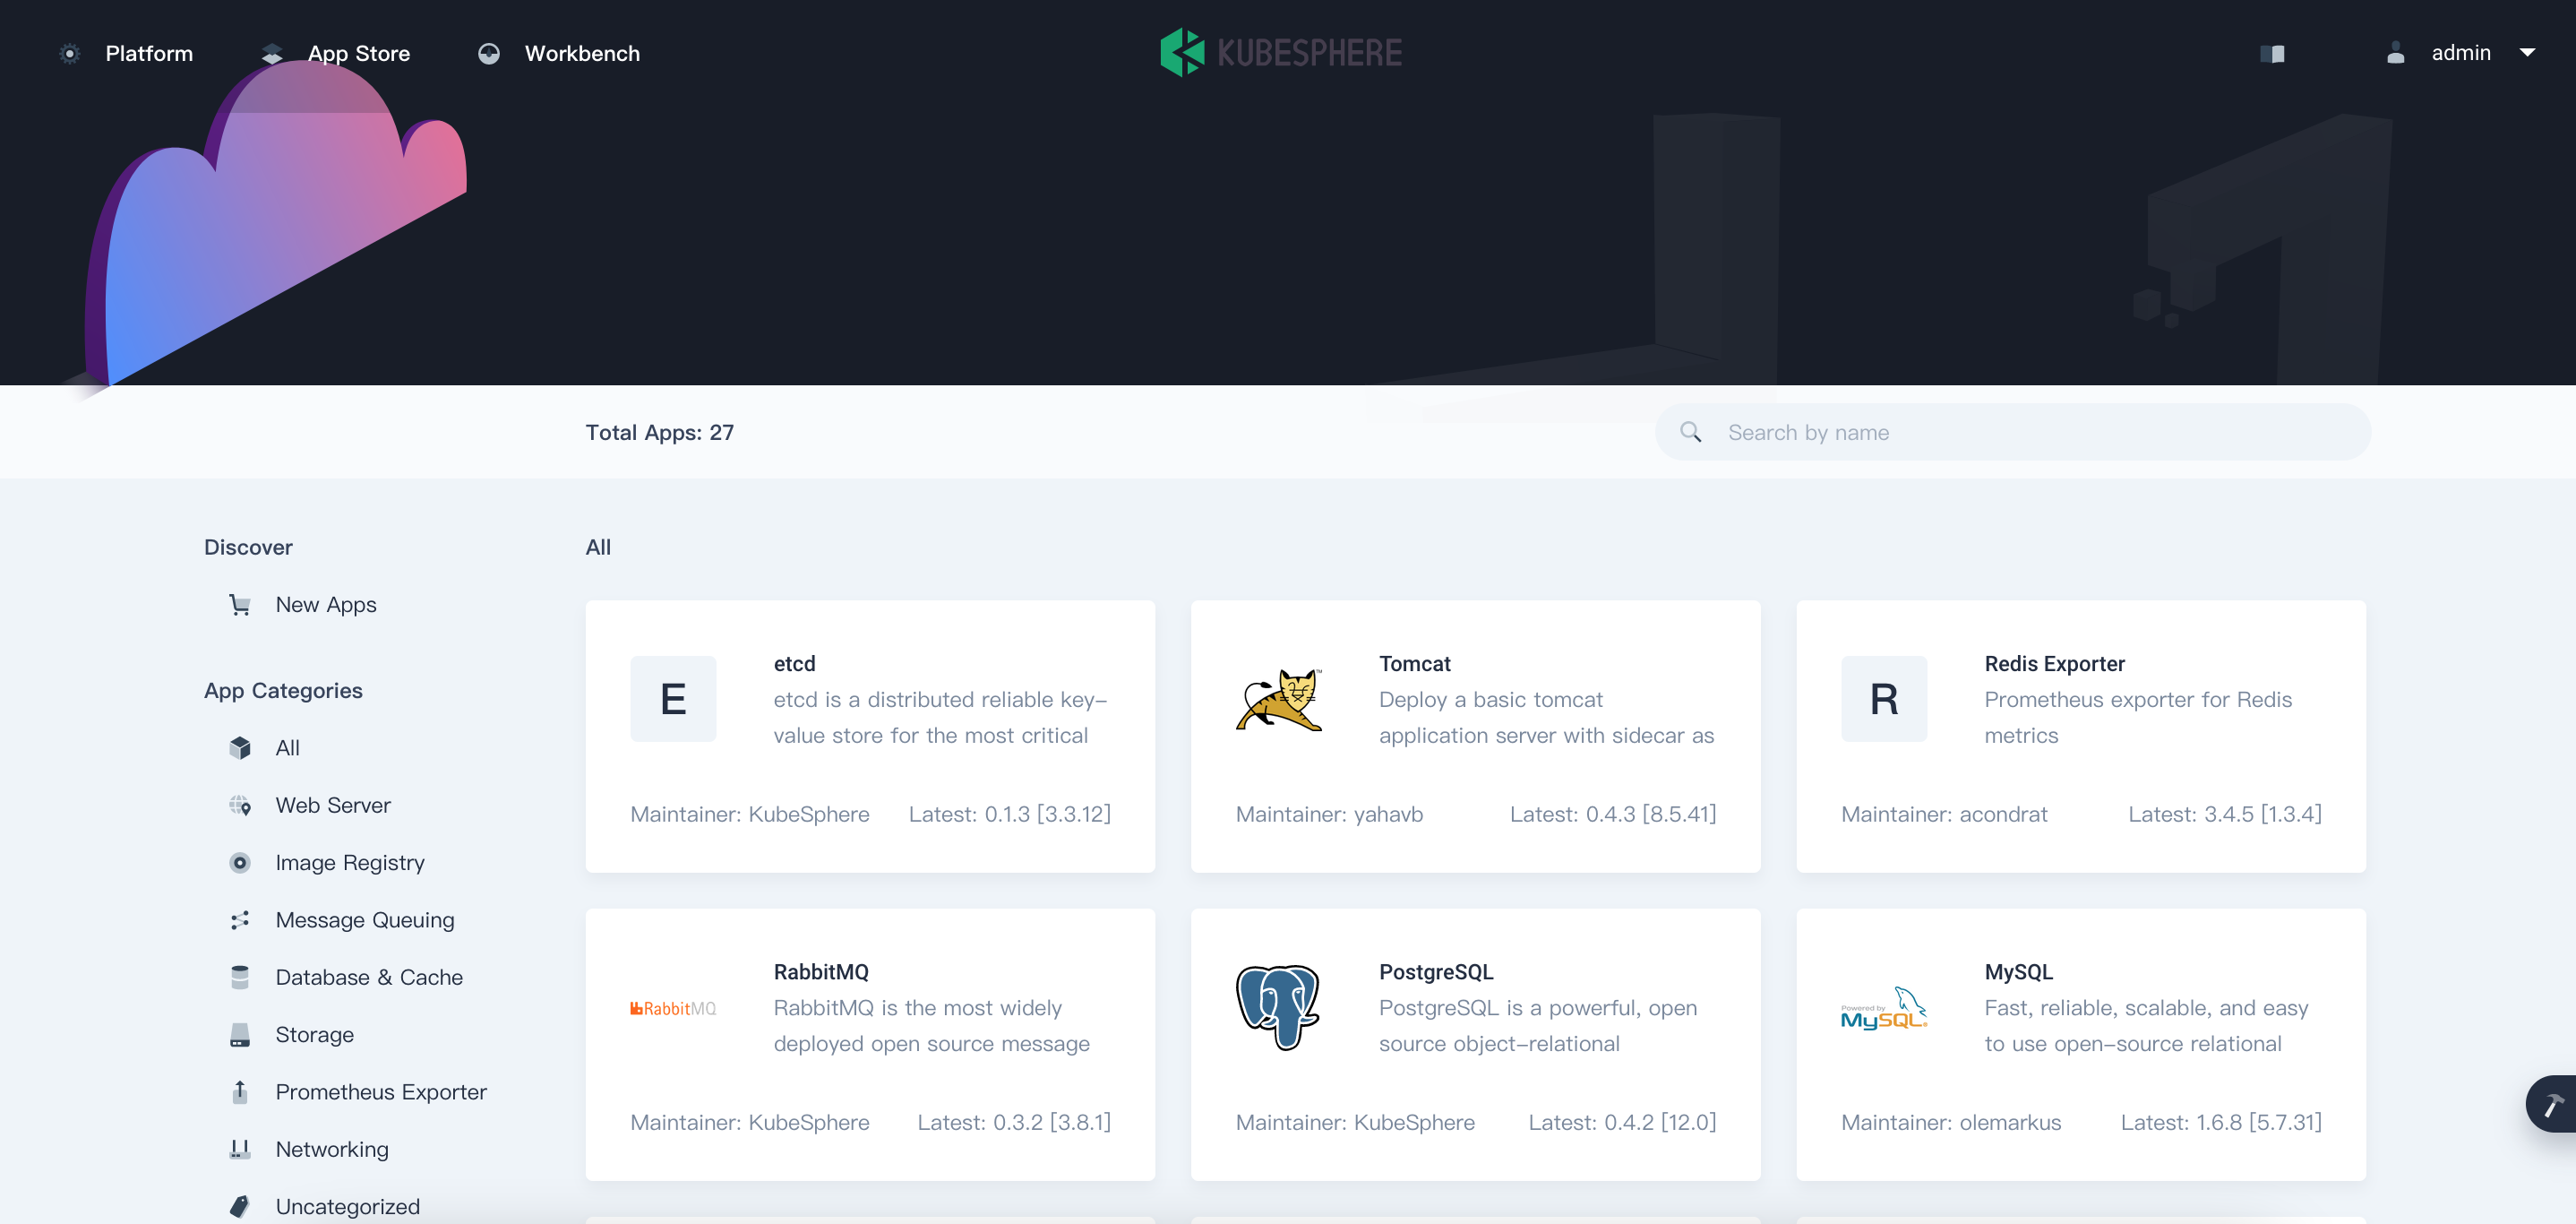
Application Store
KubeSphere provides users with a Helm-based Application store on the back of OpenPitrix, an open-source web-based system to package, deploy and manage different types of apps. Kubesphere allows developers, users to install, test application at a single place.
Enable the App Store
- By Default, the App store is disabled in KubeSphere.
- To enable it, you need to change the
openpitrixsettings in theks-installerconfiguration file. - Log in to the console as admin. Click Platform in the upper-left corner and select Cluster Management.
- Click CRDs and enter
clusterconfigurationin the search bar. Open it and edit theks-installerfile just like we did in Multicluster management section. - In the YAML file, search for
openpitrixand change false to true for enabled. After you finish, click OK to save the configuration. - Or you can also use the following command to edit the file.
kubectl edit cc ks-installer -n kubesphere-system
openpitrix:
  store:
    enabled: true
- After the successful configuration, Login to your console and you can see App Store in the upper-left.

- You can install the applications by some clicks using the app store.
That's all for this post.
Note: I will keep adding more to this blog as I continue to explore more about KubeSphere. Your Feedback is always welcome.
- Lastly, I had a lot of fun while exploring KubeSphere, it is an amazing tool to manage you Cluster. It is simply a full stack solution for your kubernetes cluster.
Reference:

