How to use Portainer to manage Azure ACI?

Hey there 👋 I am Srinivas Karnati, a DevOps Engineer.
In this post we will see how to work with Azure ACI instance using Portainer. Before diving in, let's have a overview of what Portainer and ACI are 🤔?
What is Portainer?
Portainer is an open source toolset that allows you to easily build and manage containers in Docker, Docker Swarm, Kubernetes and Azure ACI.
Portainer removes the complexity of managing containers by using its UI. It removes the need of using CLI, manifests and makes the deployment and troubleshooting easy so that a non-tech savvy person can also do it.
Okay! Now you know what Portainer is, but how to install it?
Install Portainer
Portainer comes in two packages, Community Edition and Business edition. For this tutorial, I am installing the Portainer CE edition by using Docker.
- First, Let us create a volume so that Portainer Server store its database.
docker volume create portainer_data
- Then, download and install the Portainer container:
docker run -d -p 8000:8000 -p 9443:9443 --name portainer \
    --restart=always \
    -v /var/run/docker.sock:/var/run/docker.sock \
    -v portainer_data:/data \
    portainer/portainer-ce:2.9.3
That's all you need to do to install Portainer. For more : Visit Documentation
BTW, You can check to see whether the Portainer container has installed/running by command docker ps
Now you have Portainer installed, you can log into your Portainer server by visiting :
https://localhost:9443
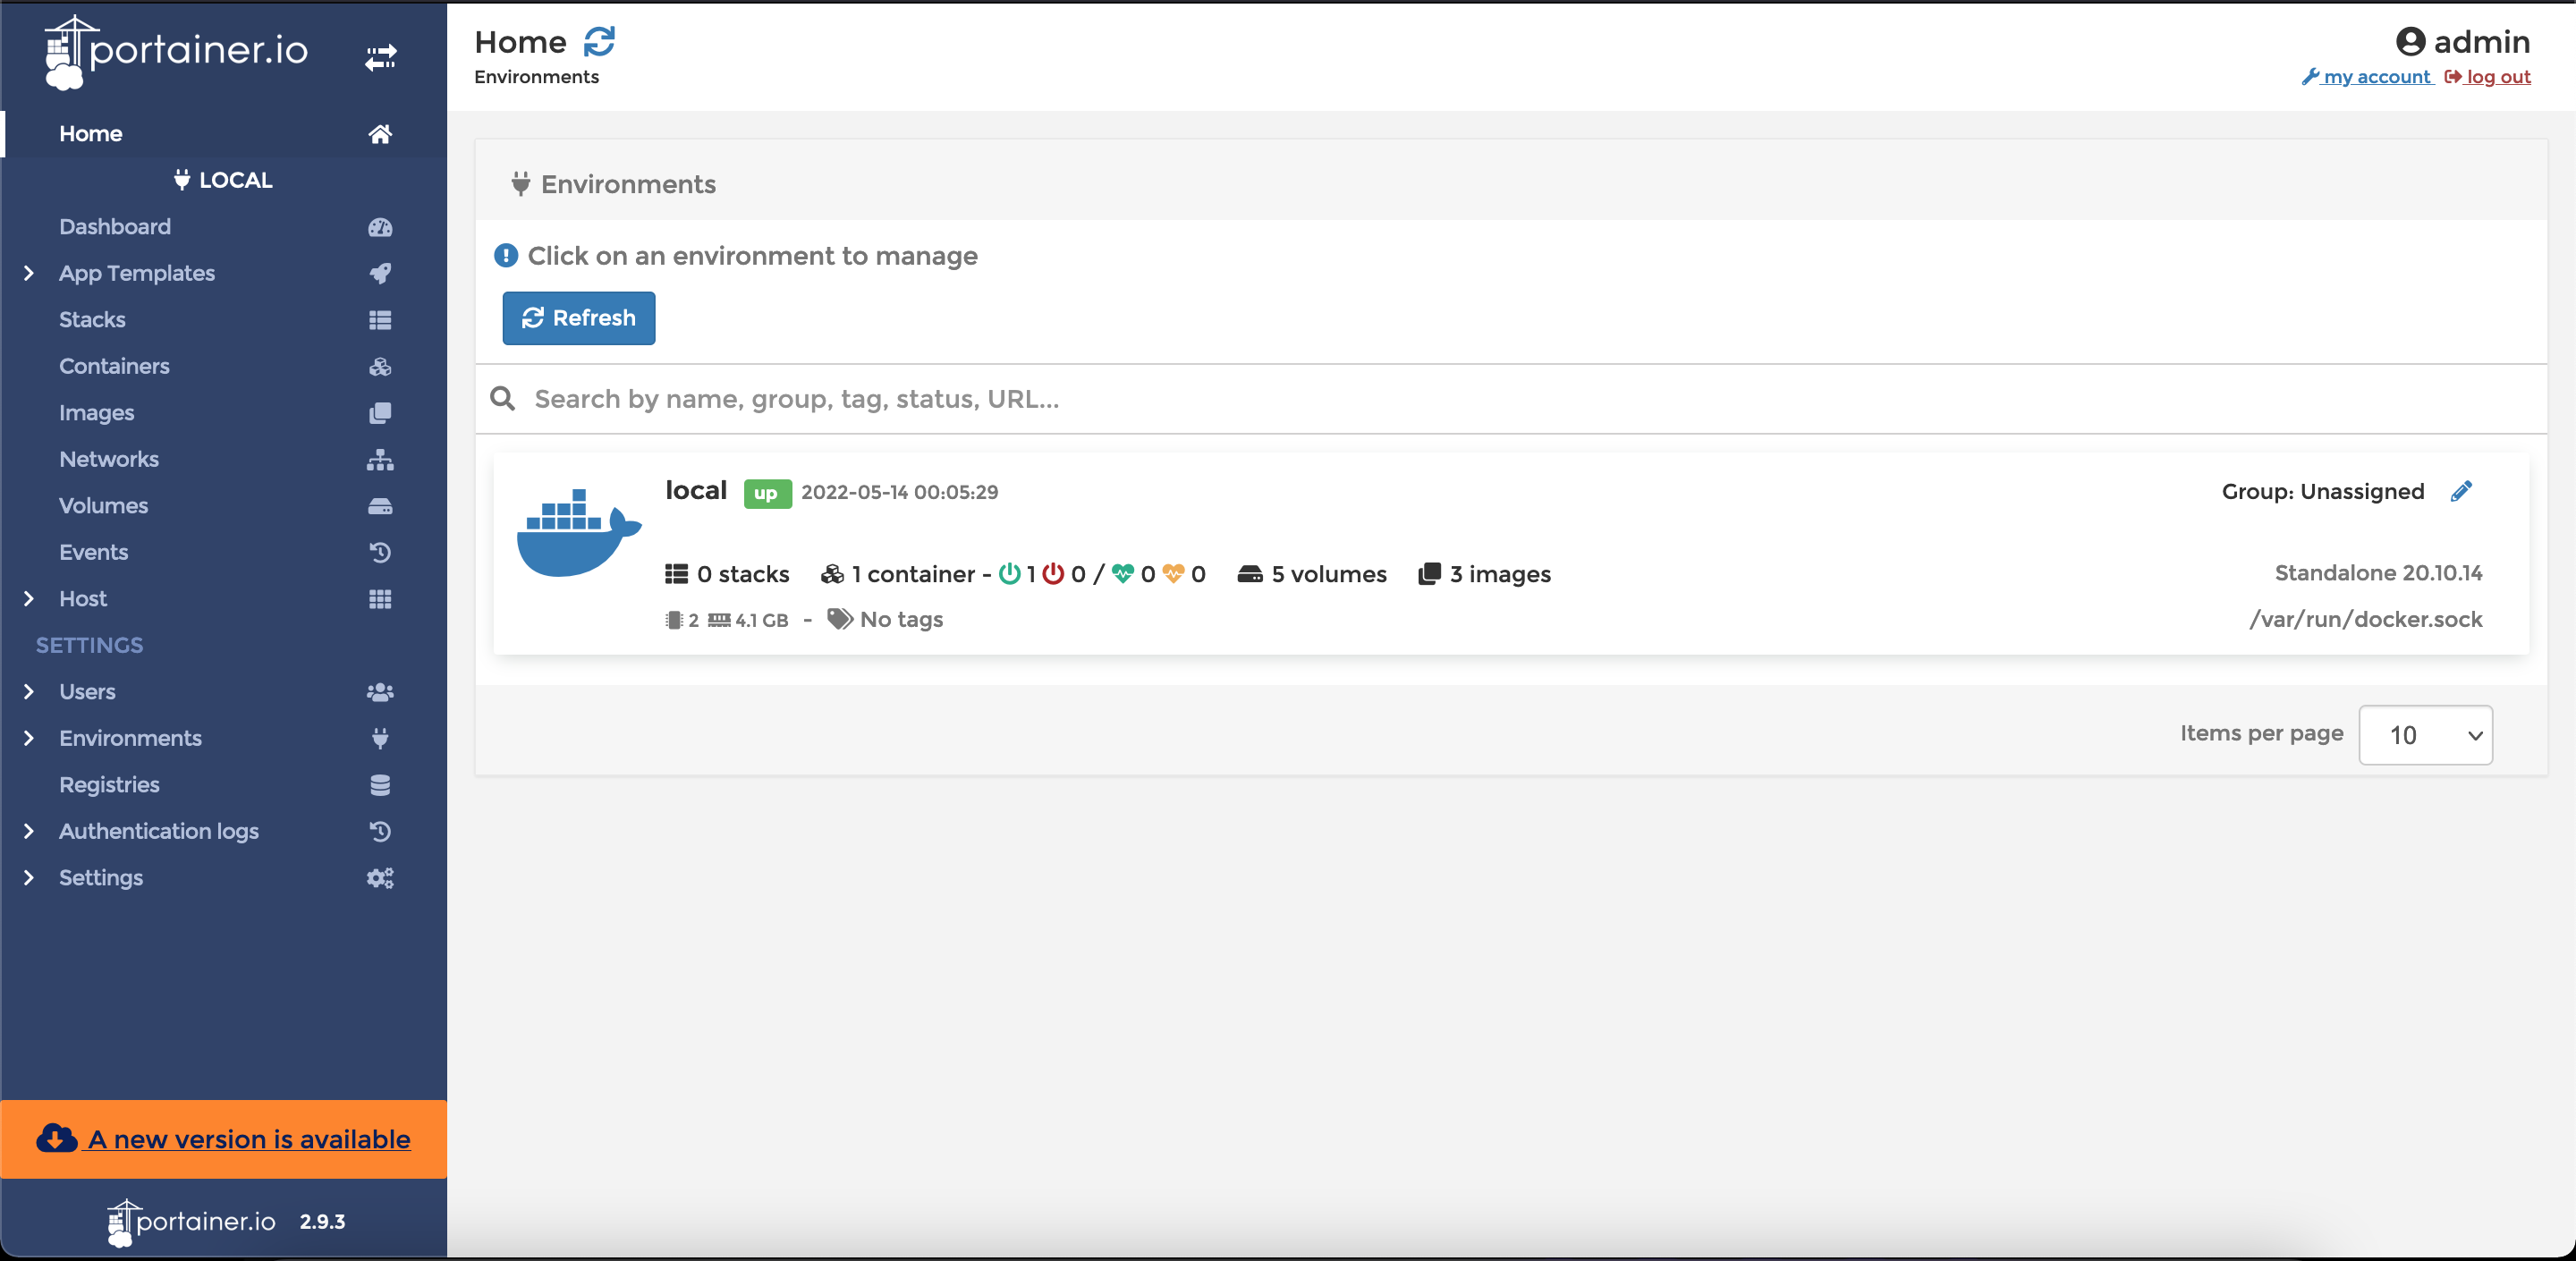
Once you perform the initial login steps, you would be able to see a home screen. 🥳
What is ACI?
ACI- Azure Container Instance
Azure Container Instances is a service that enables you to deploy containers on the Microsoft Azure cloud.
ACI supports both Linux and Windows containers. With Azure Container Instances (ACI), you can spin up a new container via the Azure portal or CLI. ACI also supports standard Docker images that you can pull from a container registry, such as Docker Hub or Azure Container Registry.
Now we know what Portainer and ACI are? Let us see how to setup ACI as an environment in Portainer, and how to manage ACI instances using Portainer.
Manage ACI instances using Portainer
Setup Azure
- First step is to register an Application via the AAD( Azure Active Directory) of your Azure subscription
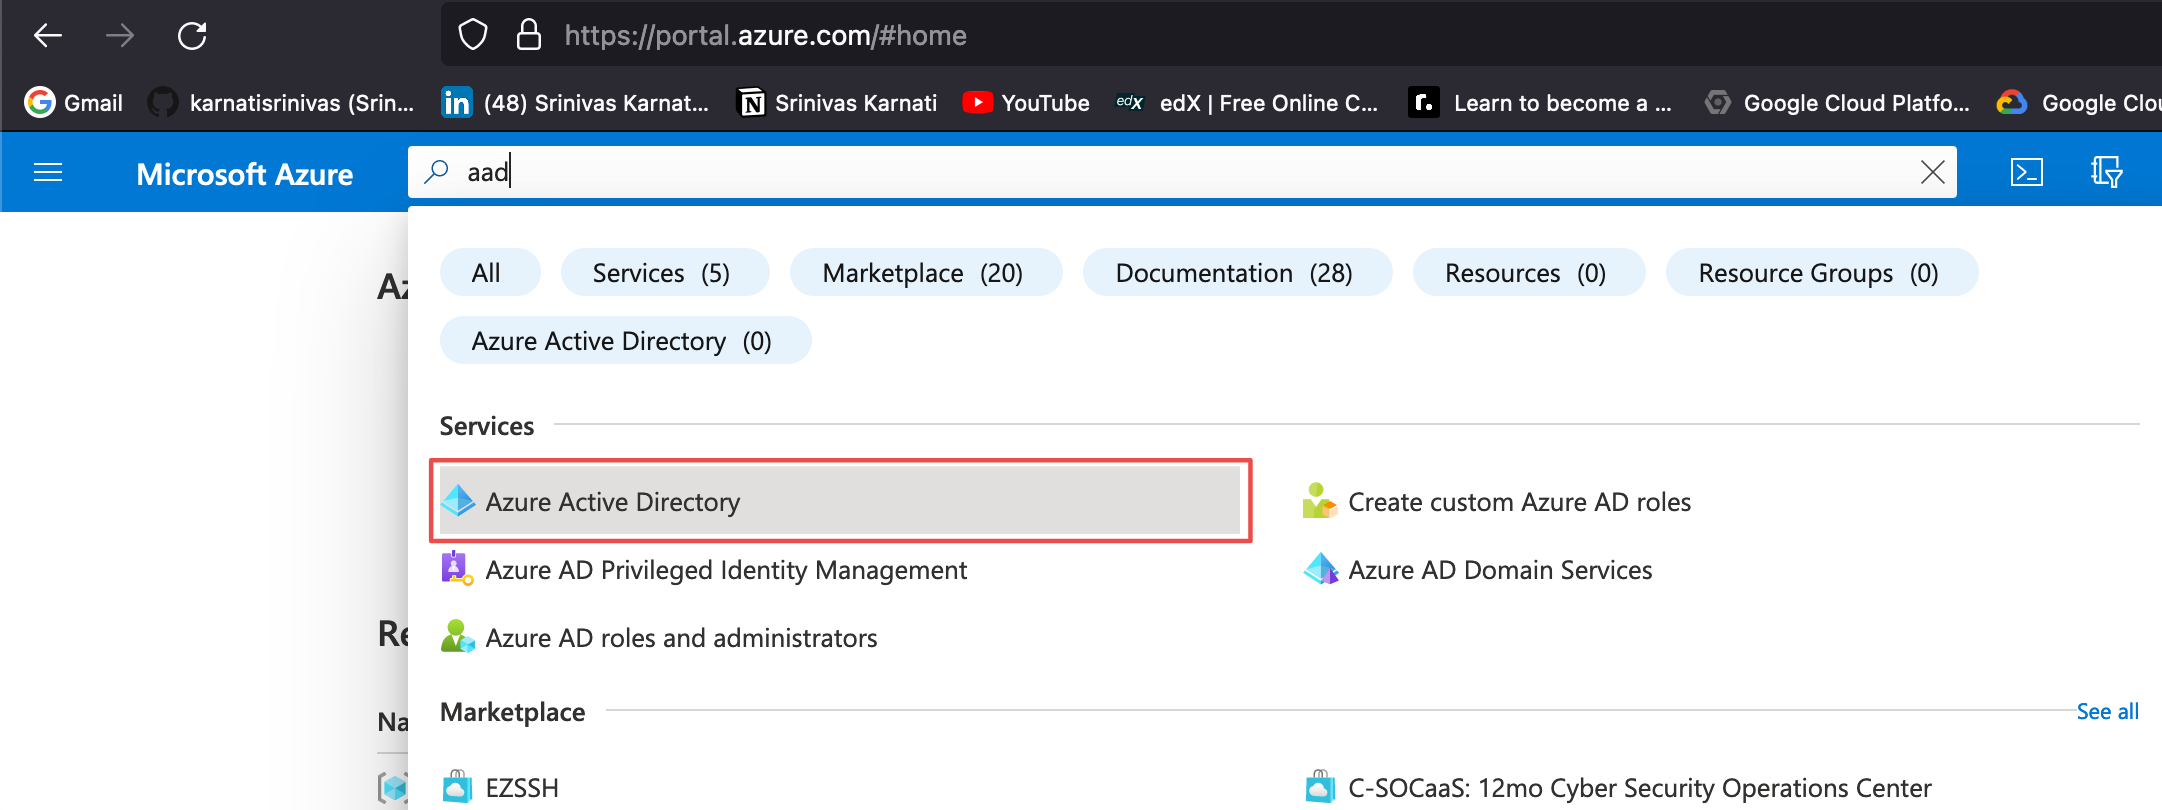
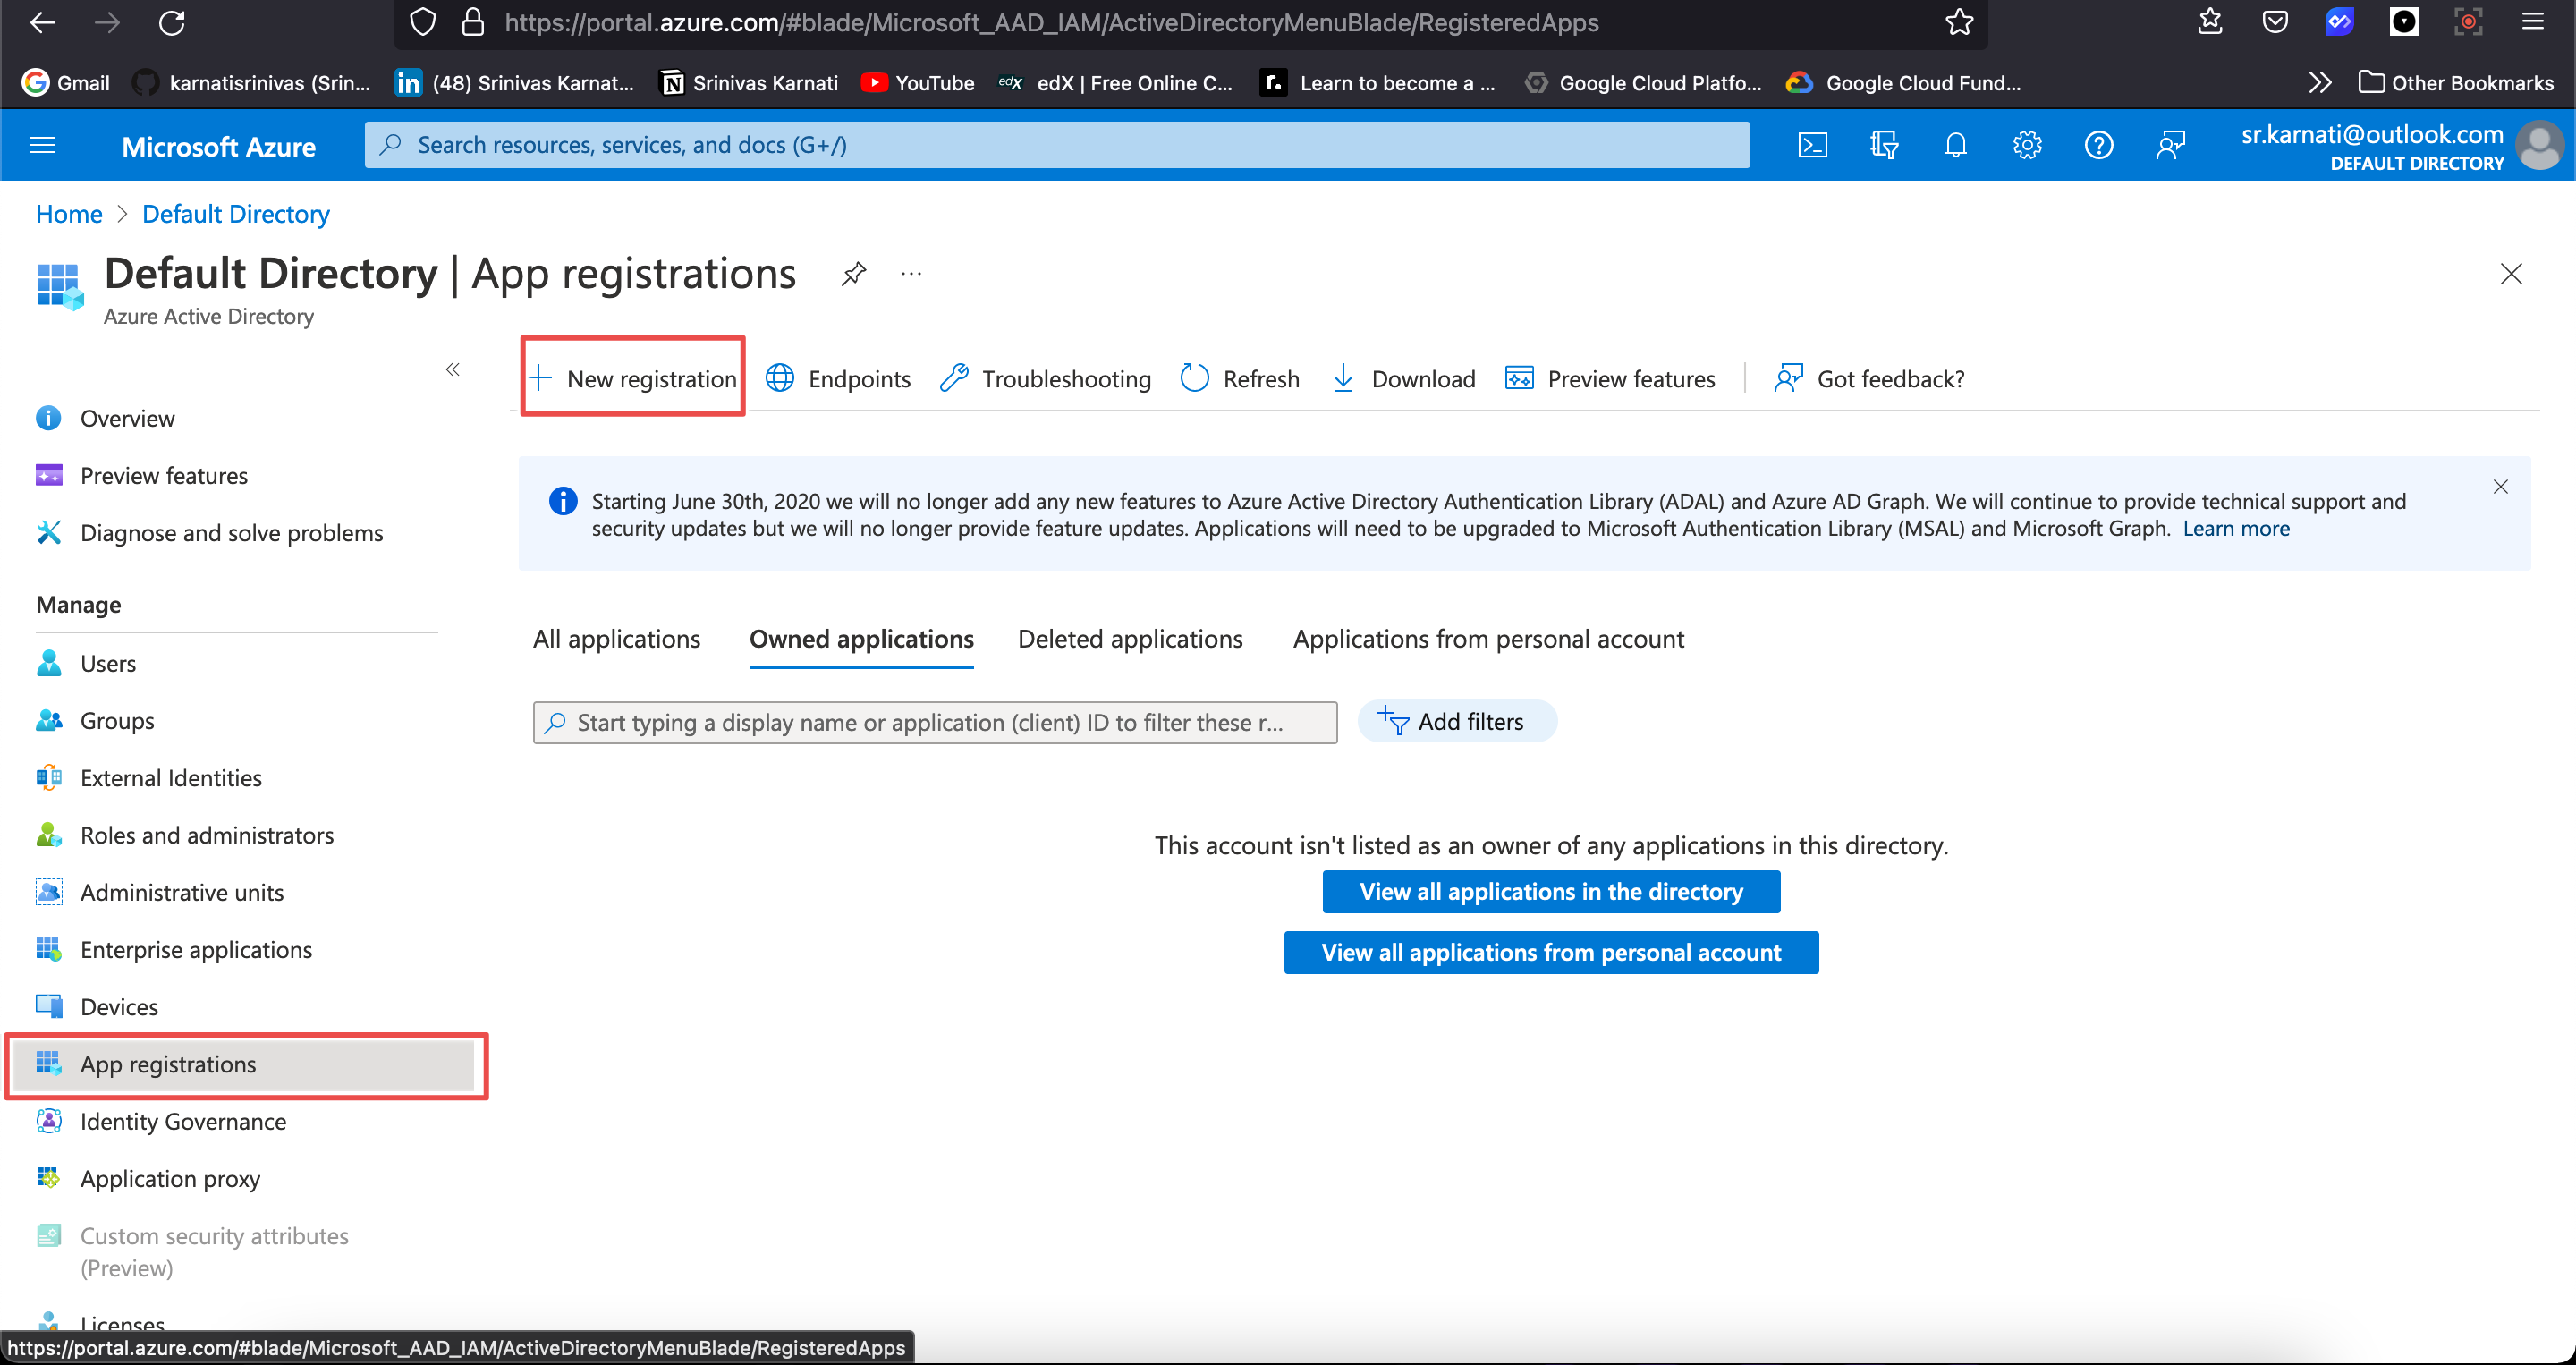
- On the left navigation of AAD service , select the App registrations option and New registraion
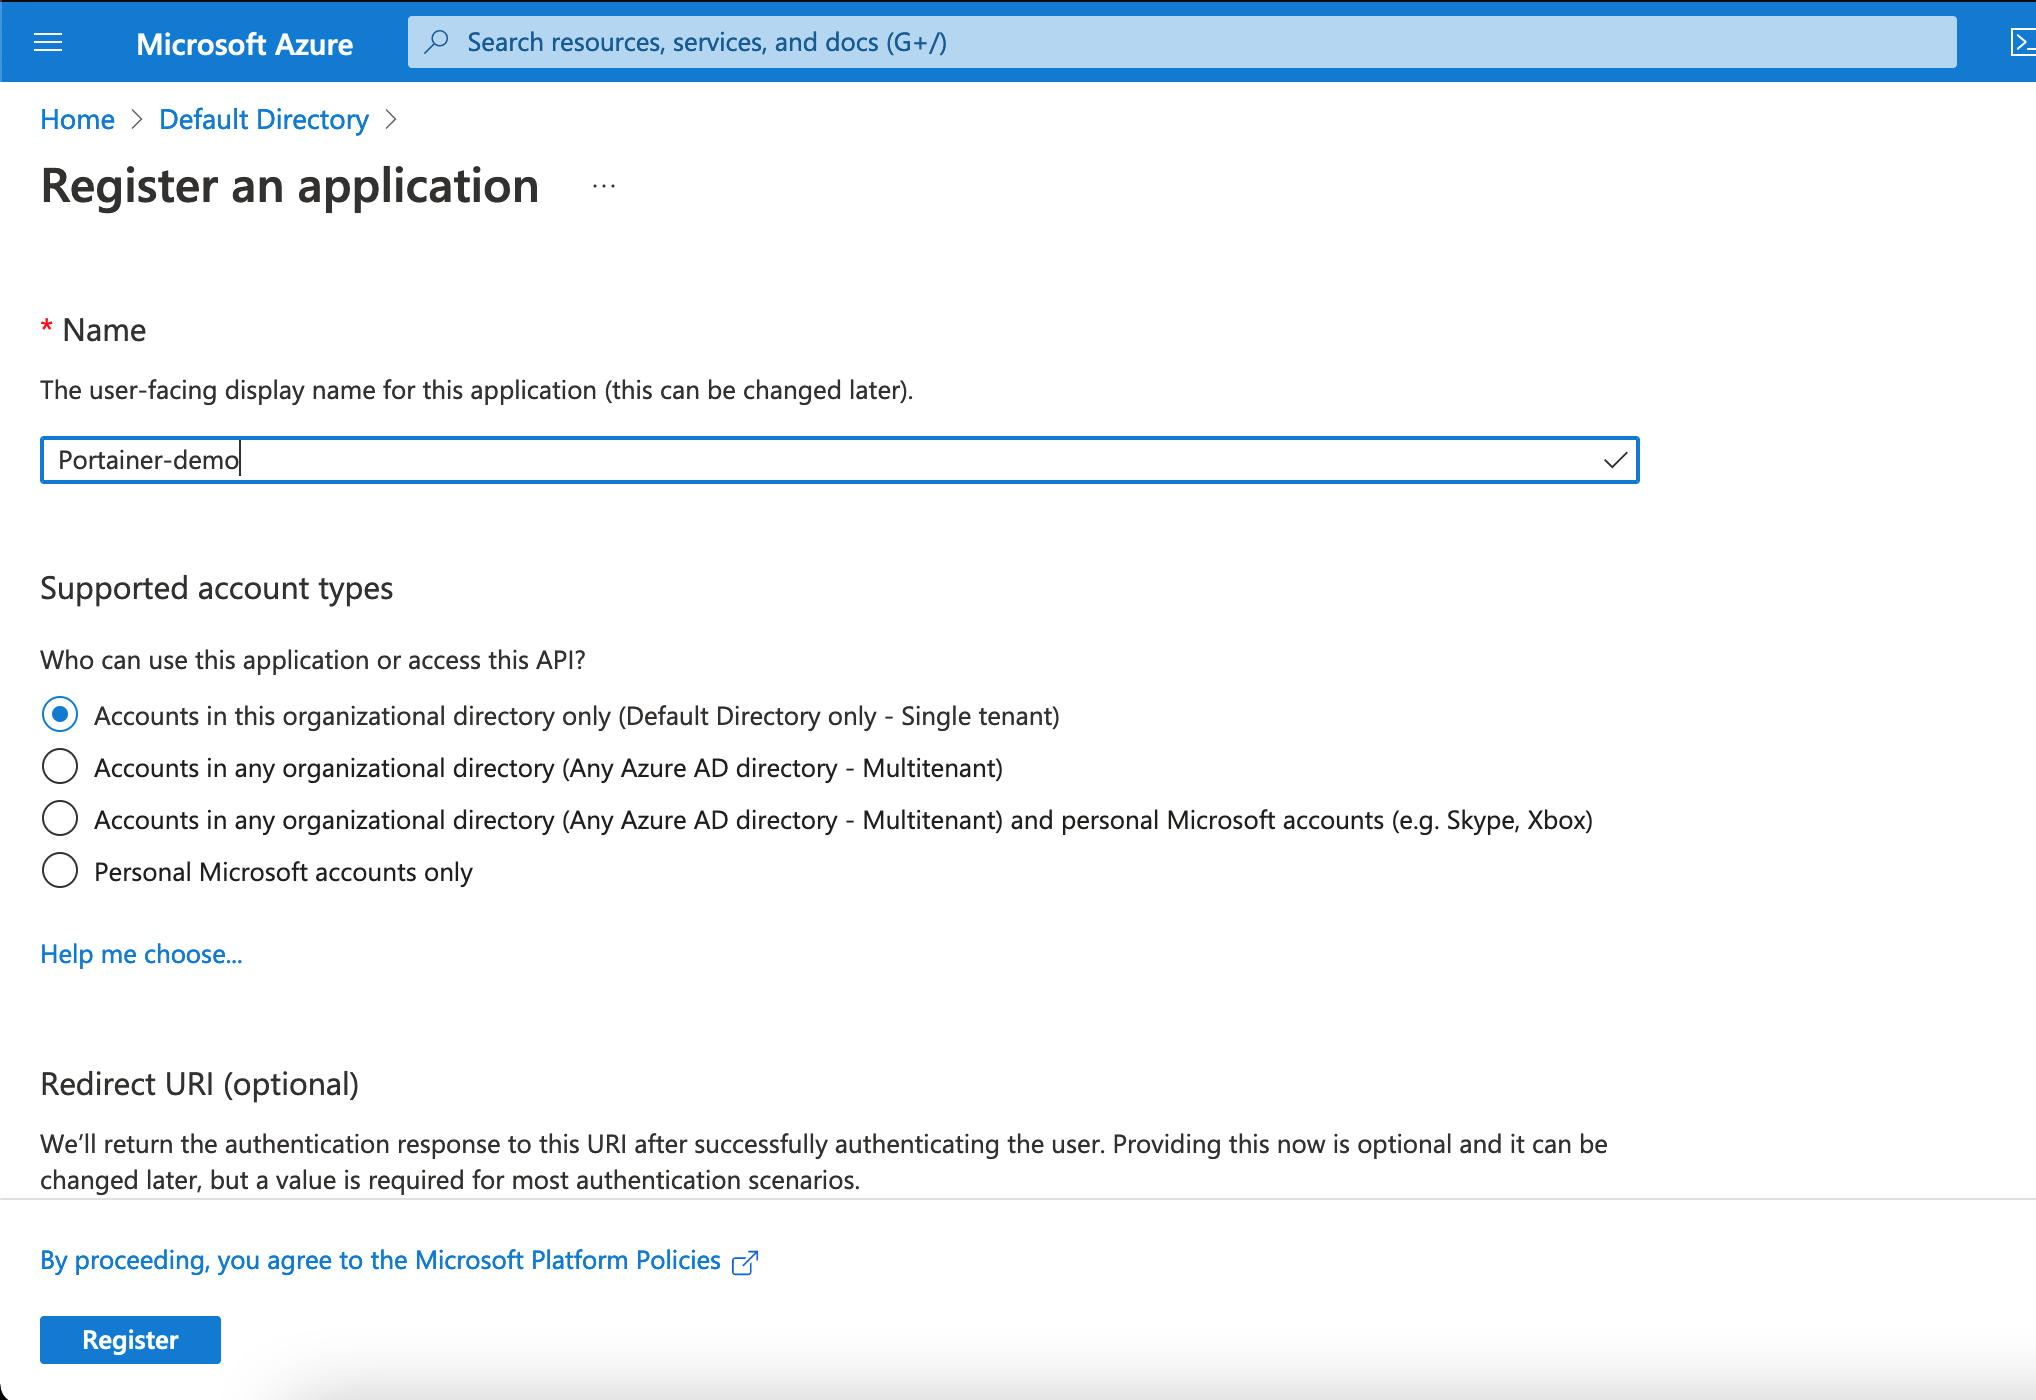
- Give your App a name. You can leave all the rest as defualt and click on Register.
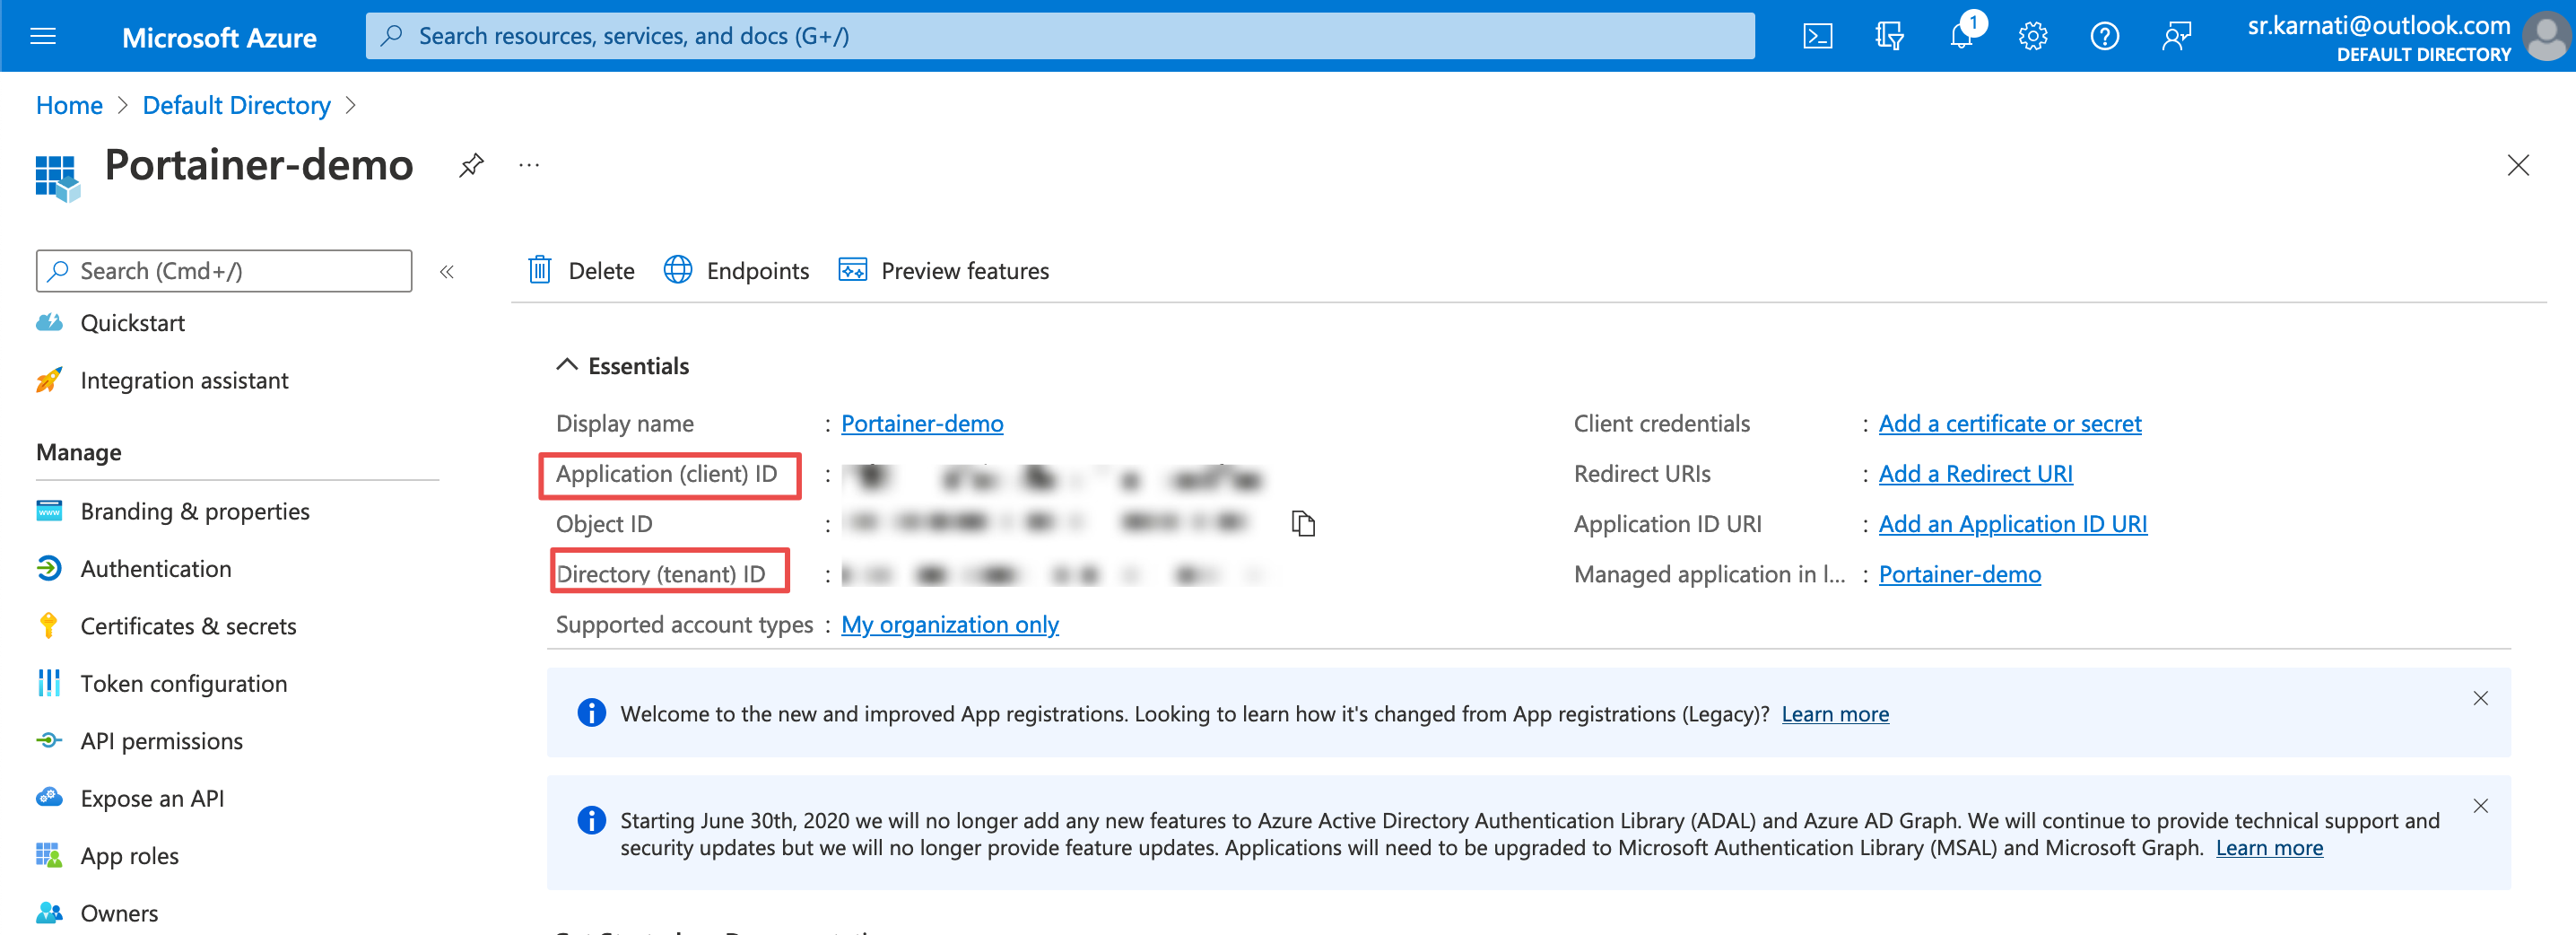
- After the App Registration, you will see an Overview of the App. Here make sure to copy and store the ApplicationID and Directory (tenant) ID. We will need those details while connecting Portainer to Azure.
- We also need to generate a secret so that Portainer can authenticate ACI. To generate a Secret, Select 'Certificates & secrets' in the left navigation menu.
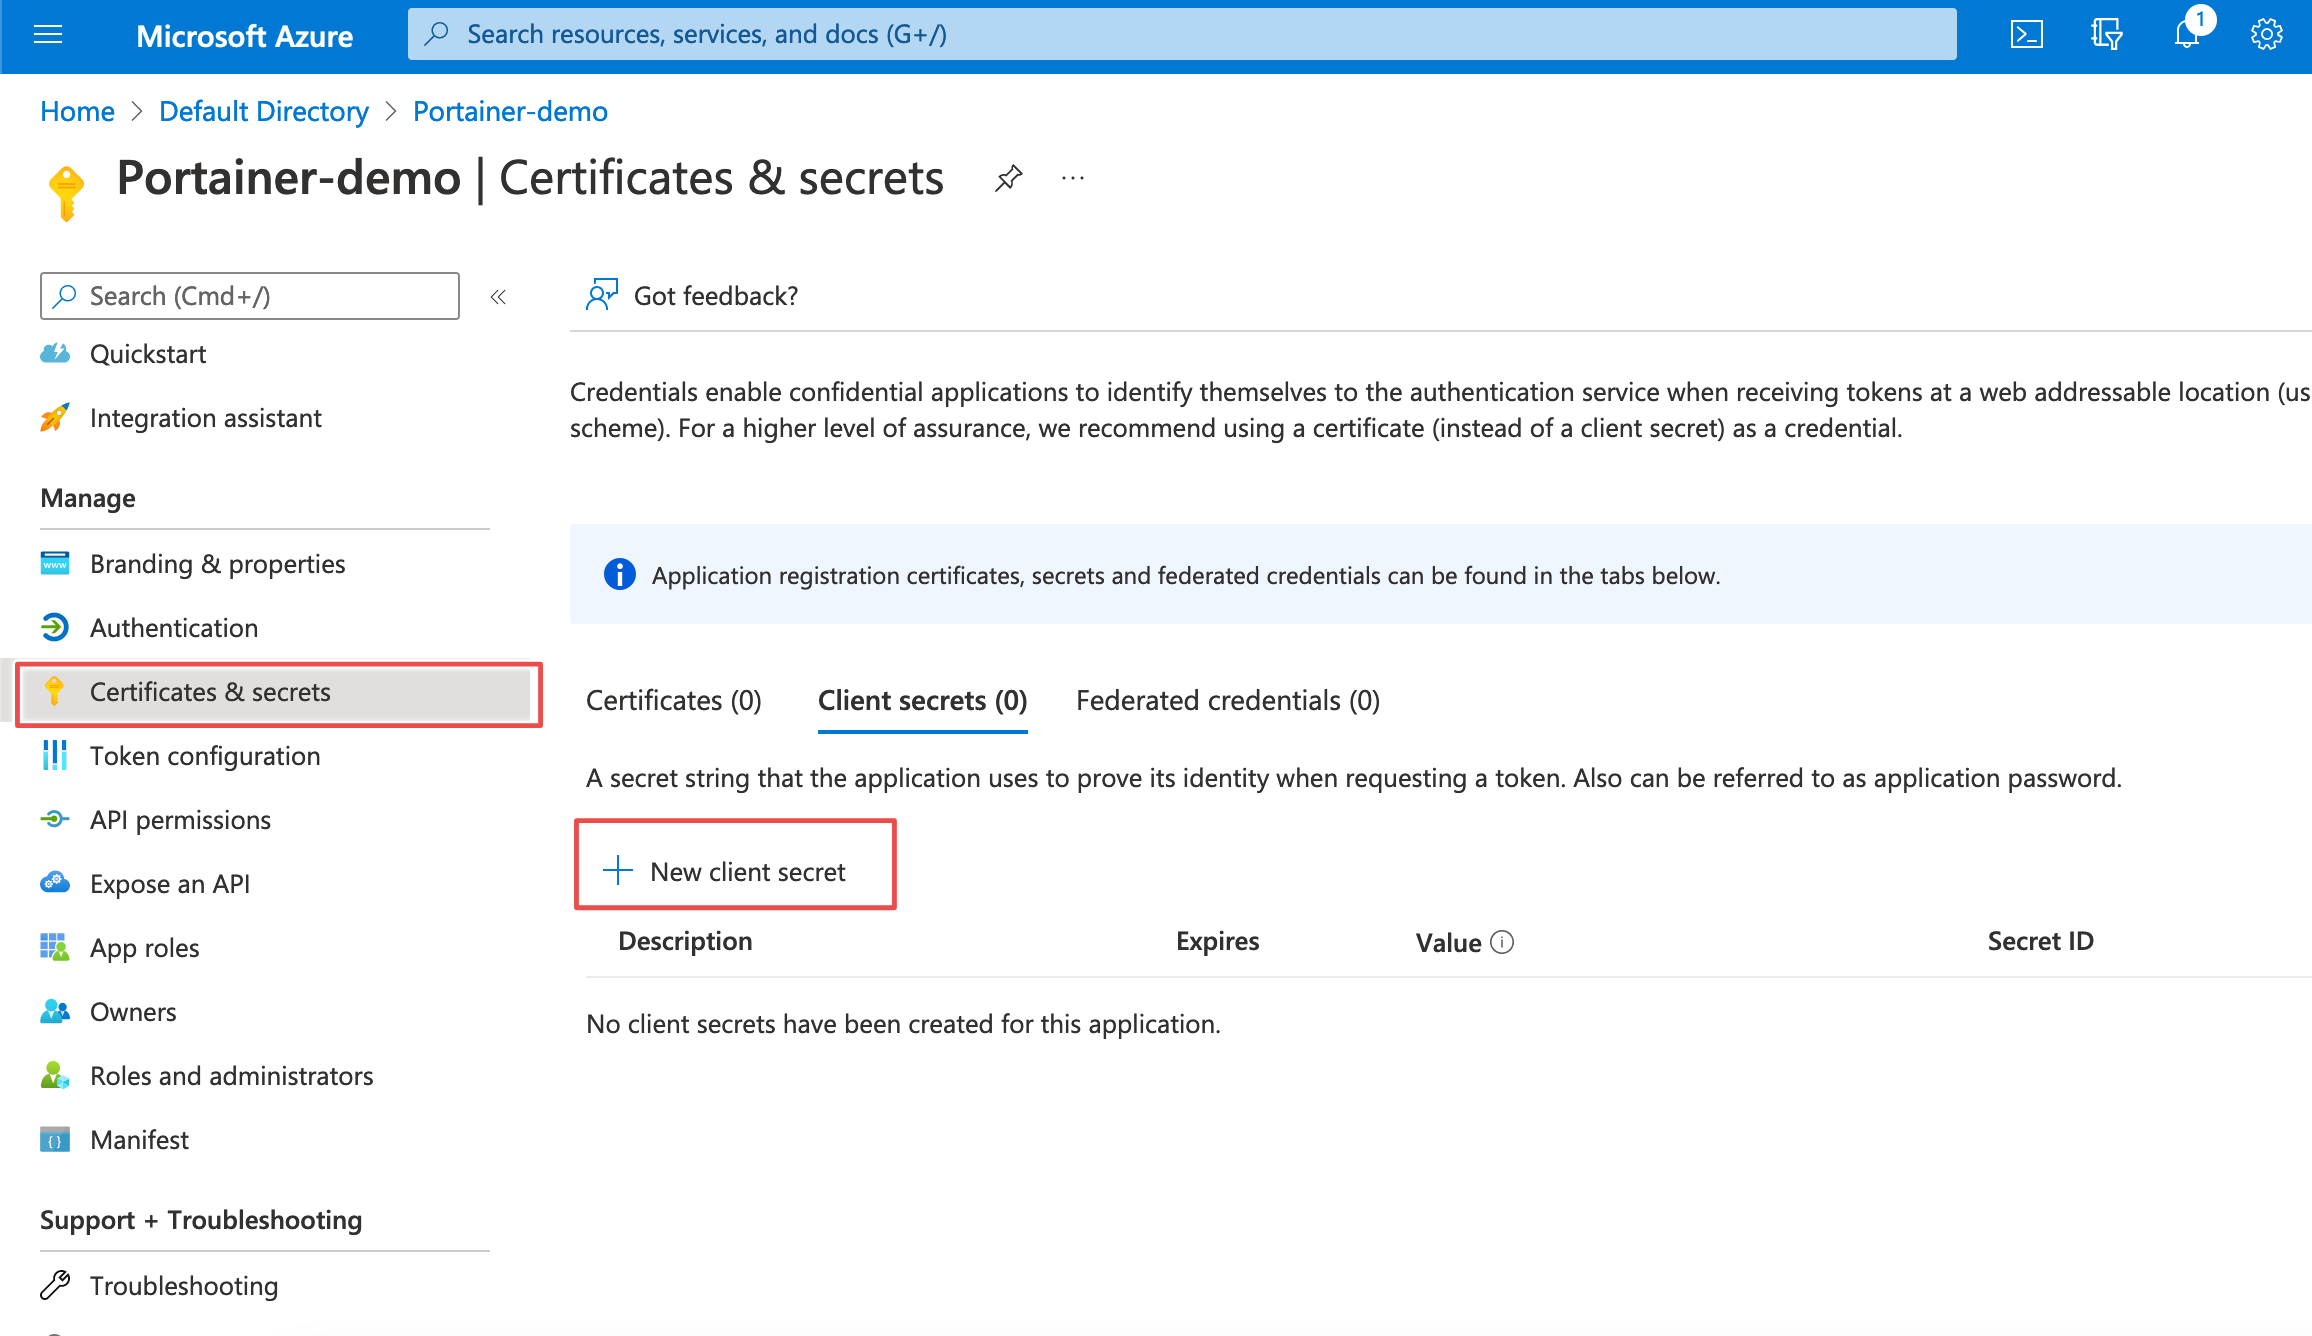
- Create the secret by clicking the New client secret button followed by the Add button. Copy the Value and Secret.
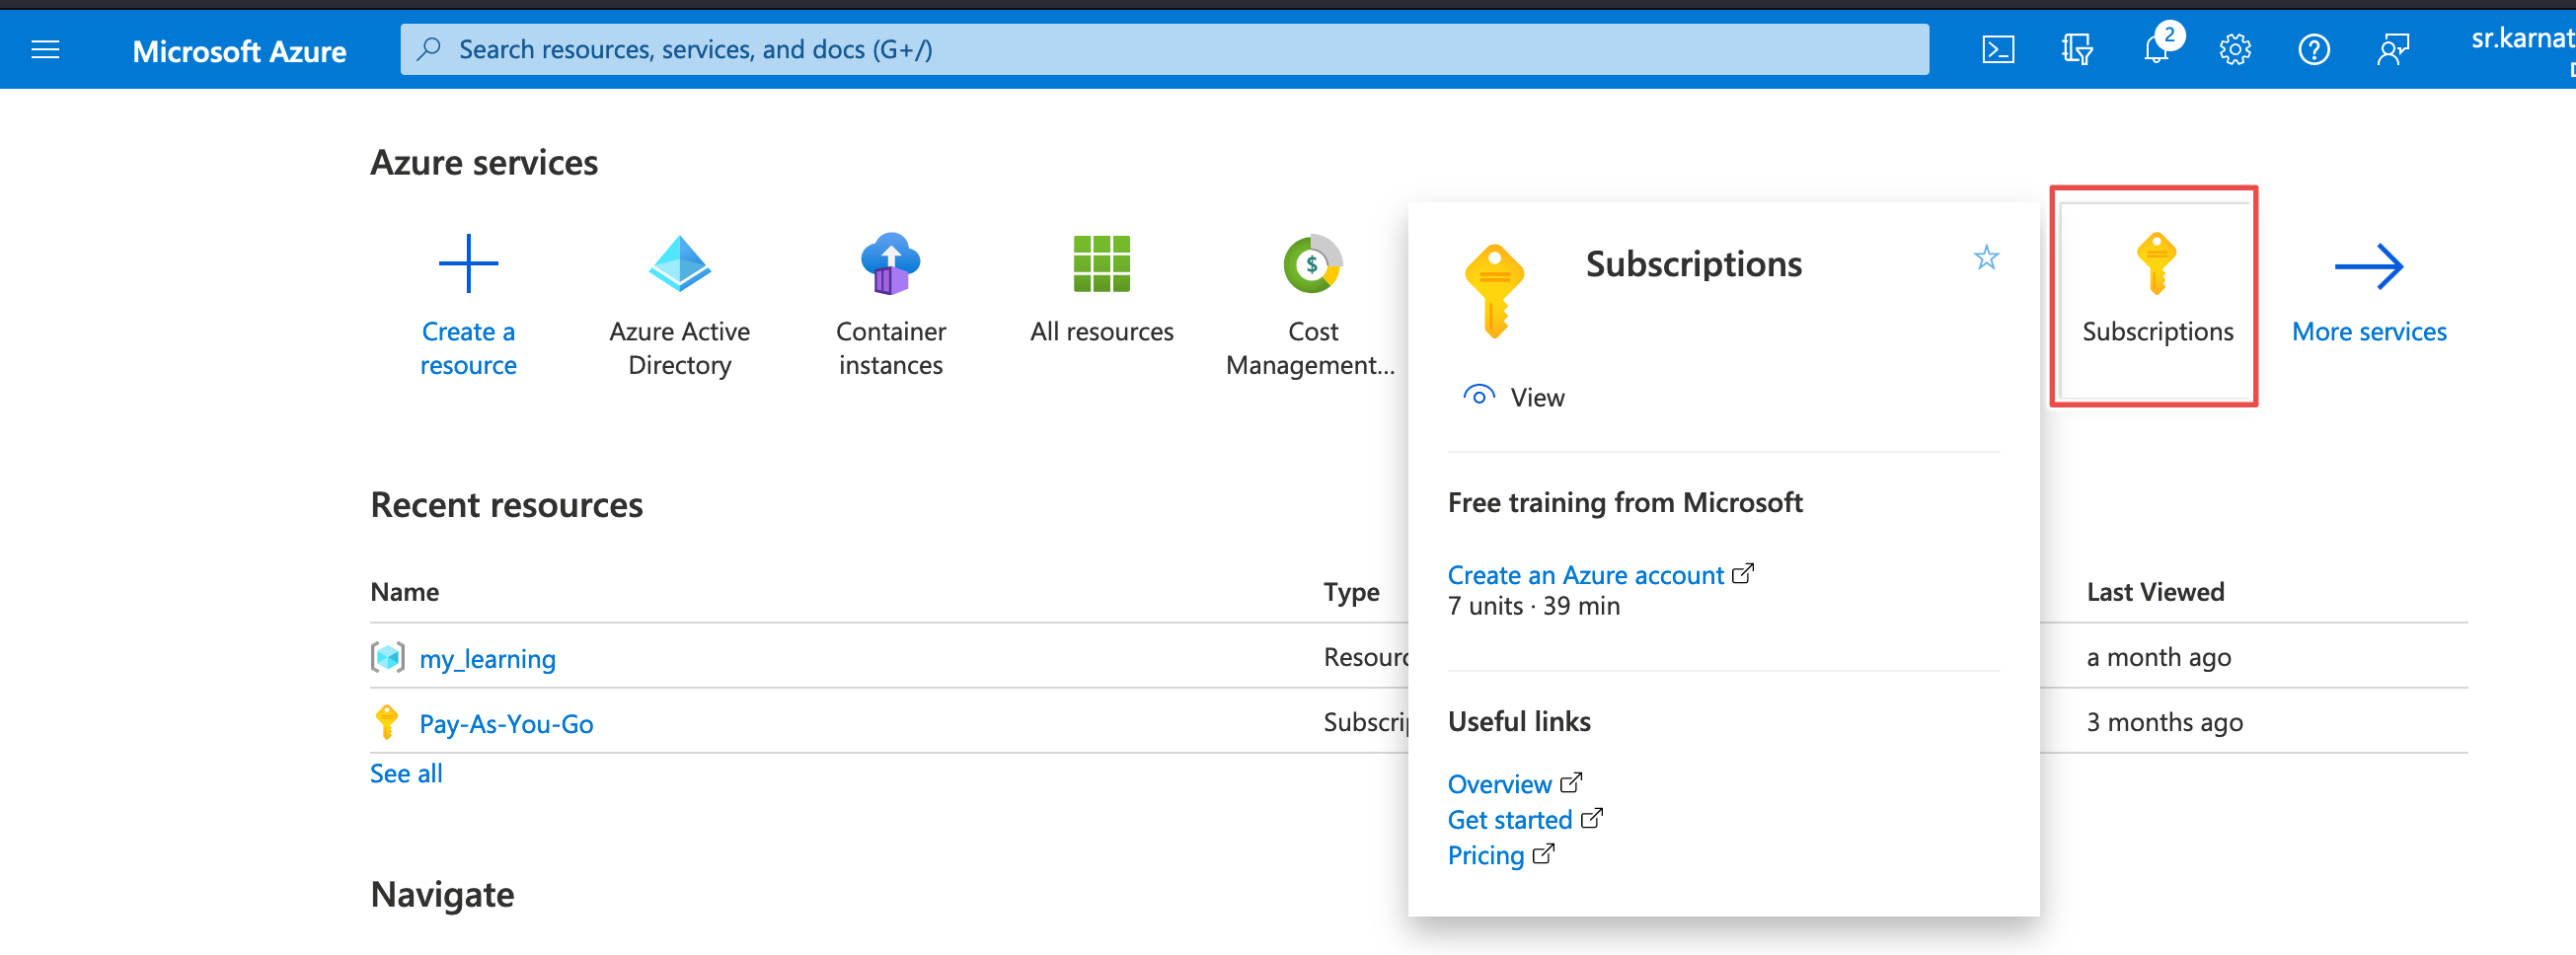
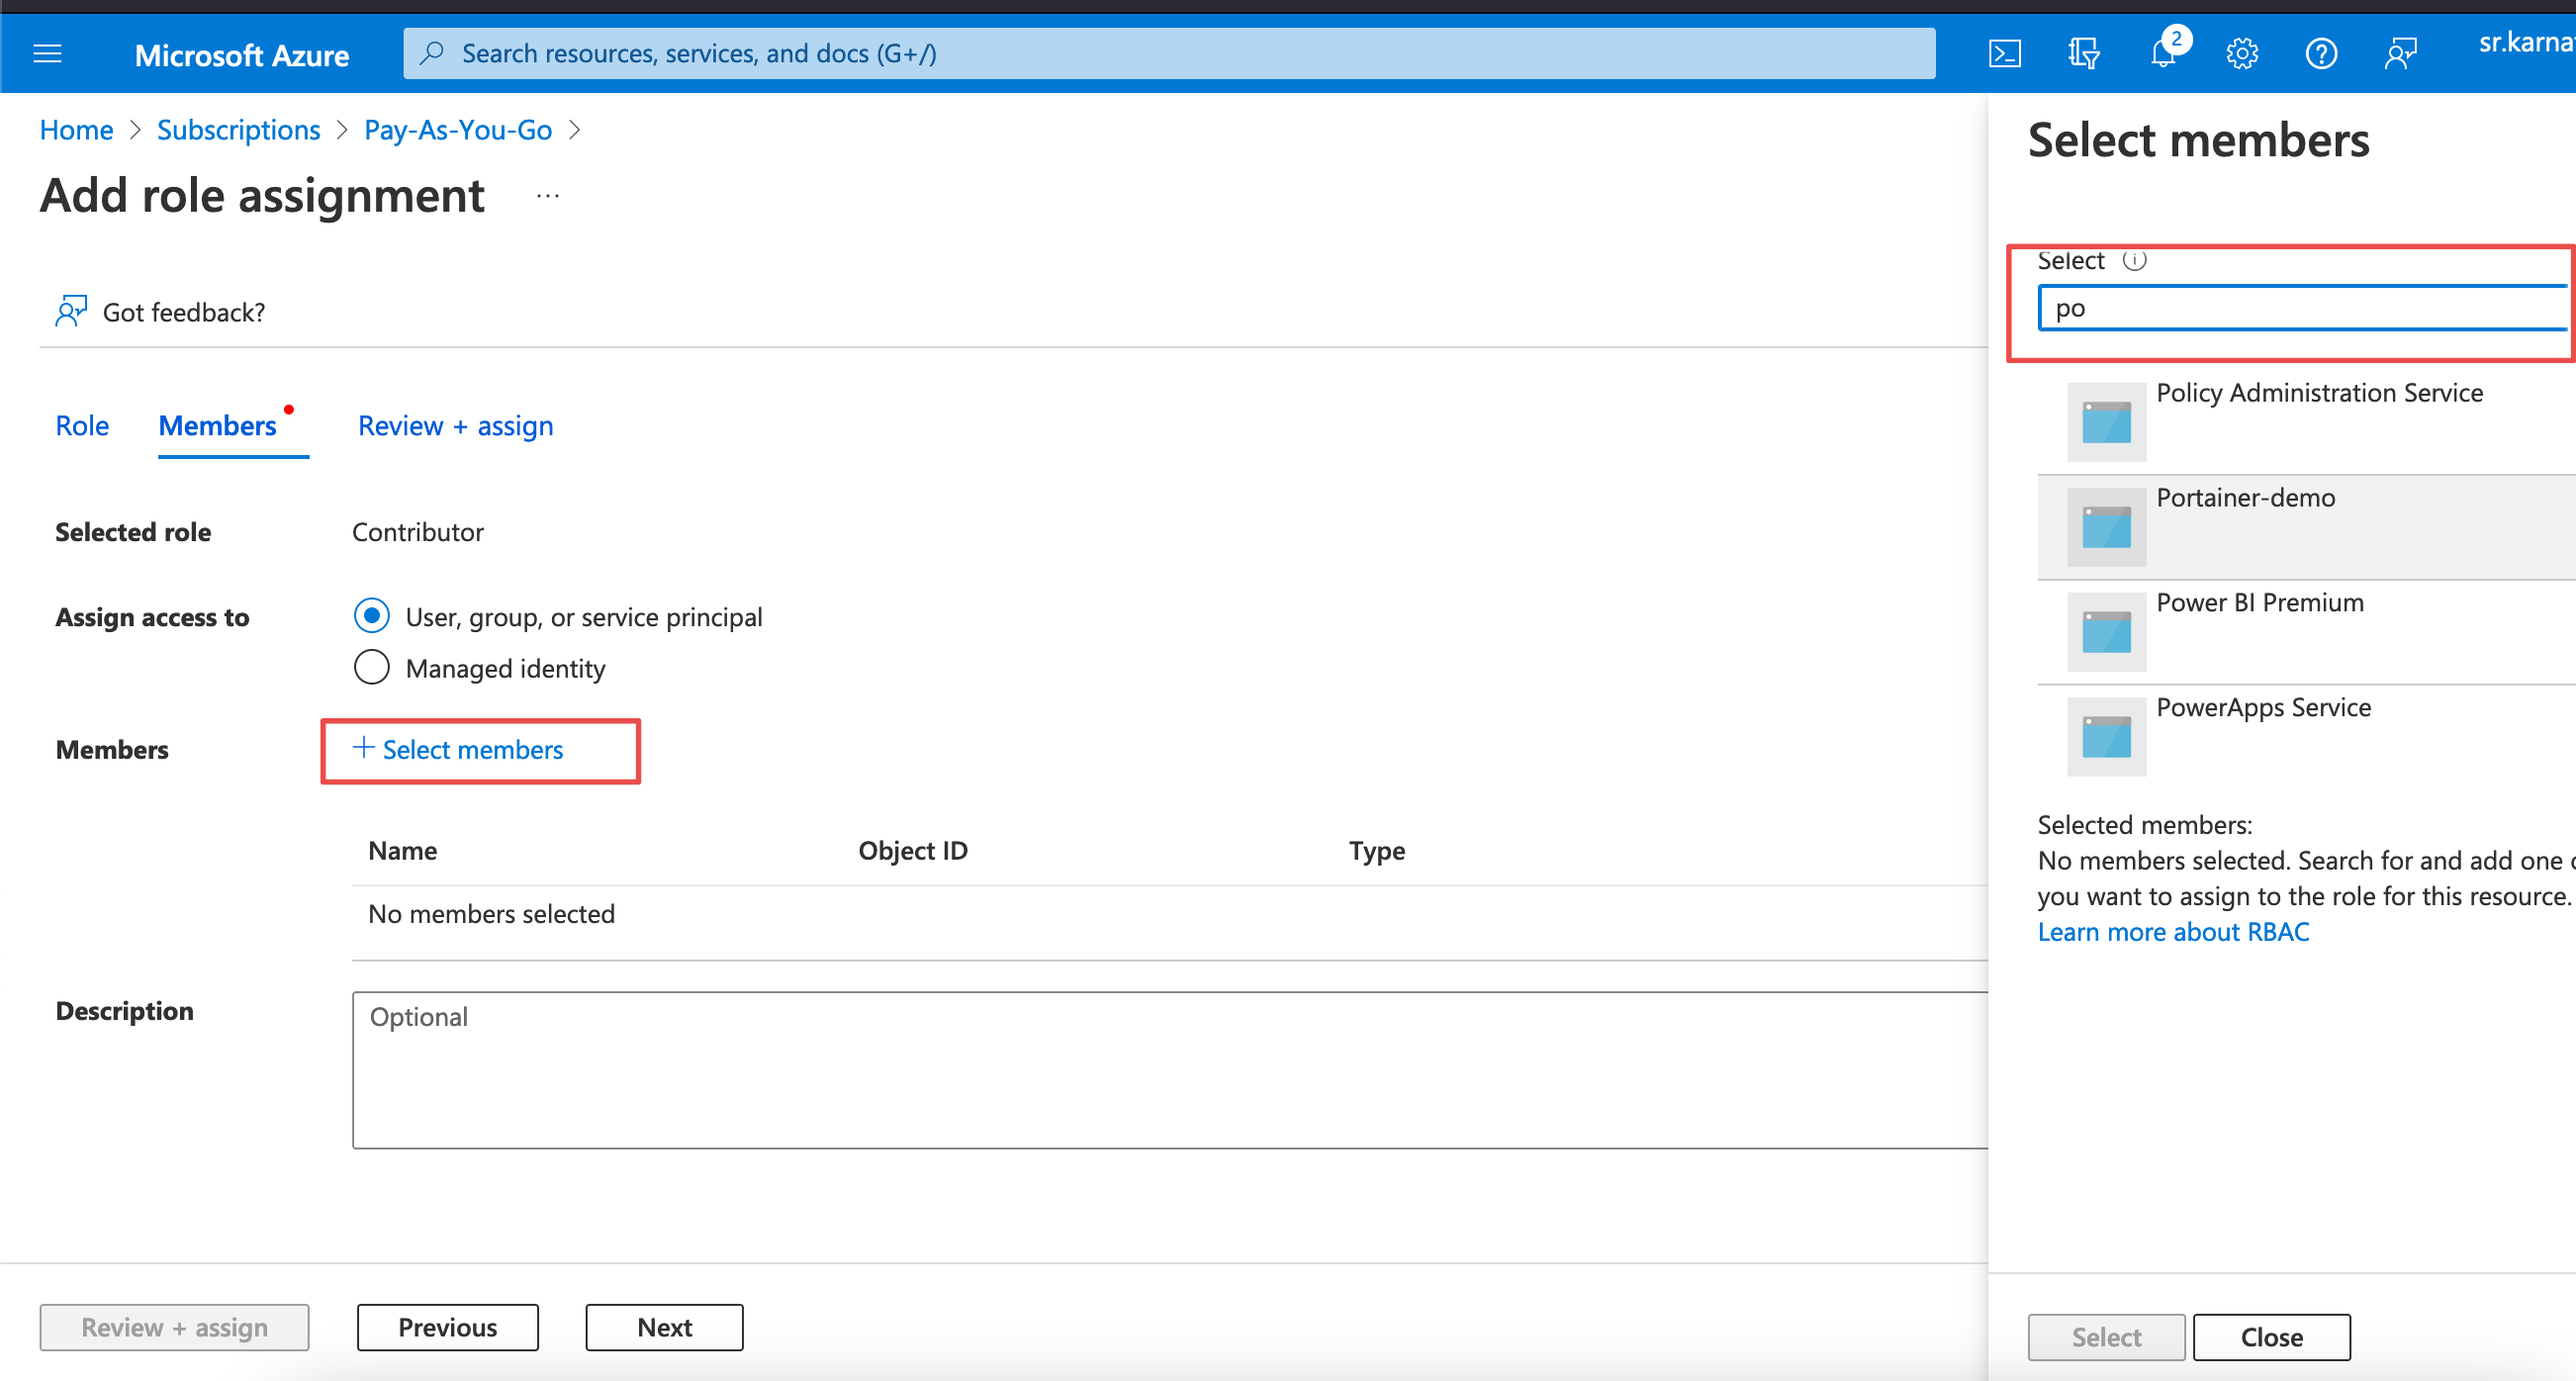
- The next step is to make our App as Contributor to the Azure so that it can make changes to our Azure Environment (ACI). To make our App as Contributor, go to "Subscriptions".
- Select your Subscription and Click on Access Control
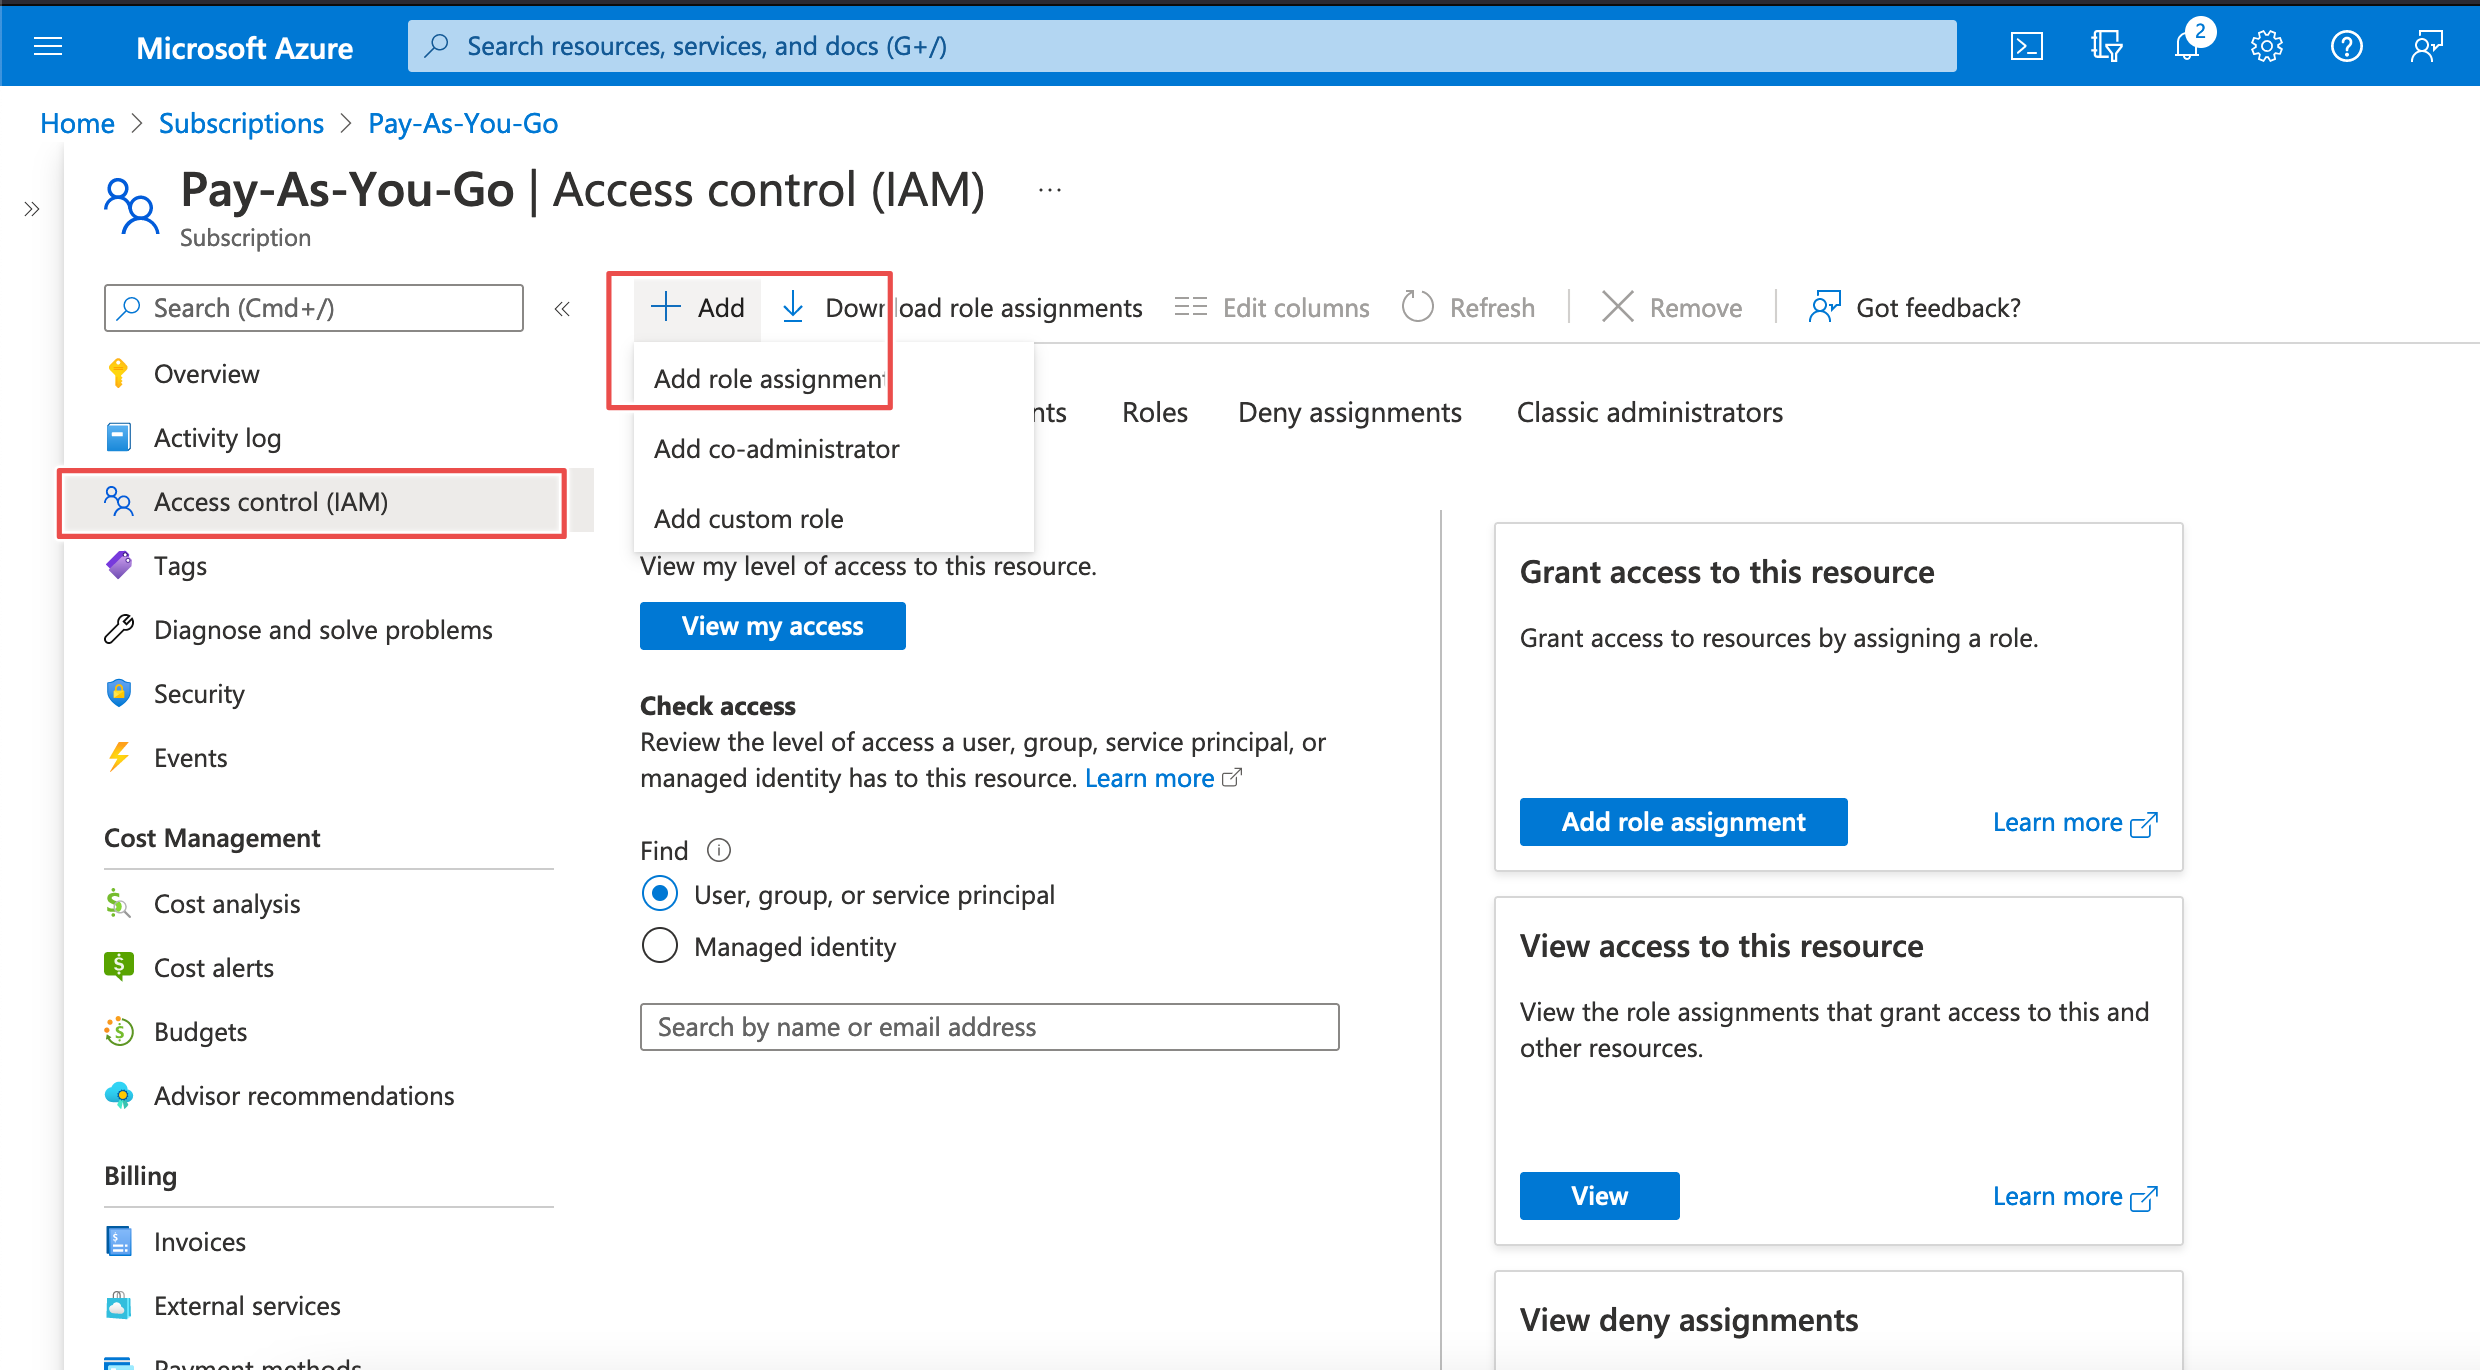
- You are going to add a Role of Contributor to the App by clicking on the Add button. Search for the App to add it as member.
We are done with Azure setup. Now let's add the ACI enviroment on Portainer.
Portainer Setup
- Open your Portainer interface and select the "Environments"
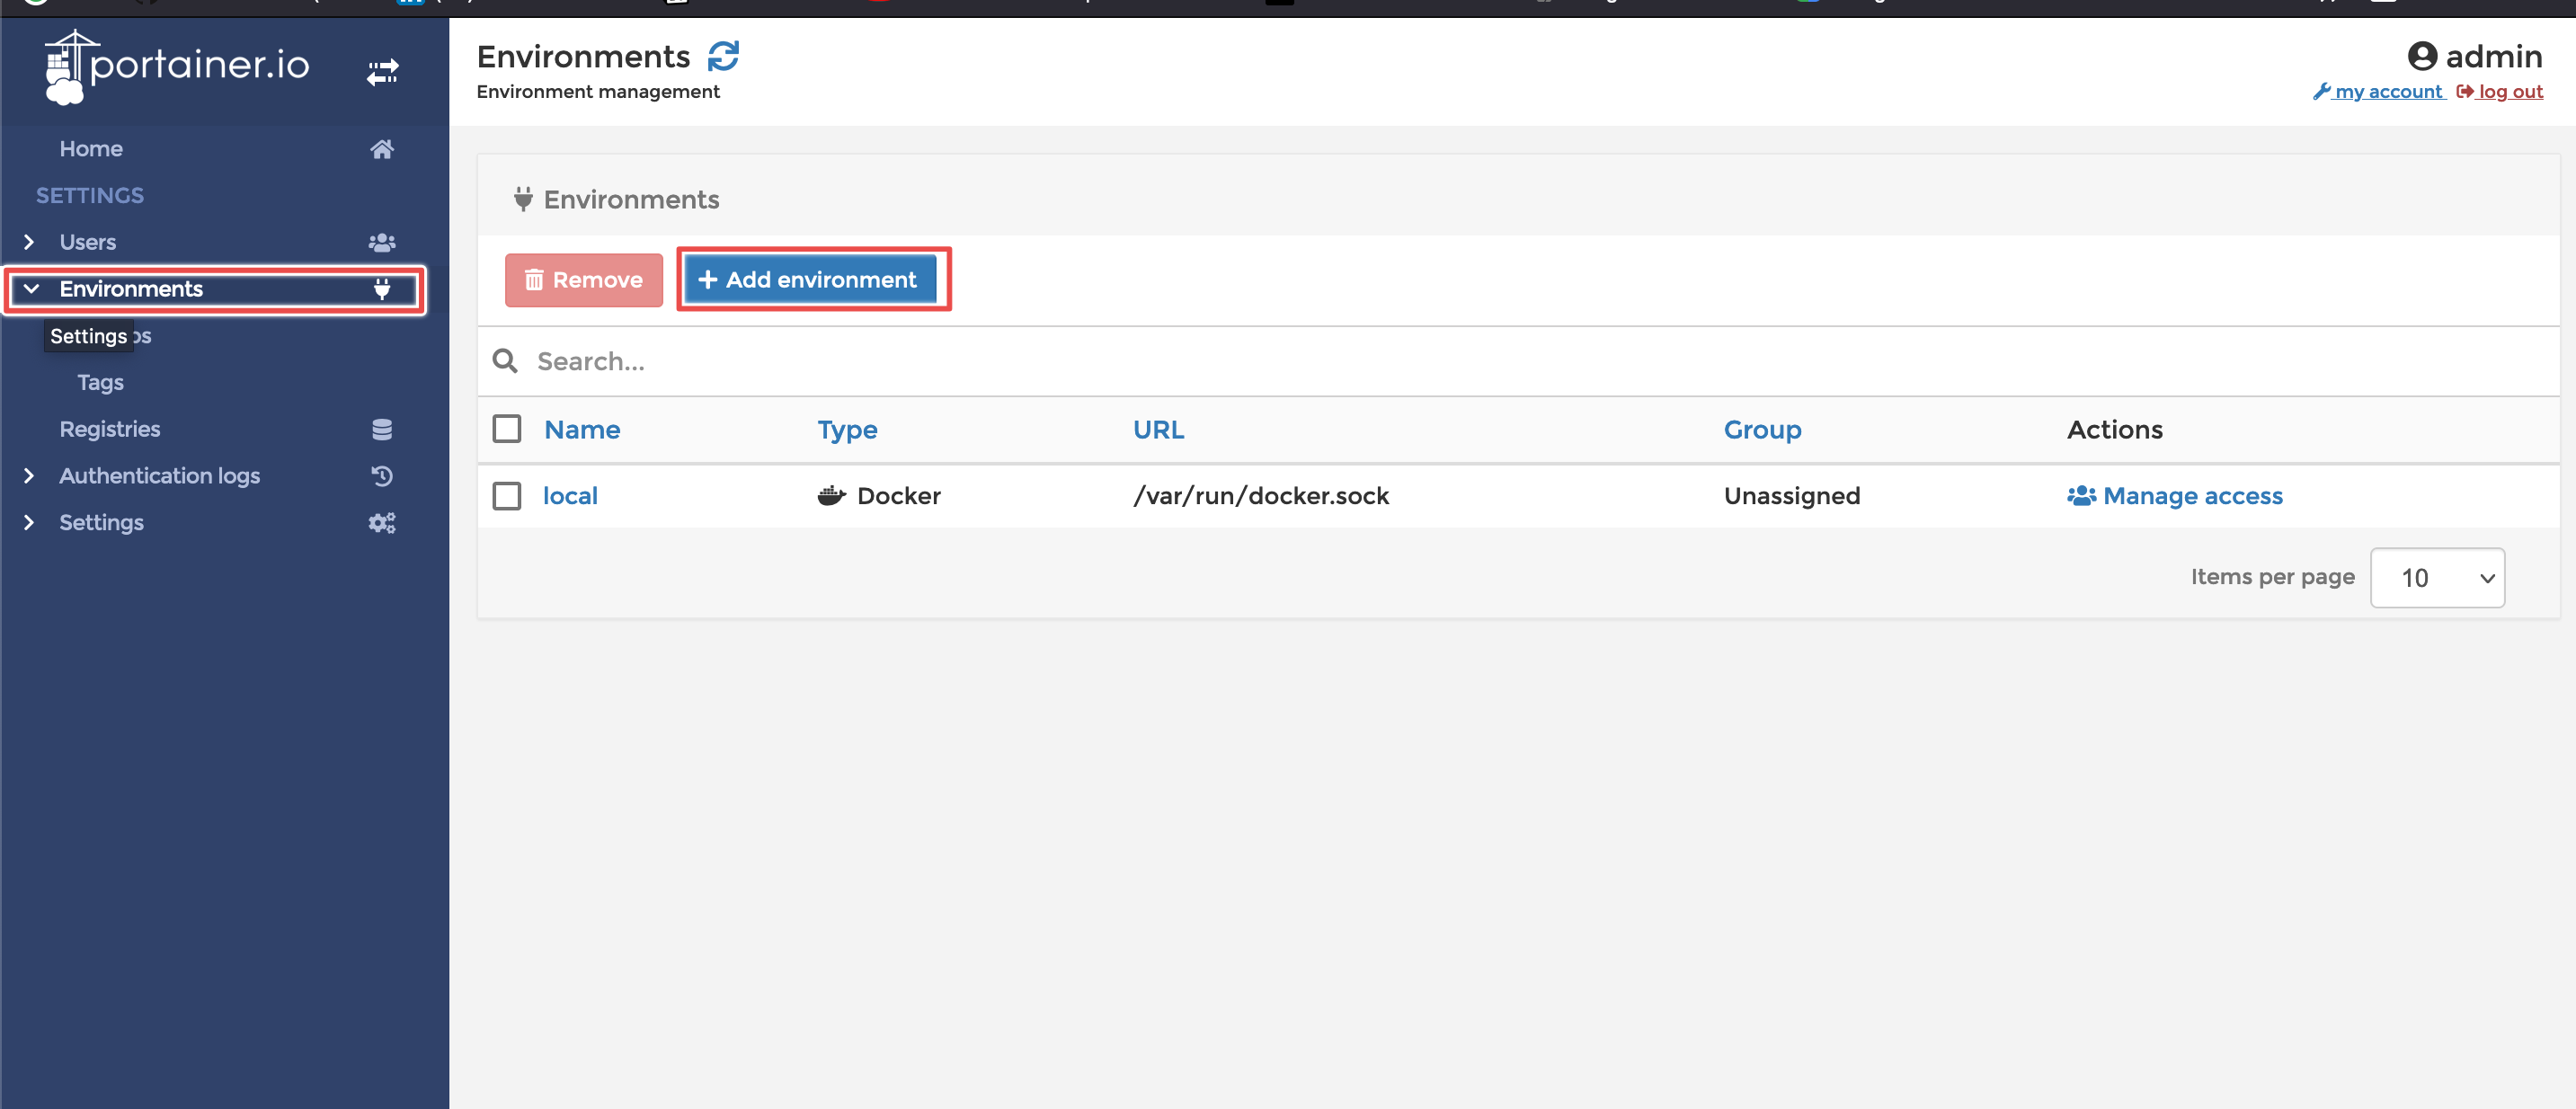
- Click on " Add environment"
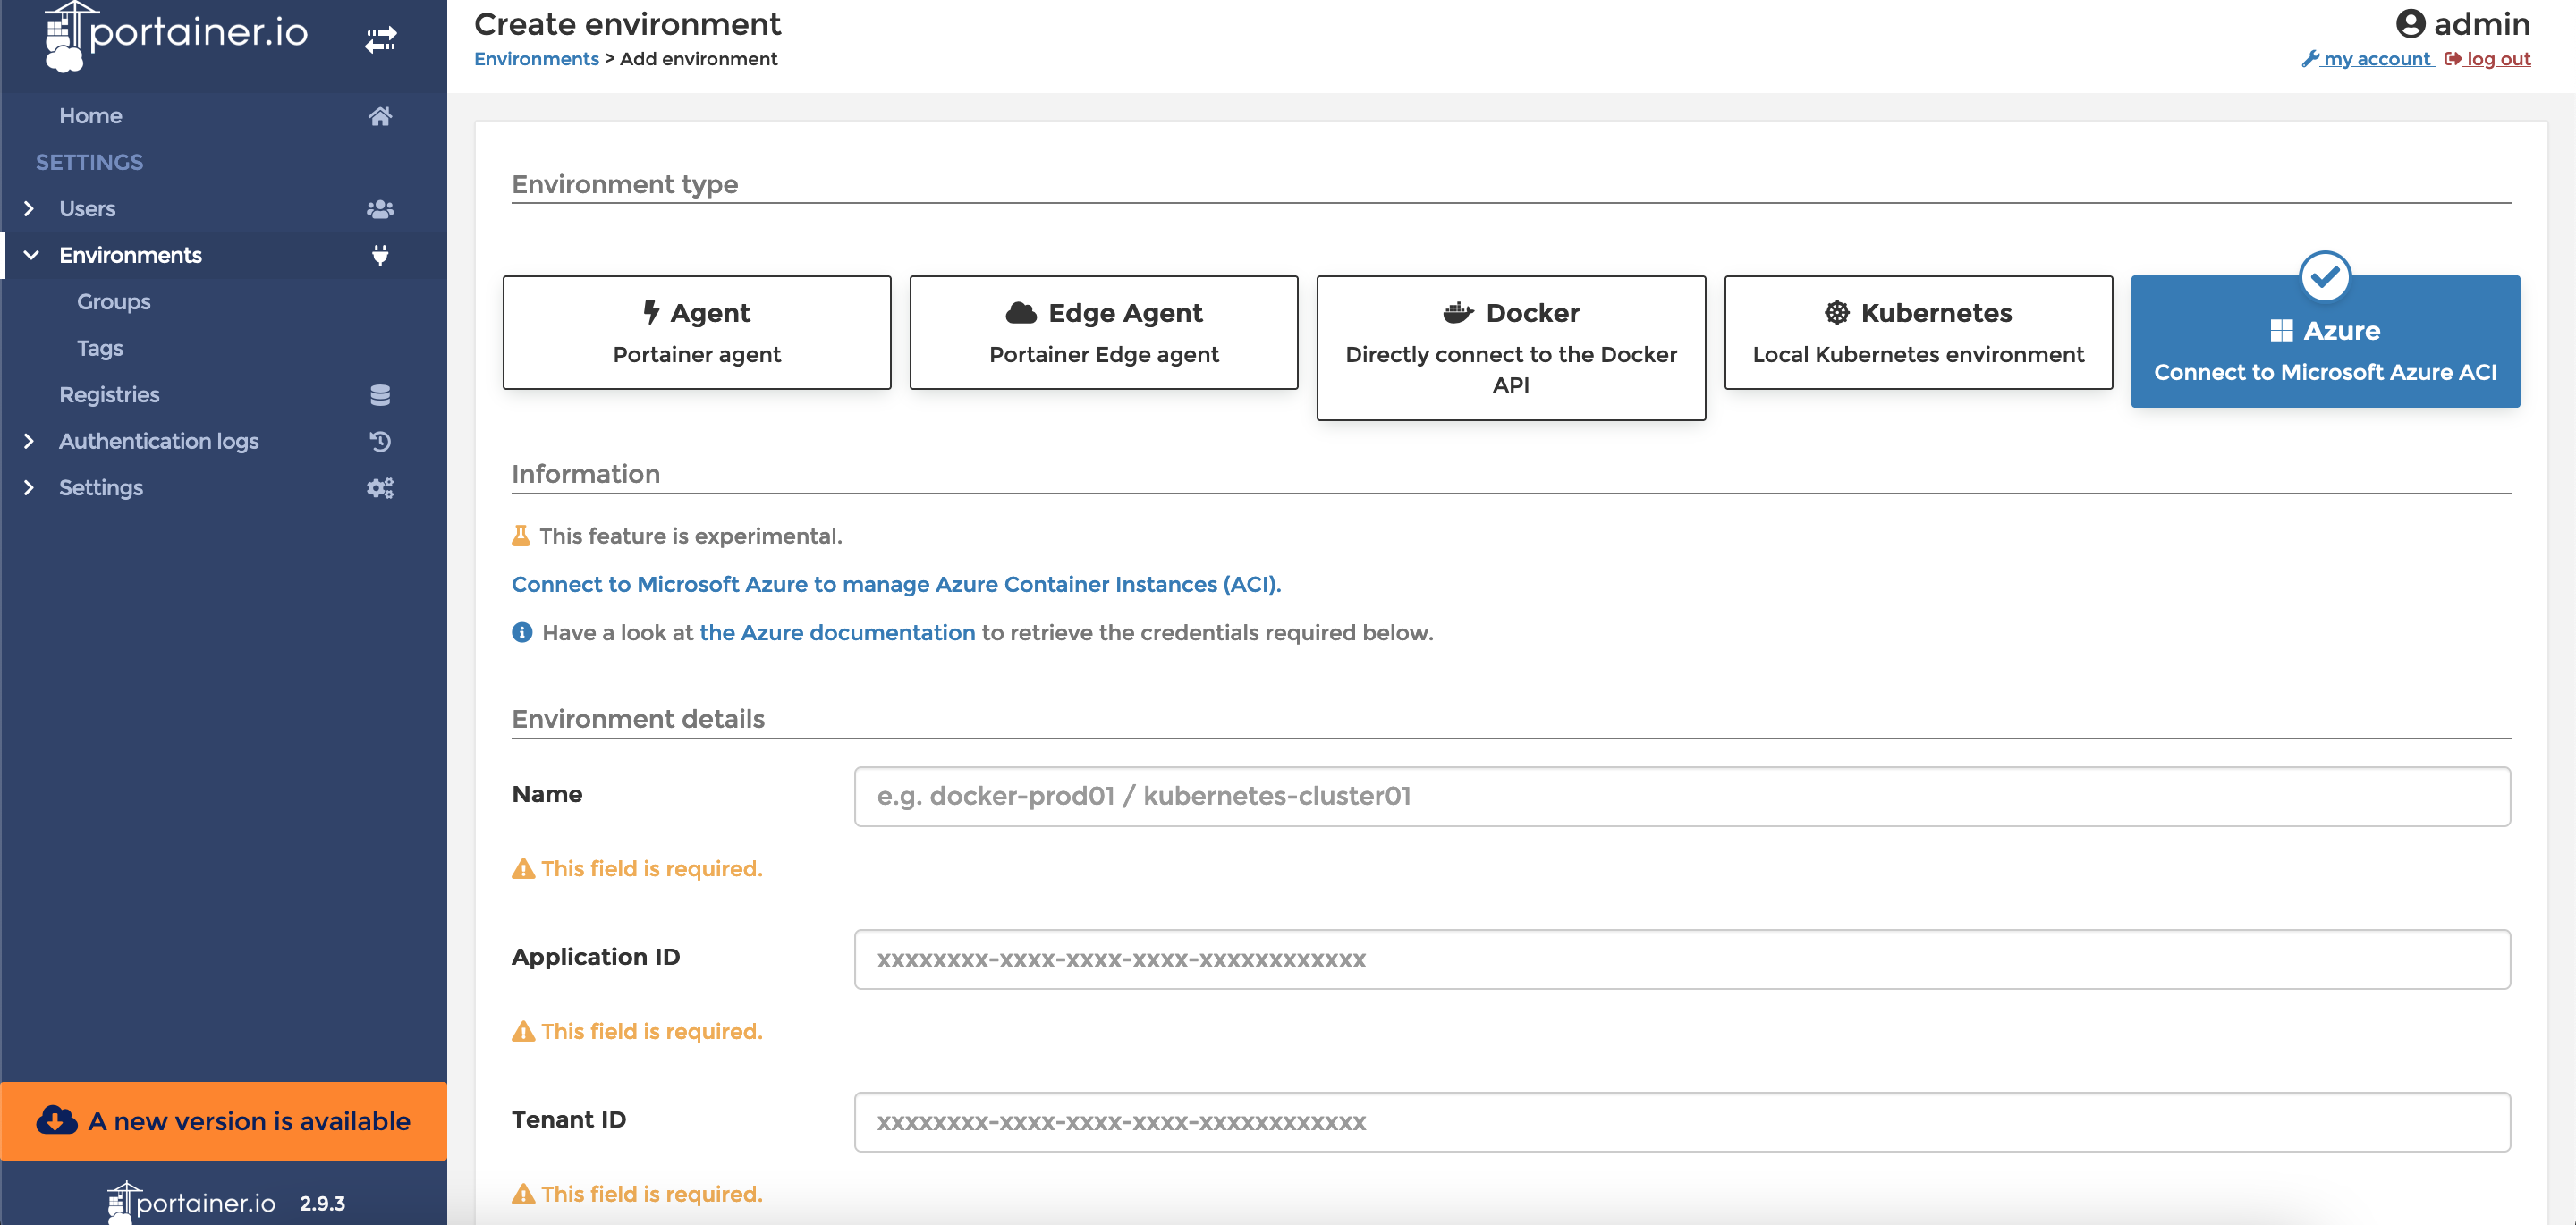
- Select the Azure - Connect to Microsoft Azure ACI
- In the Azure Setup, we copied the values of Application ID, Tenant ID, Secret Value. Add those values here.
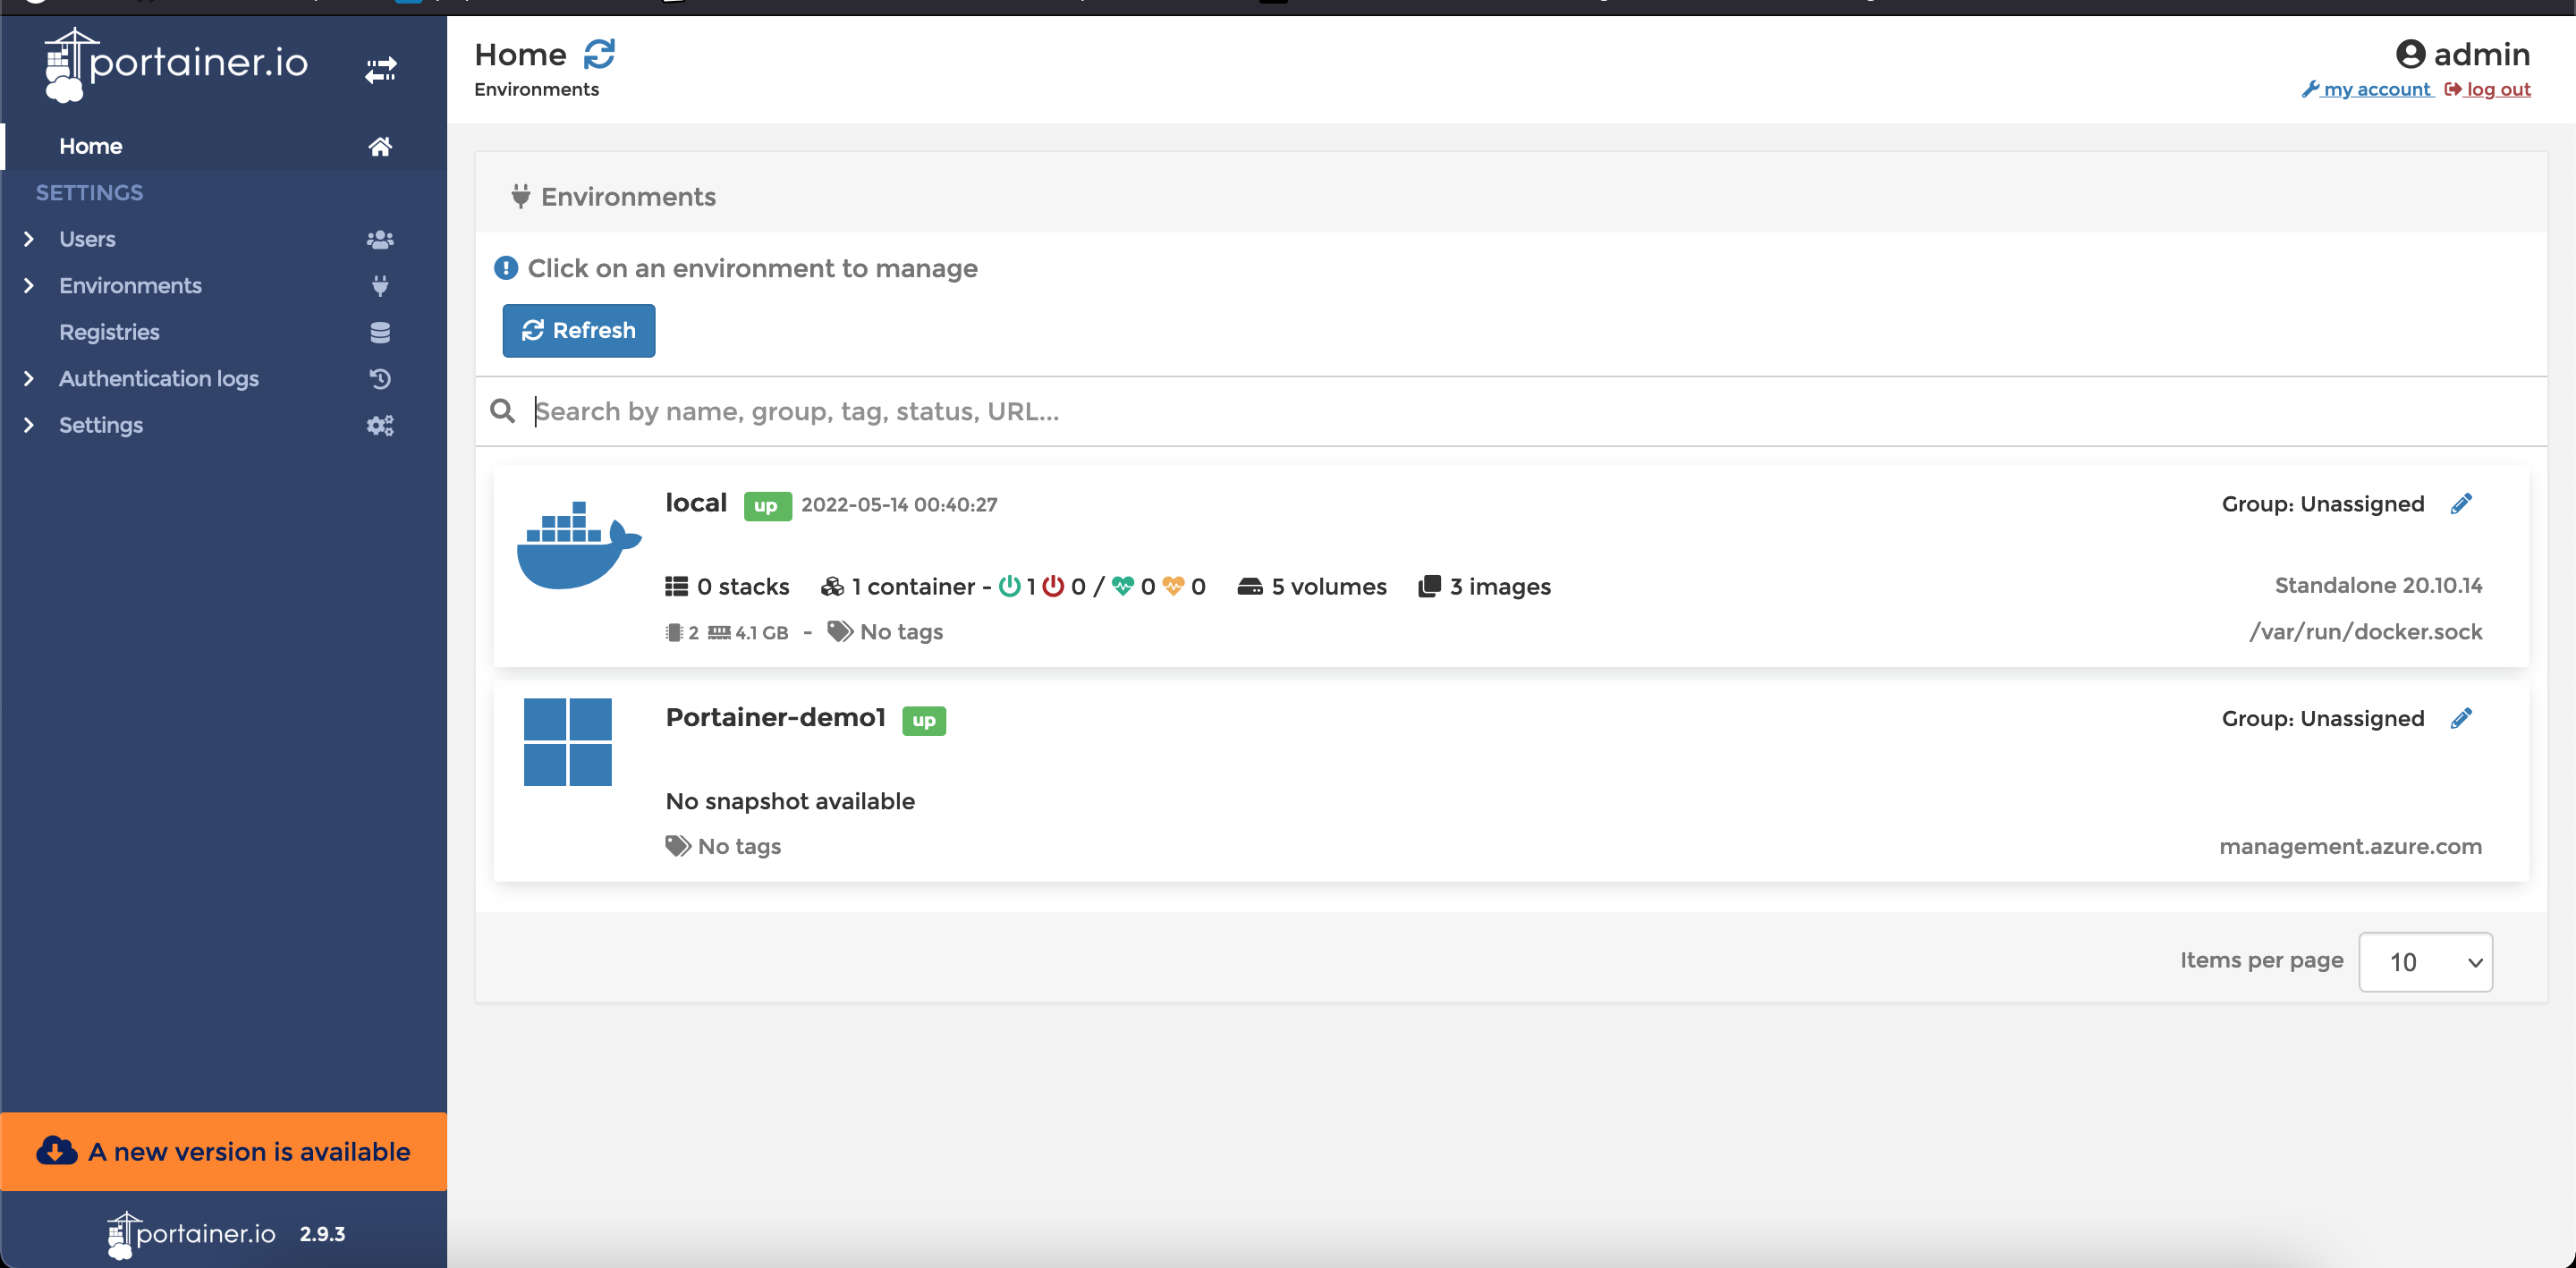
Once you are done, click on Add environment. Upon success, you will see the Azure ACI added as environment in your Homepage.
Deploy Nginx Container in ACI using Portainer
- Start your Azure ACI environment from the homepage.
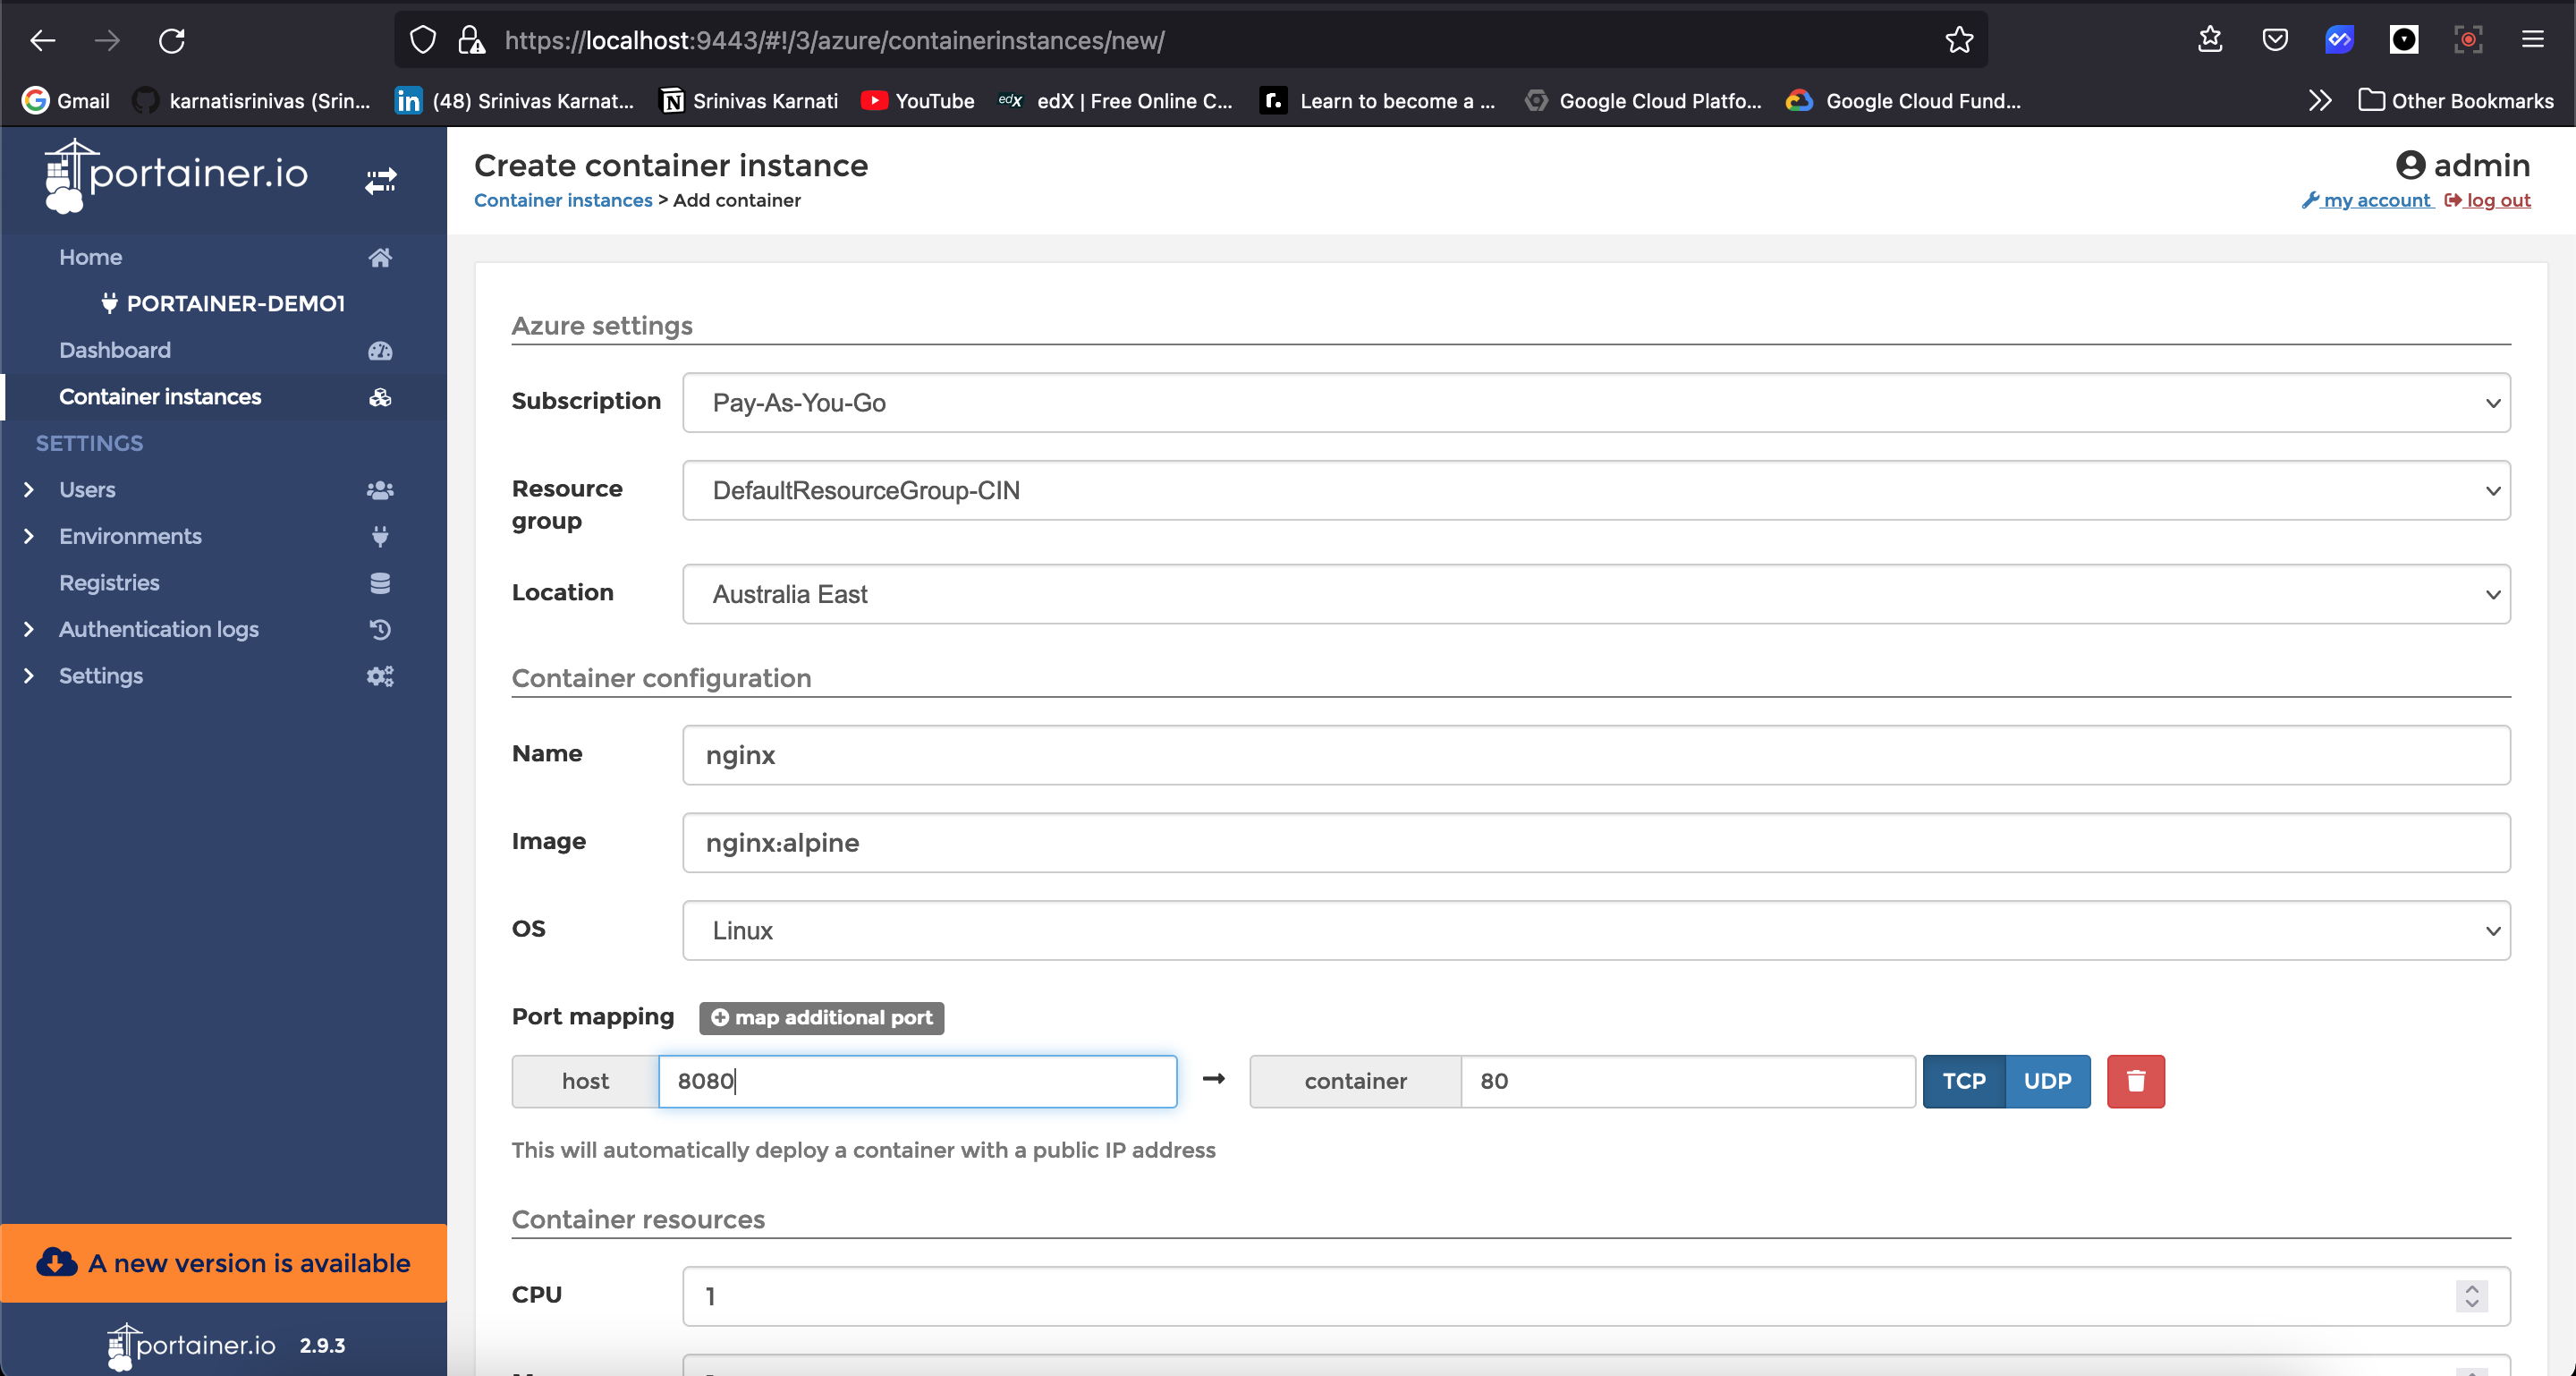
- Select the Container instances option on the left navigation menu and then click on the Add container.

- On the following screen you need to:
- Select your Azure subscription.
- Resource group for your Container.
- The Location of your preference on Azure.
- A name for your container.
- The image you want to deploy.
- The ports to access your container.
- The resources you want to allocate to the container.
- If your Container deployment went successful, you will see the public IP address for your container in the following screen.
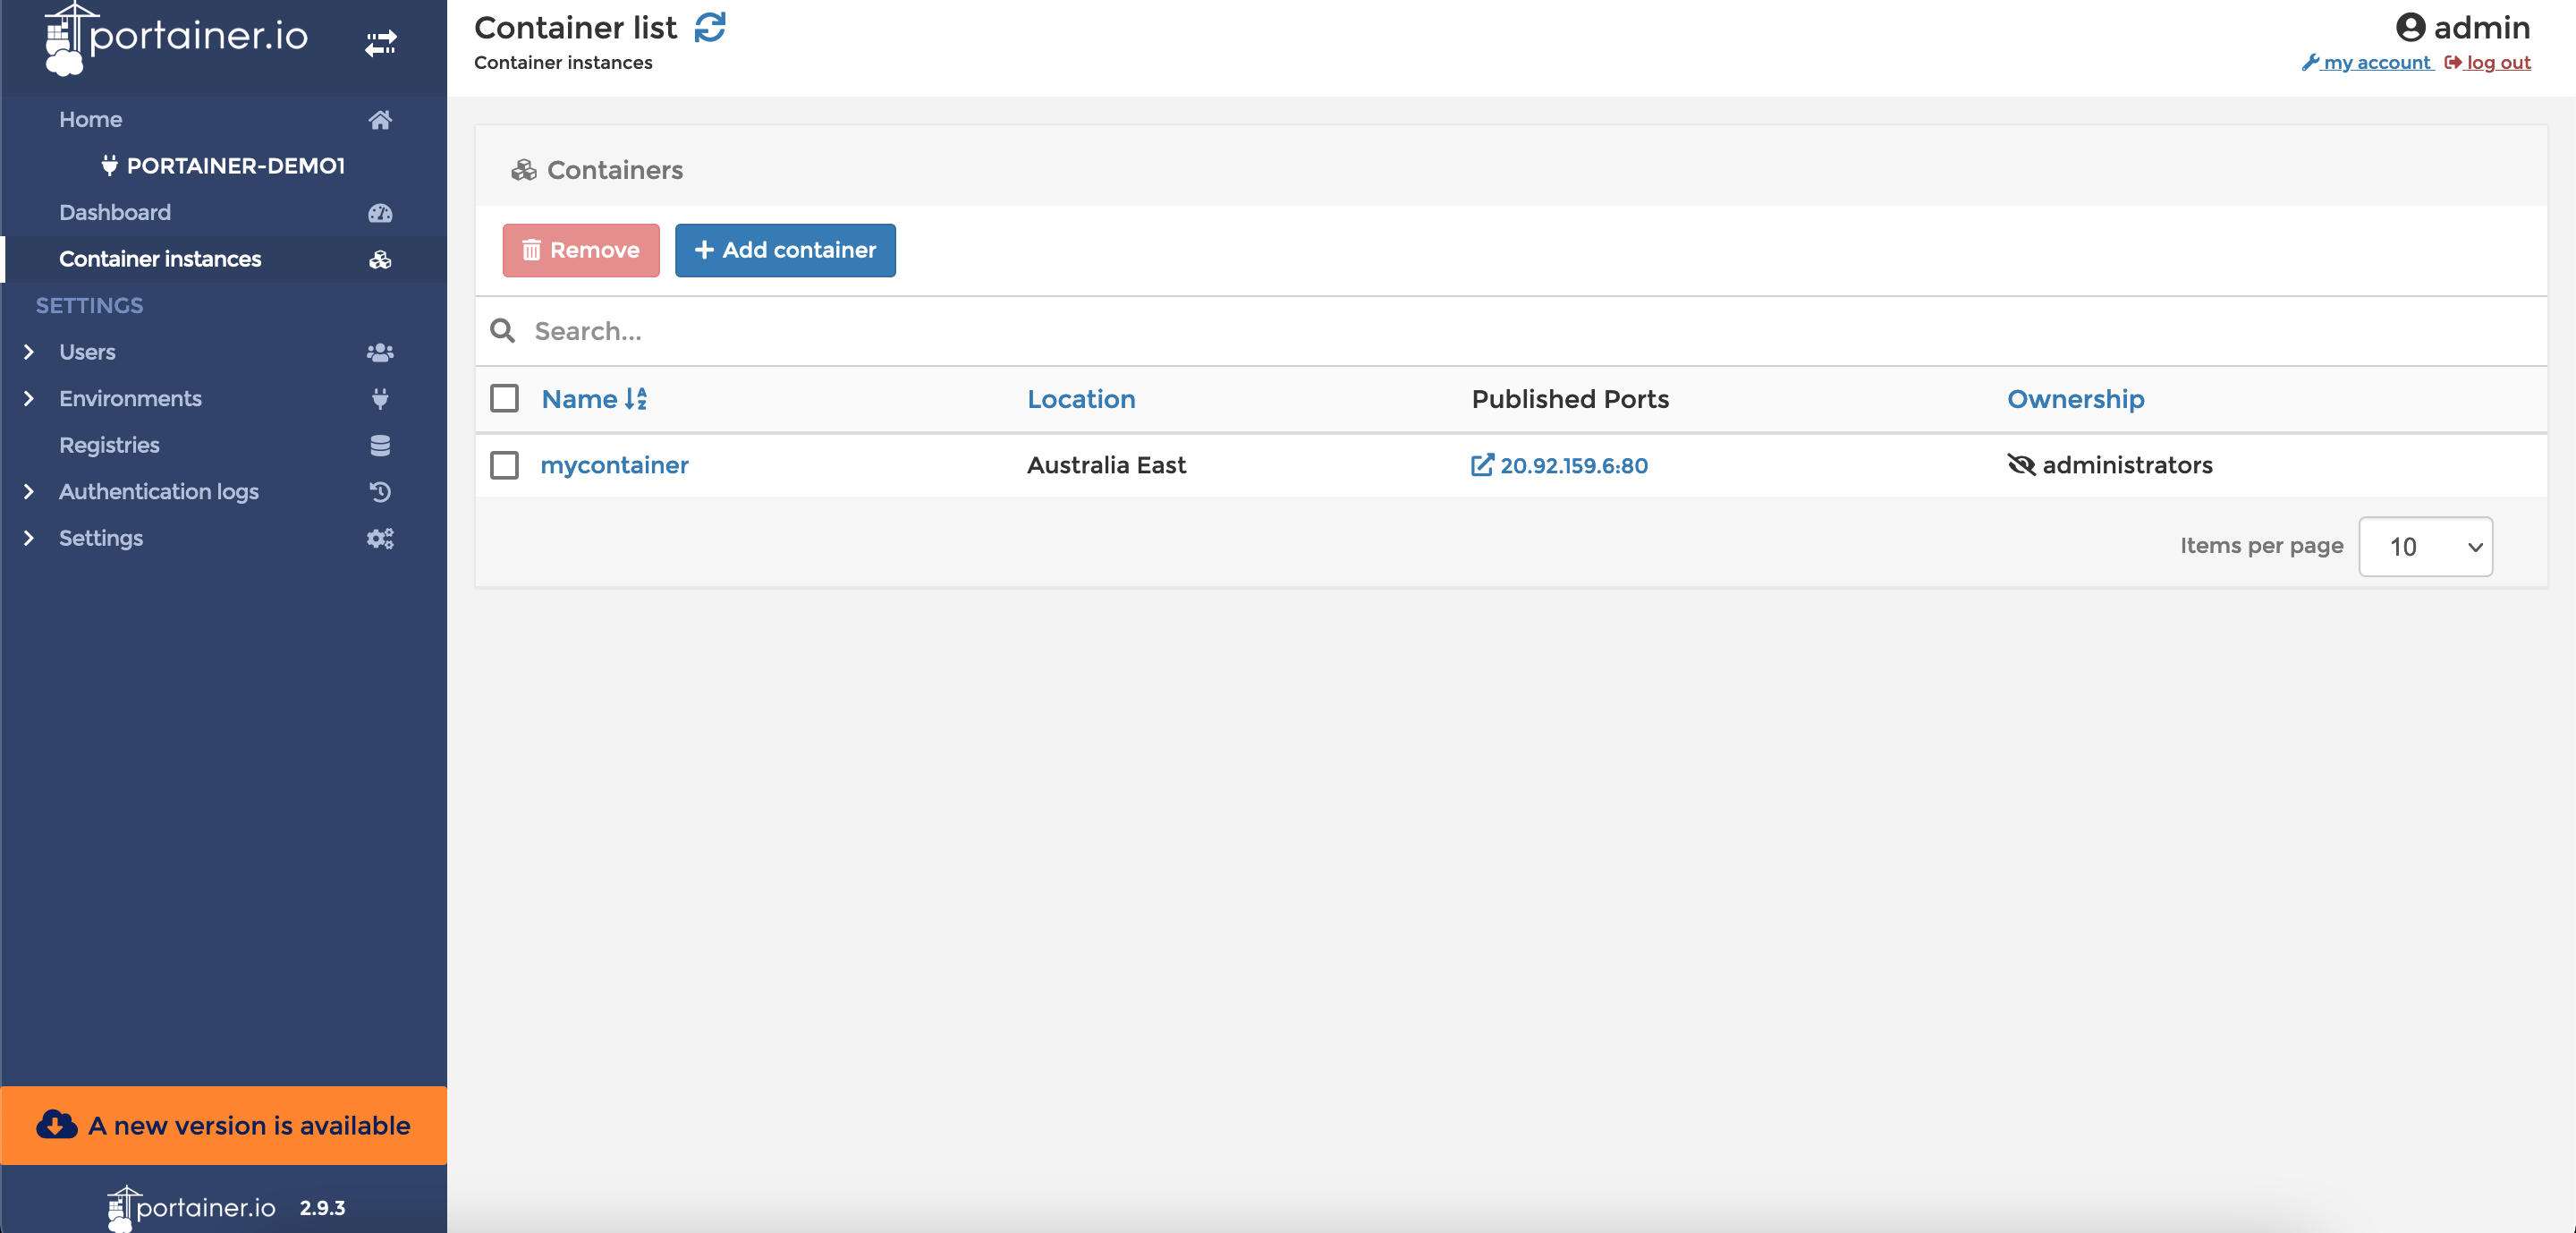
- Clicking on the IP address will open a new tab on your browser where you can access your container.
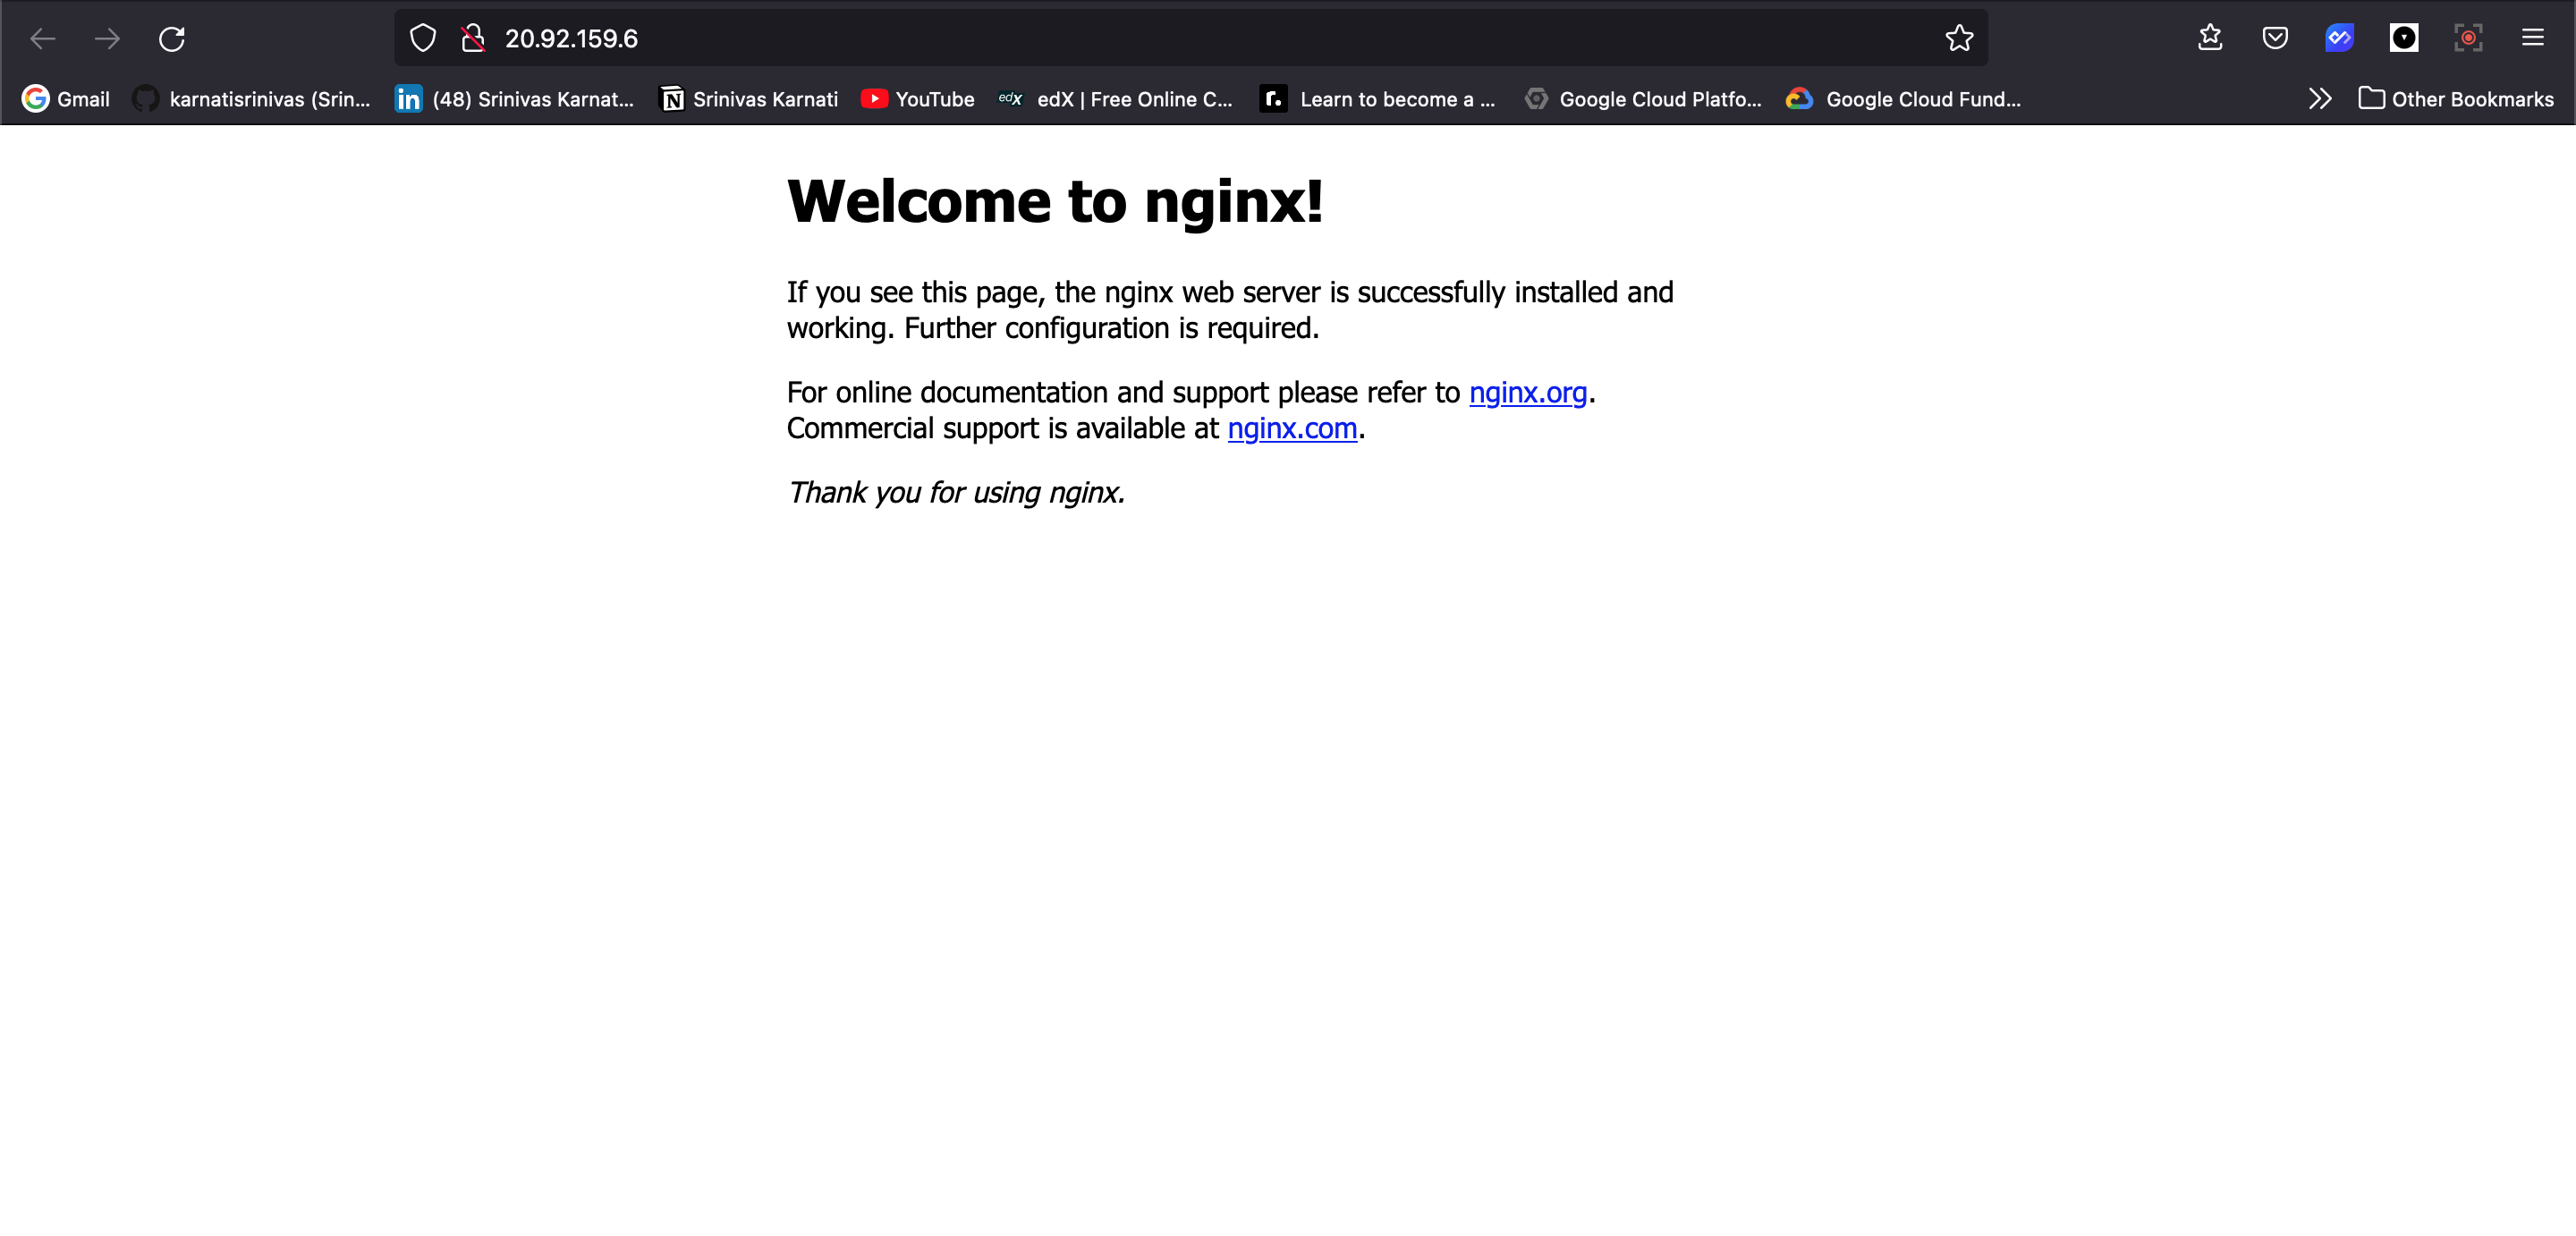
That's it !!! 🥳. You now can manage your Azure ACI instances using Portainer GUI.
Conclusion
Portainer is an amazing tools that helps you to manage your container environments very easily. It provides an easy to use UI which almost removes the usage of complexities which arises while using CLI. But it has limitations while working with ACI which I hope Portainer resolves soon. ❤️

