Getting Started with Azure CLI

Hey there 👋 I am Srinivas Karnati, a DevOps Engineer.
What is Azure CLI?
The Azure Command-Line Interface (CLI) is a command-line tool which connect to Azure and execute administrative commands on Azure resources. It allows the execution of commands through a terminal using interactive command-line prompts or a script.
How to install the Azure CLI on Macos?
Azure CLI is available to install in Windows, macOS and Linux environments. It can also be run in a Docker container and Azure Cloud Shell.
We can install Azure CLI on MacOS using Homebrew package manager. Homebrew makes it easy to keep your installation of the CLI update to date. It is always a best practice to update the homebrew first and install the packages.
brew update
brew install azure-cli
Once the dependencies are installed, you can check the version of Azure CLI using
az --version
Sign into Azure CLI
- To sign into the Azure, Run the
logincommandaz login
Otherwise, open https://aka.ms/devicelogin on your browser and enter the authorization code displayed in your terminal.
- Sign in with your account credentials in the browser.
Azure CLI Examples
To see subscriptions in your Azure account, we can use account as follows:
az account list

\\ We can also use account show

az account show
To see resources that are created in your azure account, we can use resource command:
az resource list
find and --help
To search for commands, use az find. For example, to search for command names containing network, use the following command:
az find network
Use the --help argument to get a complete list of commands and subgroups of a group. For example, to find the CLI commands for working with account we use:
az account --help
Create a Virtual Network using Azure CLI
Virtual networks (VNets) is something that allows Azure resources to communicate securely with each other. VNets can also be connected to other VNets if their address ranges don't overlap.
Use the az network vnet create command to create a virtual network named VNet1 with address prefix of 10.1.0.0/16 and a subnet named Subnet1 with address prefix of 10.1.1.0/24.
az network vnet create \
 --name "vnet1" \
--resource-group "my_learning" \
--address-prefixes 10.1.0.0/16
--subnet-name "subnet1" \
--subnet-prefixes 10.1.1.0/24
You can also use shell variables to pass the values like as follows:
vnetName=vnet1
subnetName=subnet1
vnetAddressPrefix=10.1.0.0/16
subnetAddressPrefix=10.1.1.0/24

az network vnet create \
  --name $vnetName \
  --resource-group $resourceGroup \
  --address-prefixes $vnetAddress \
  --subnet-name $subnetName \
  --subnet-prefixes $subnetAddress
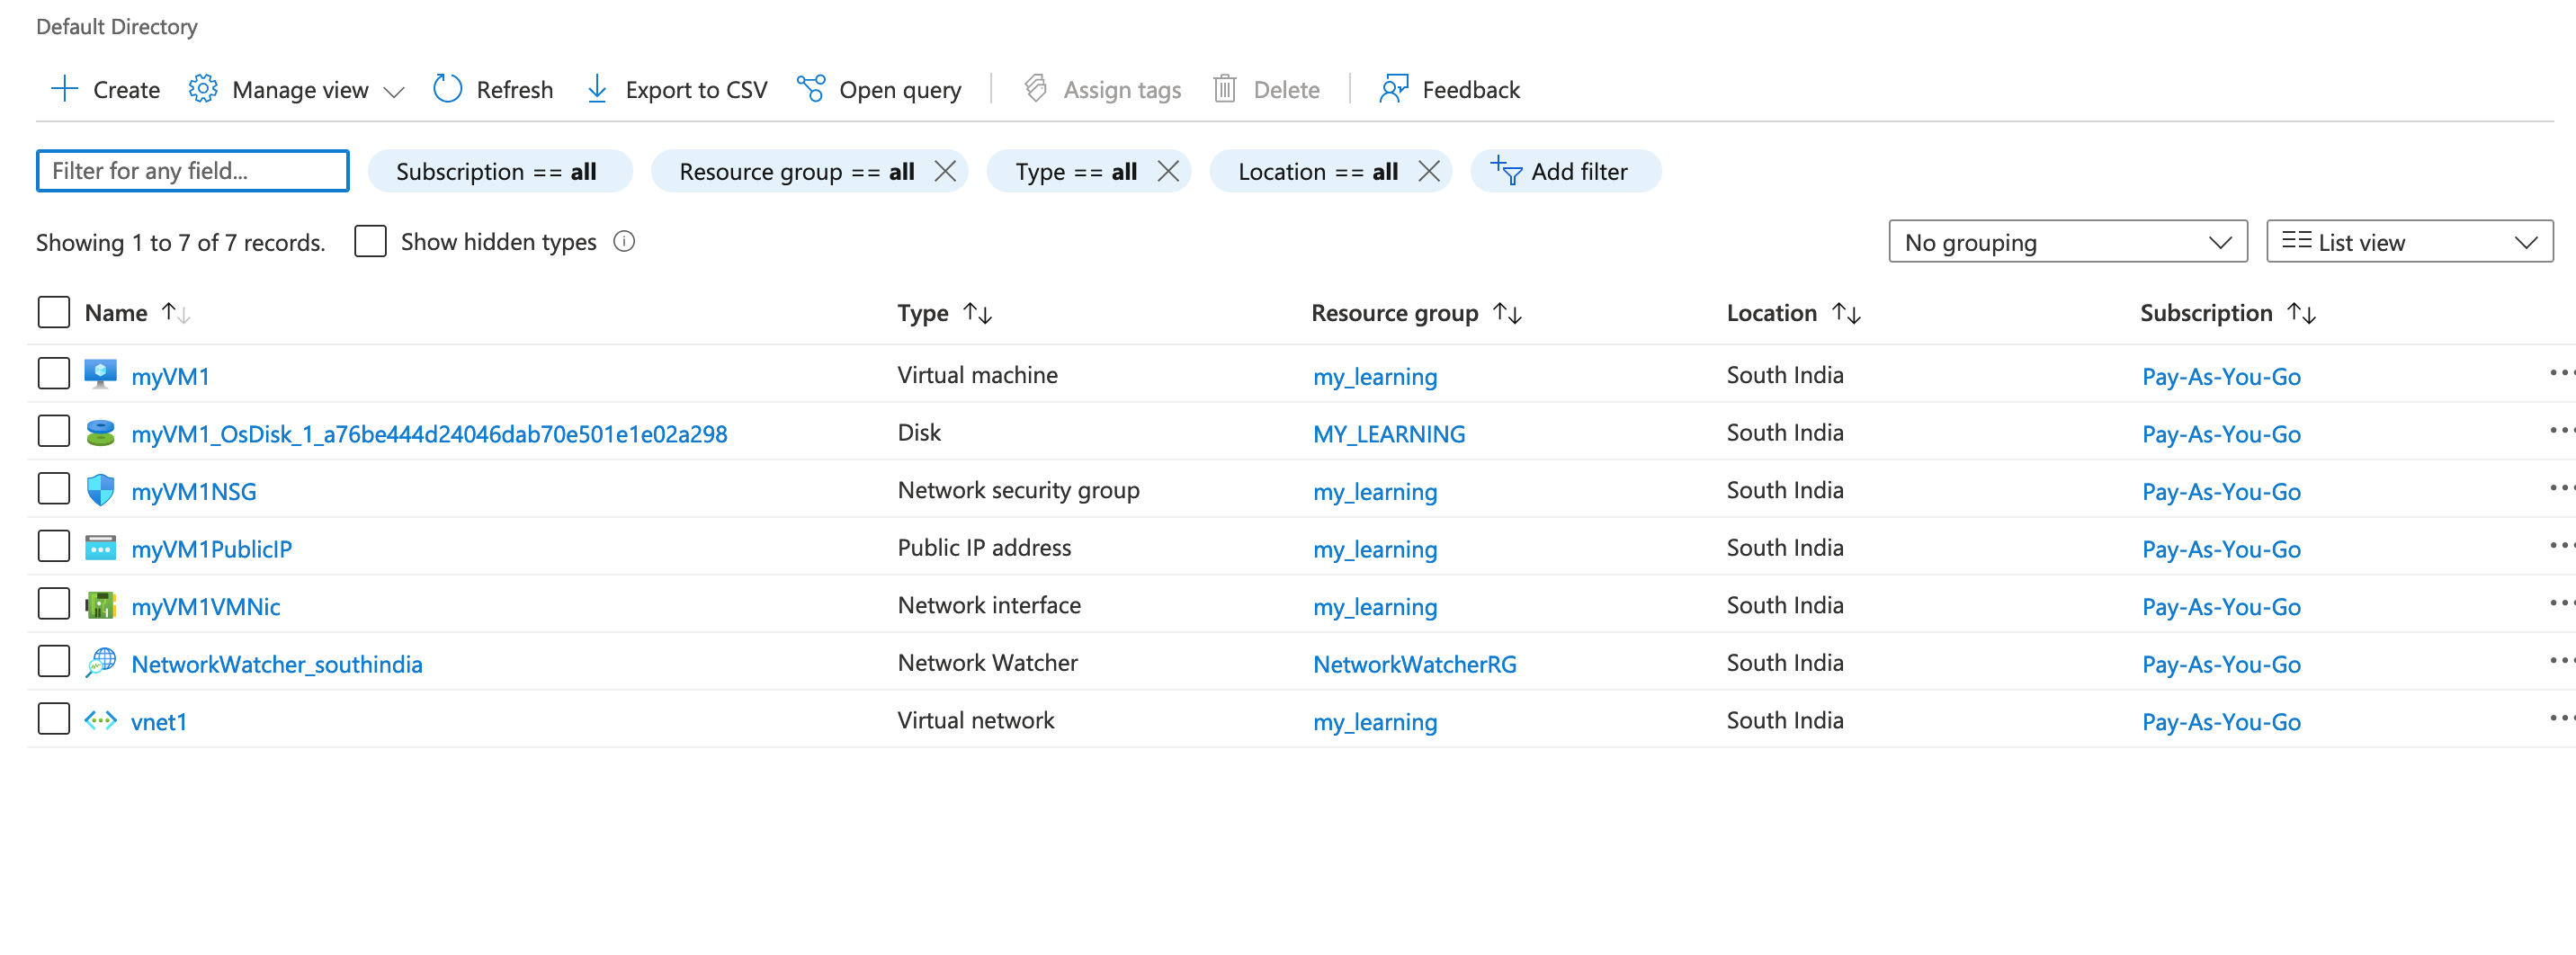
Once you run the commands mentioned earlier, upon successful execution you will be able to see the vnet created in the resources list.
In the Terminal :

In the Portal:

Create a Virtual Machine (VM) using CLI
We use the az vm create command to create a new virtual machine running Ubuntu, which uses SSH authentication for login, and is connected to the subnet and VNet we created just now.
az vm create --name "myVM1" --resource-group "my_learning"
--image UbuntuLTS --vnet-name "vnet1"
--subnet "subnet1" --generate-ssh-keys
Upon successfull execution, you should be able to see the following output which displays all information you need to access the VM.
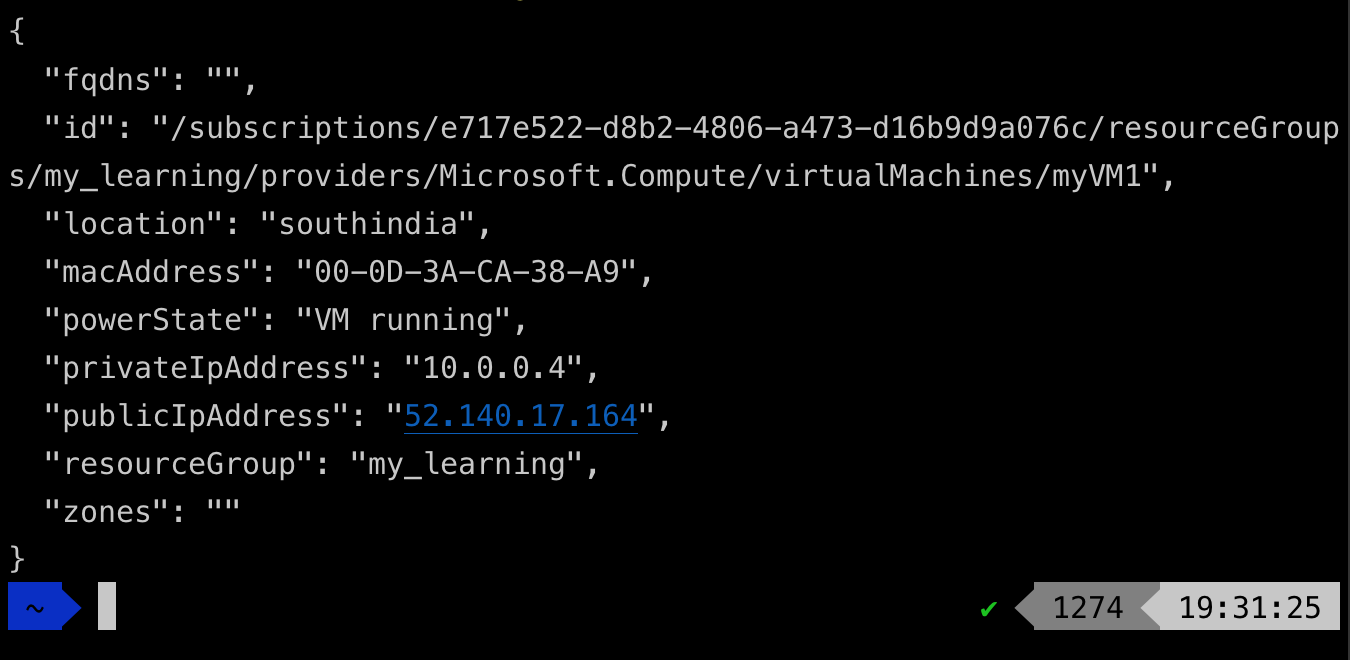
Confirm that the VM is running by connecting over SSH.
ssh <public IP address>
Go ahead and log out from the VM by typing exit.
Note: Always Clean up the resources which are not in use to save billing costs.
Connect with me on:

