In this article, we will see how to use Portainer extension for Docker Desktop. Does Portainer, Docker extensions sound new? Let's see what are those.
What is Portainer?
Portainer is a lightweight container management system which allows you to manage your container environments like Docker, Kubernetes, Nomad etc.
Portainer is an amazing tool that helps you :
- to simplify the process of Deployment
- to manage different containers
- to manage different endpoints from the same instance.
And one more thing is that it has amazing UI for managing your container environments.
Why you need Portainer
Let's assume you have many containers running and you want to see the all the containers. We usually do, docker ps -a . we get something like this:

There's no issue with this , that it doesn't look good.
With Portainer, you can manage all your containers at ease. Portainer provides an amazing GUI that helps you to view/ make changes in your container environment.
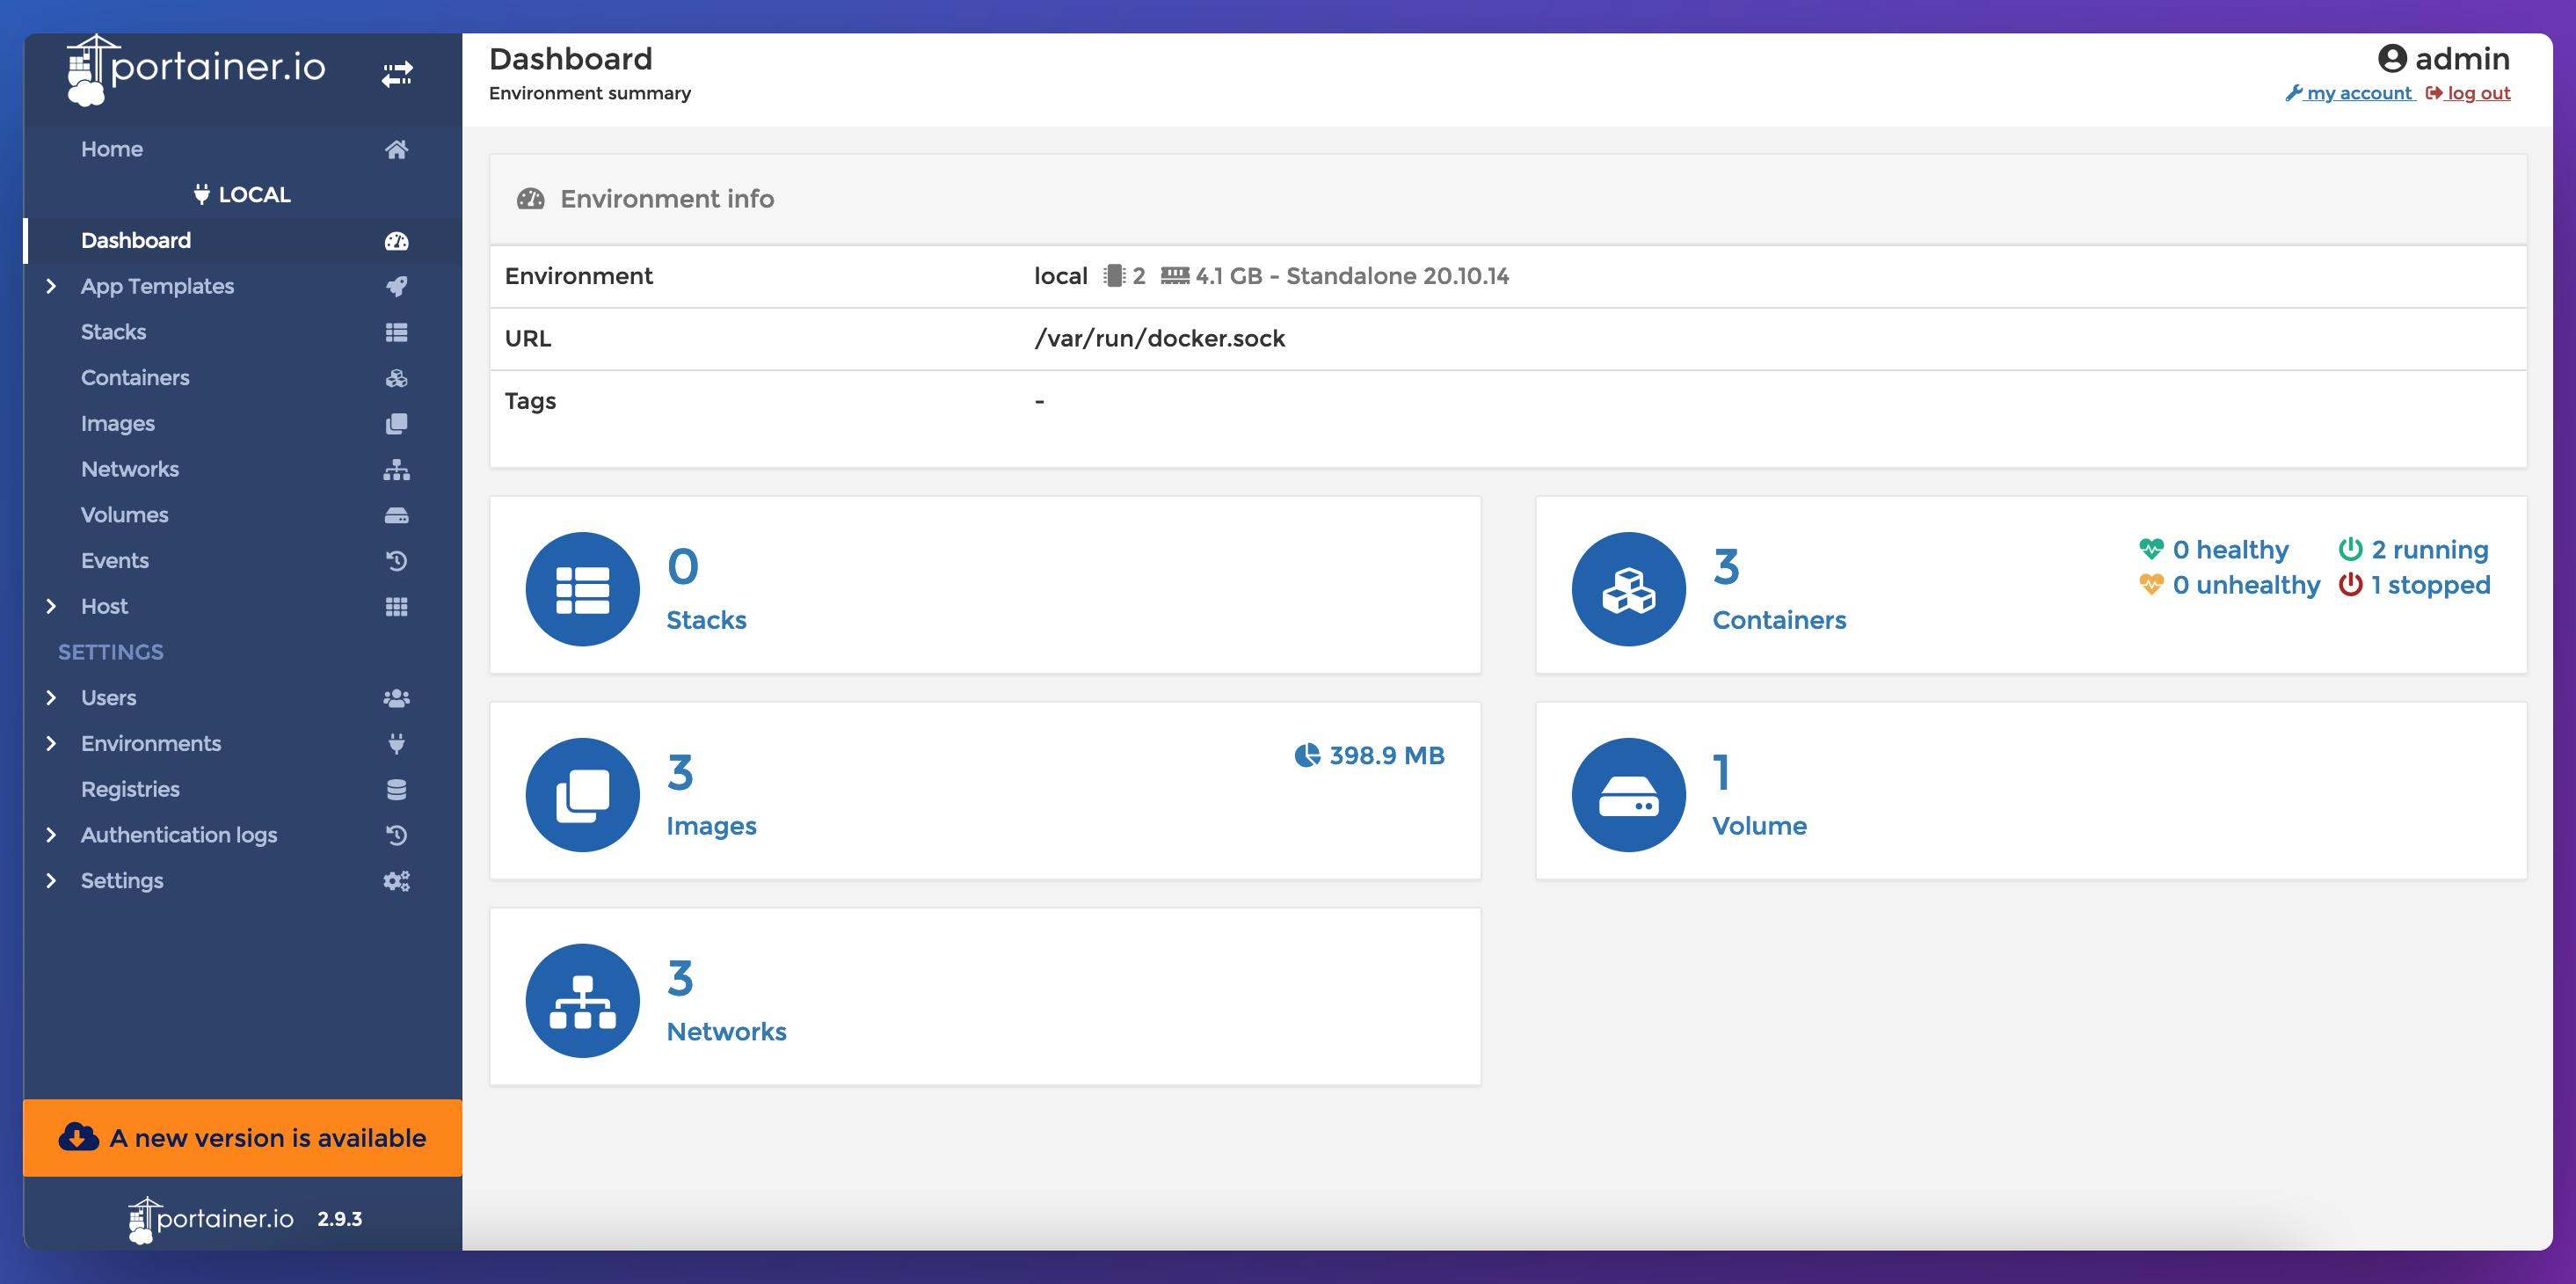
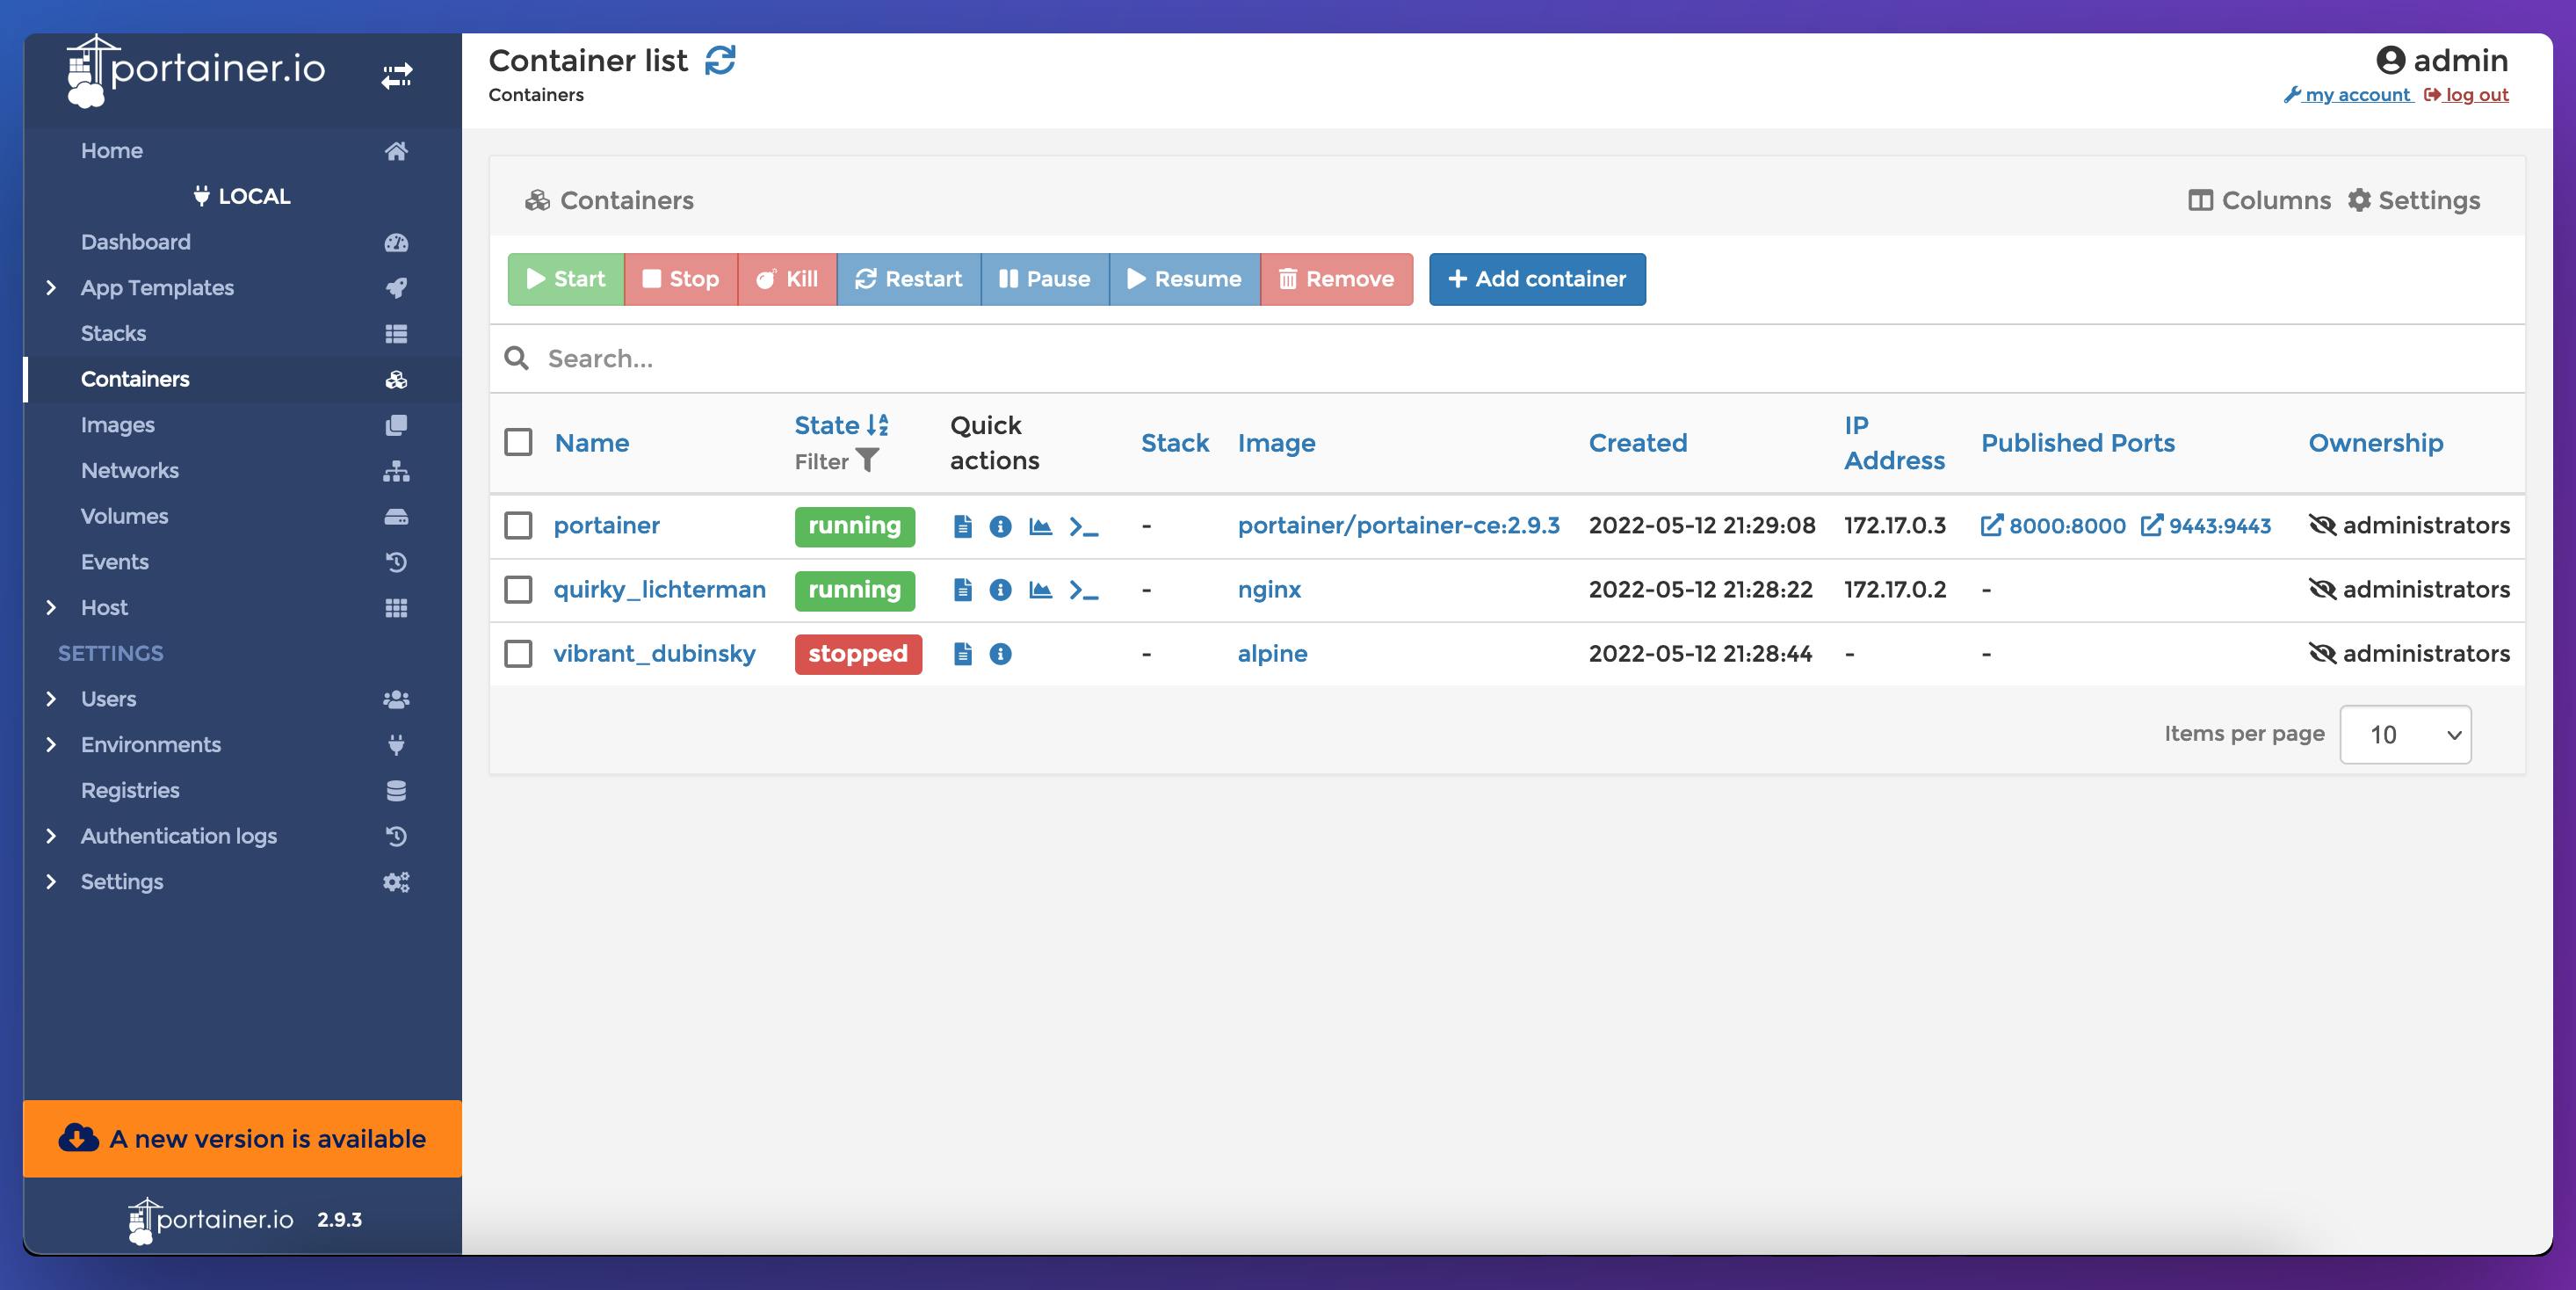
By using Portainer, I don't have to check the correct syntax for the docker commands. In the portainer UI, you would be able to manage all Docker Objects like Images, containers, networks, volumes.
What is Docker Extension?
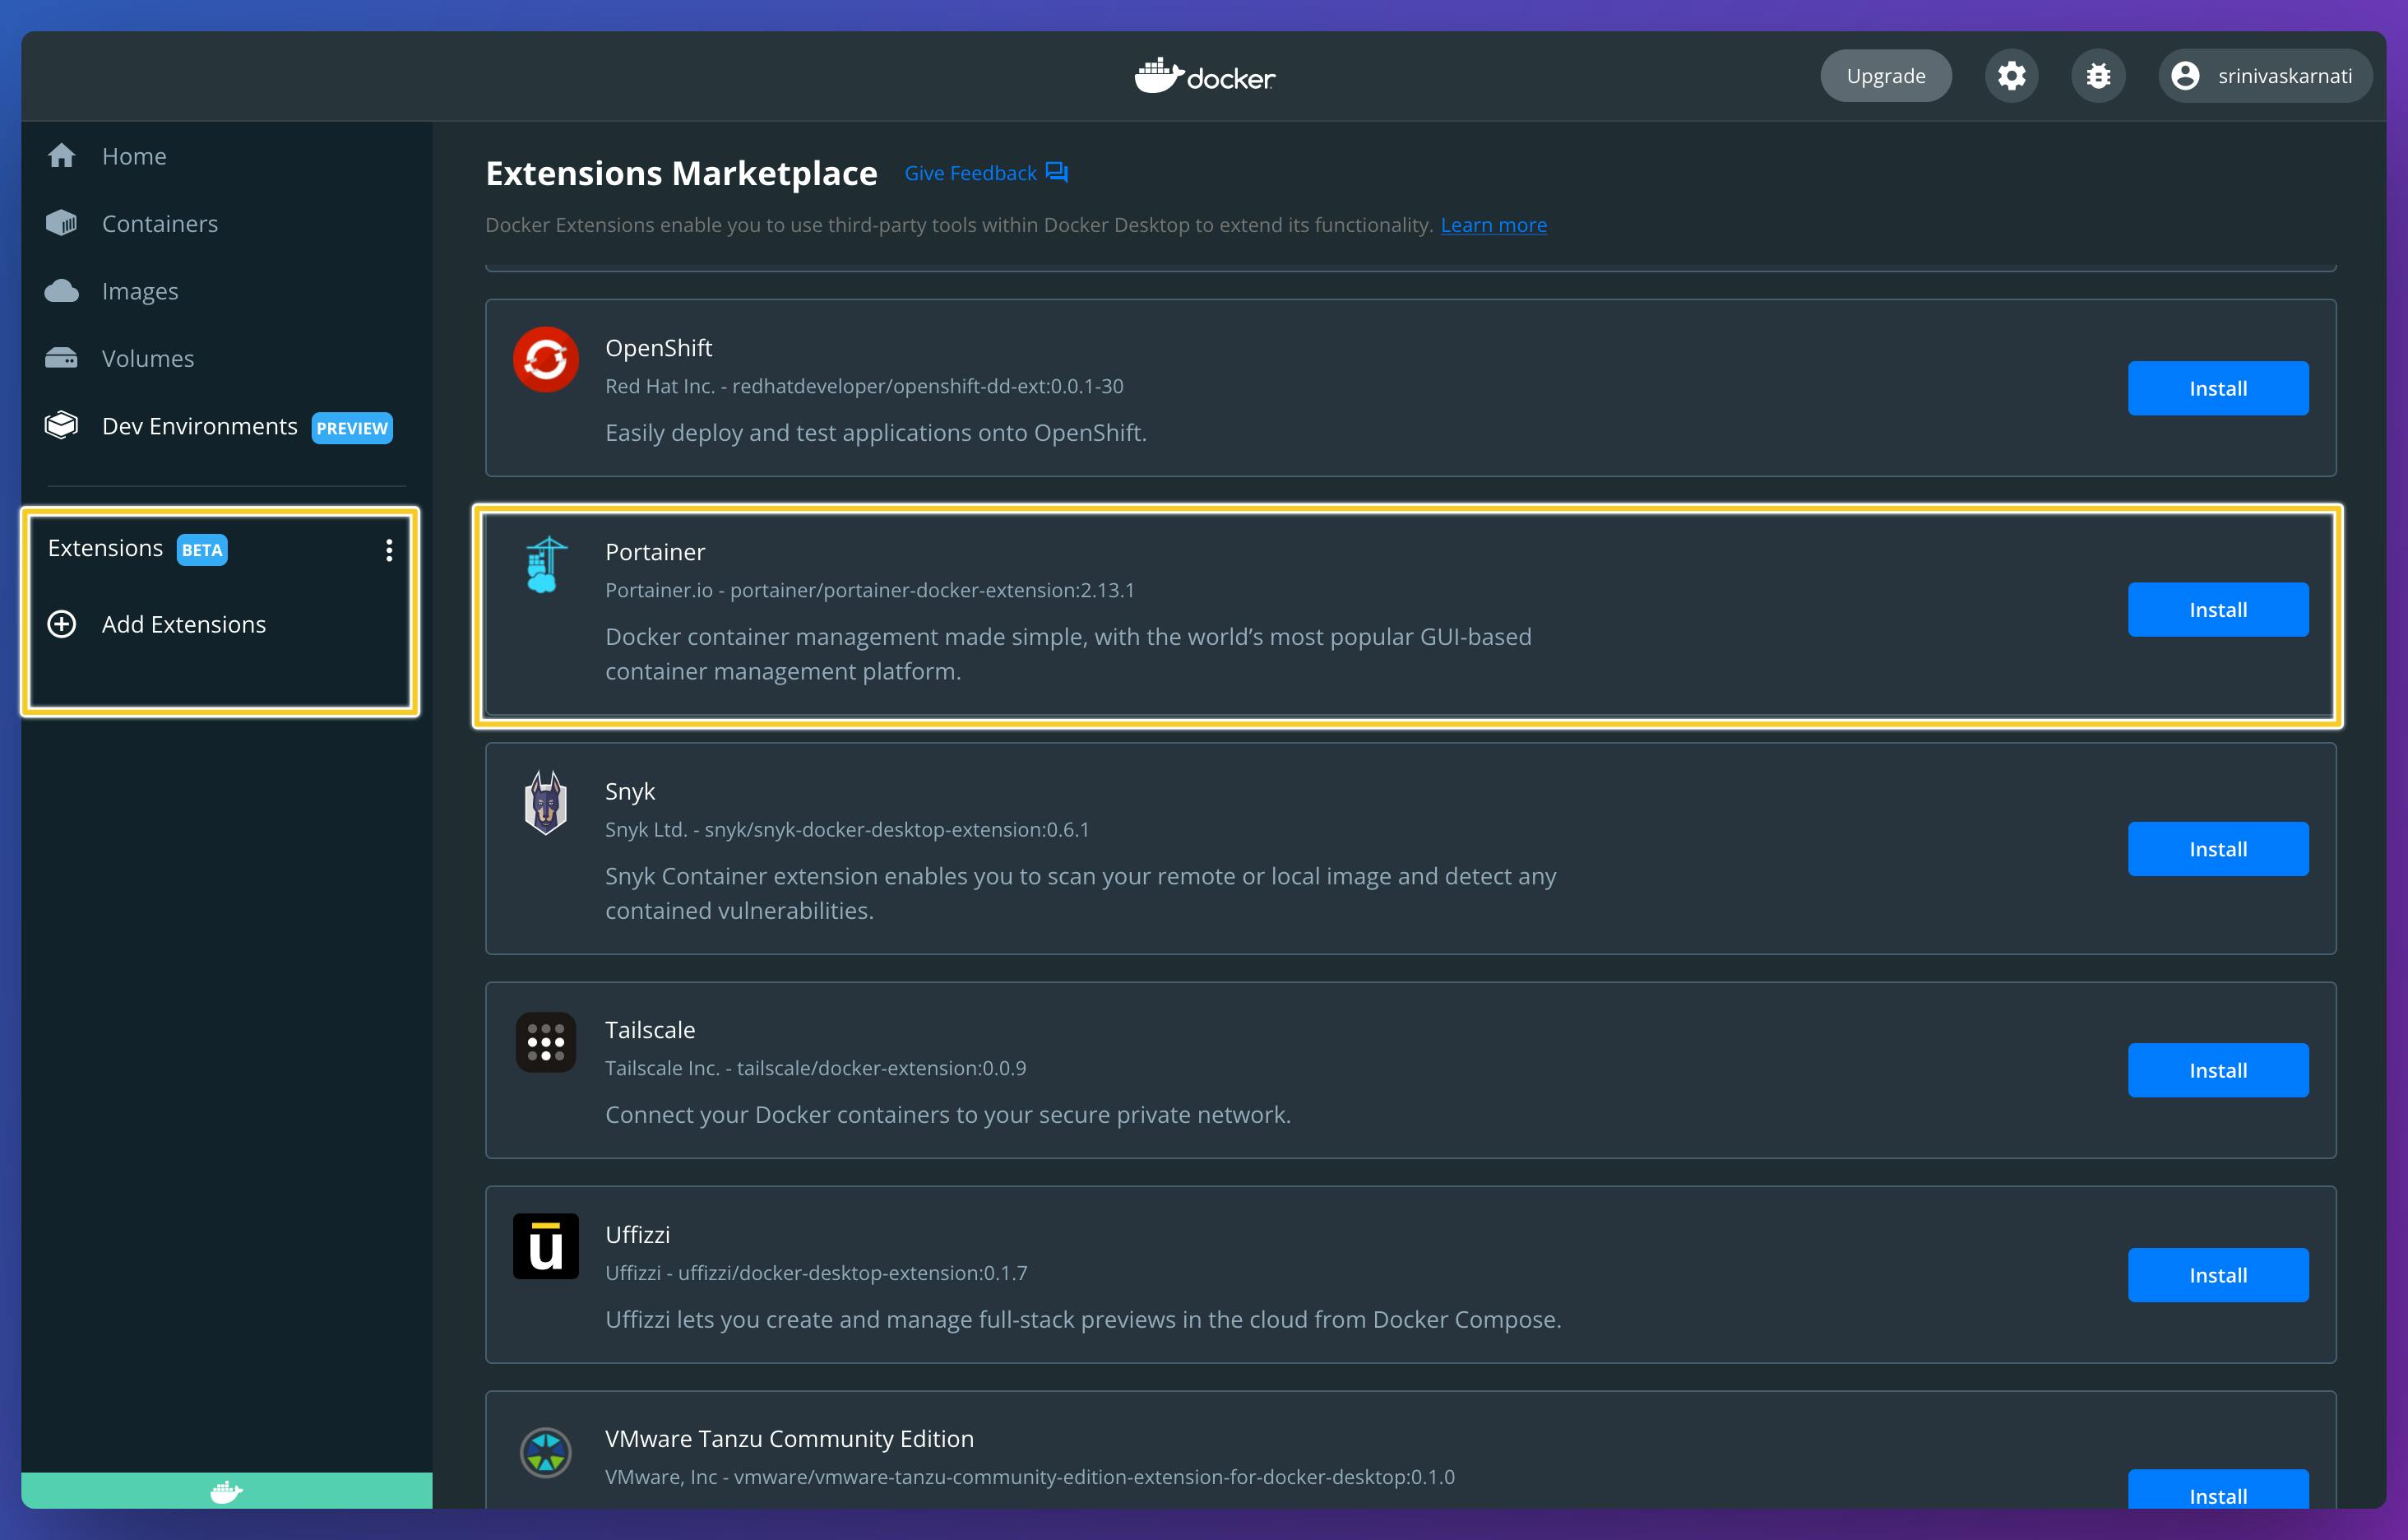
Docker Extensions are the feature that lets you use third-party tools within Docker Desktop to extend its functionality. You can install many number of Docker extensions. Docker Extensions is available as part of Docker Desktop 4.8.0 or a later release.
Install Portainer Docker Extension:
- Open Docker Desktop.
- From the Dashboard, select Add Extensions in the menu bar. The Extensions Marketplace opens.
- Browse for the Portainer extensions.
- Click Install.
- From here, you can click Open to access the extension or install more extensions. The extension also appears in the menu bar.
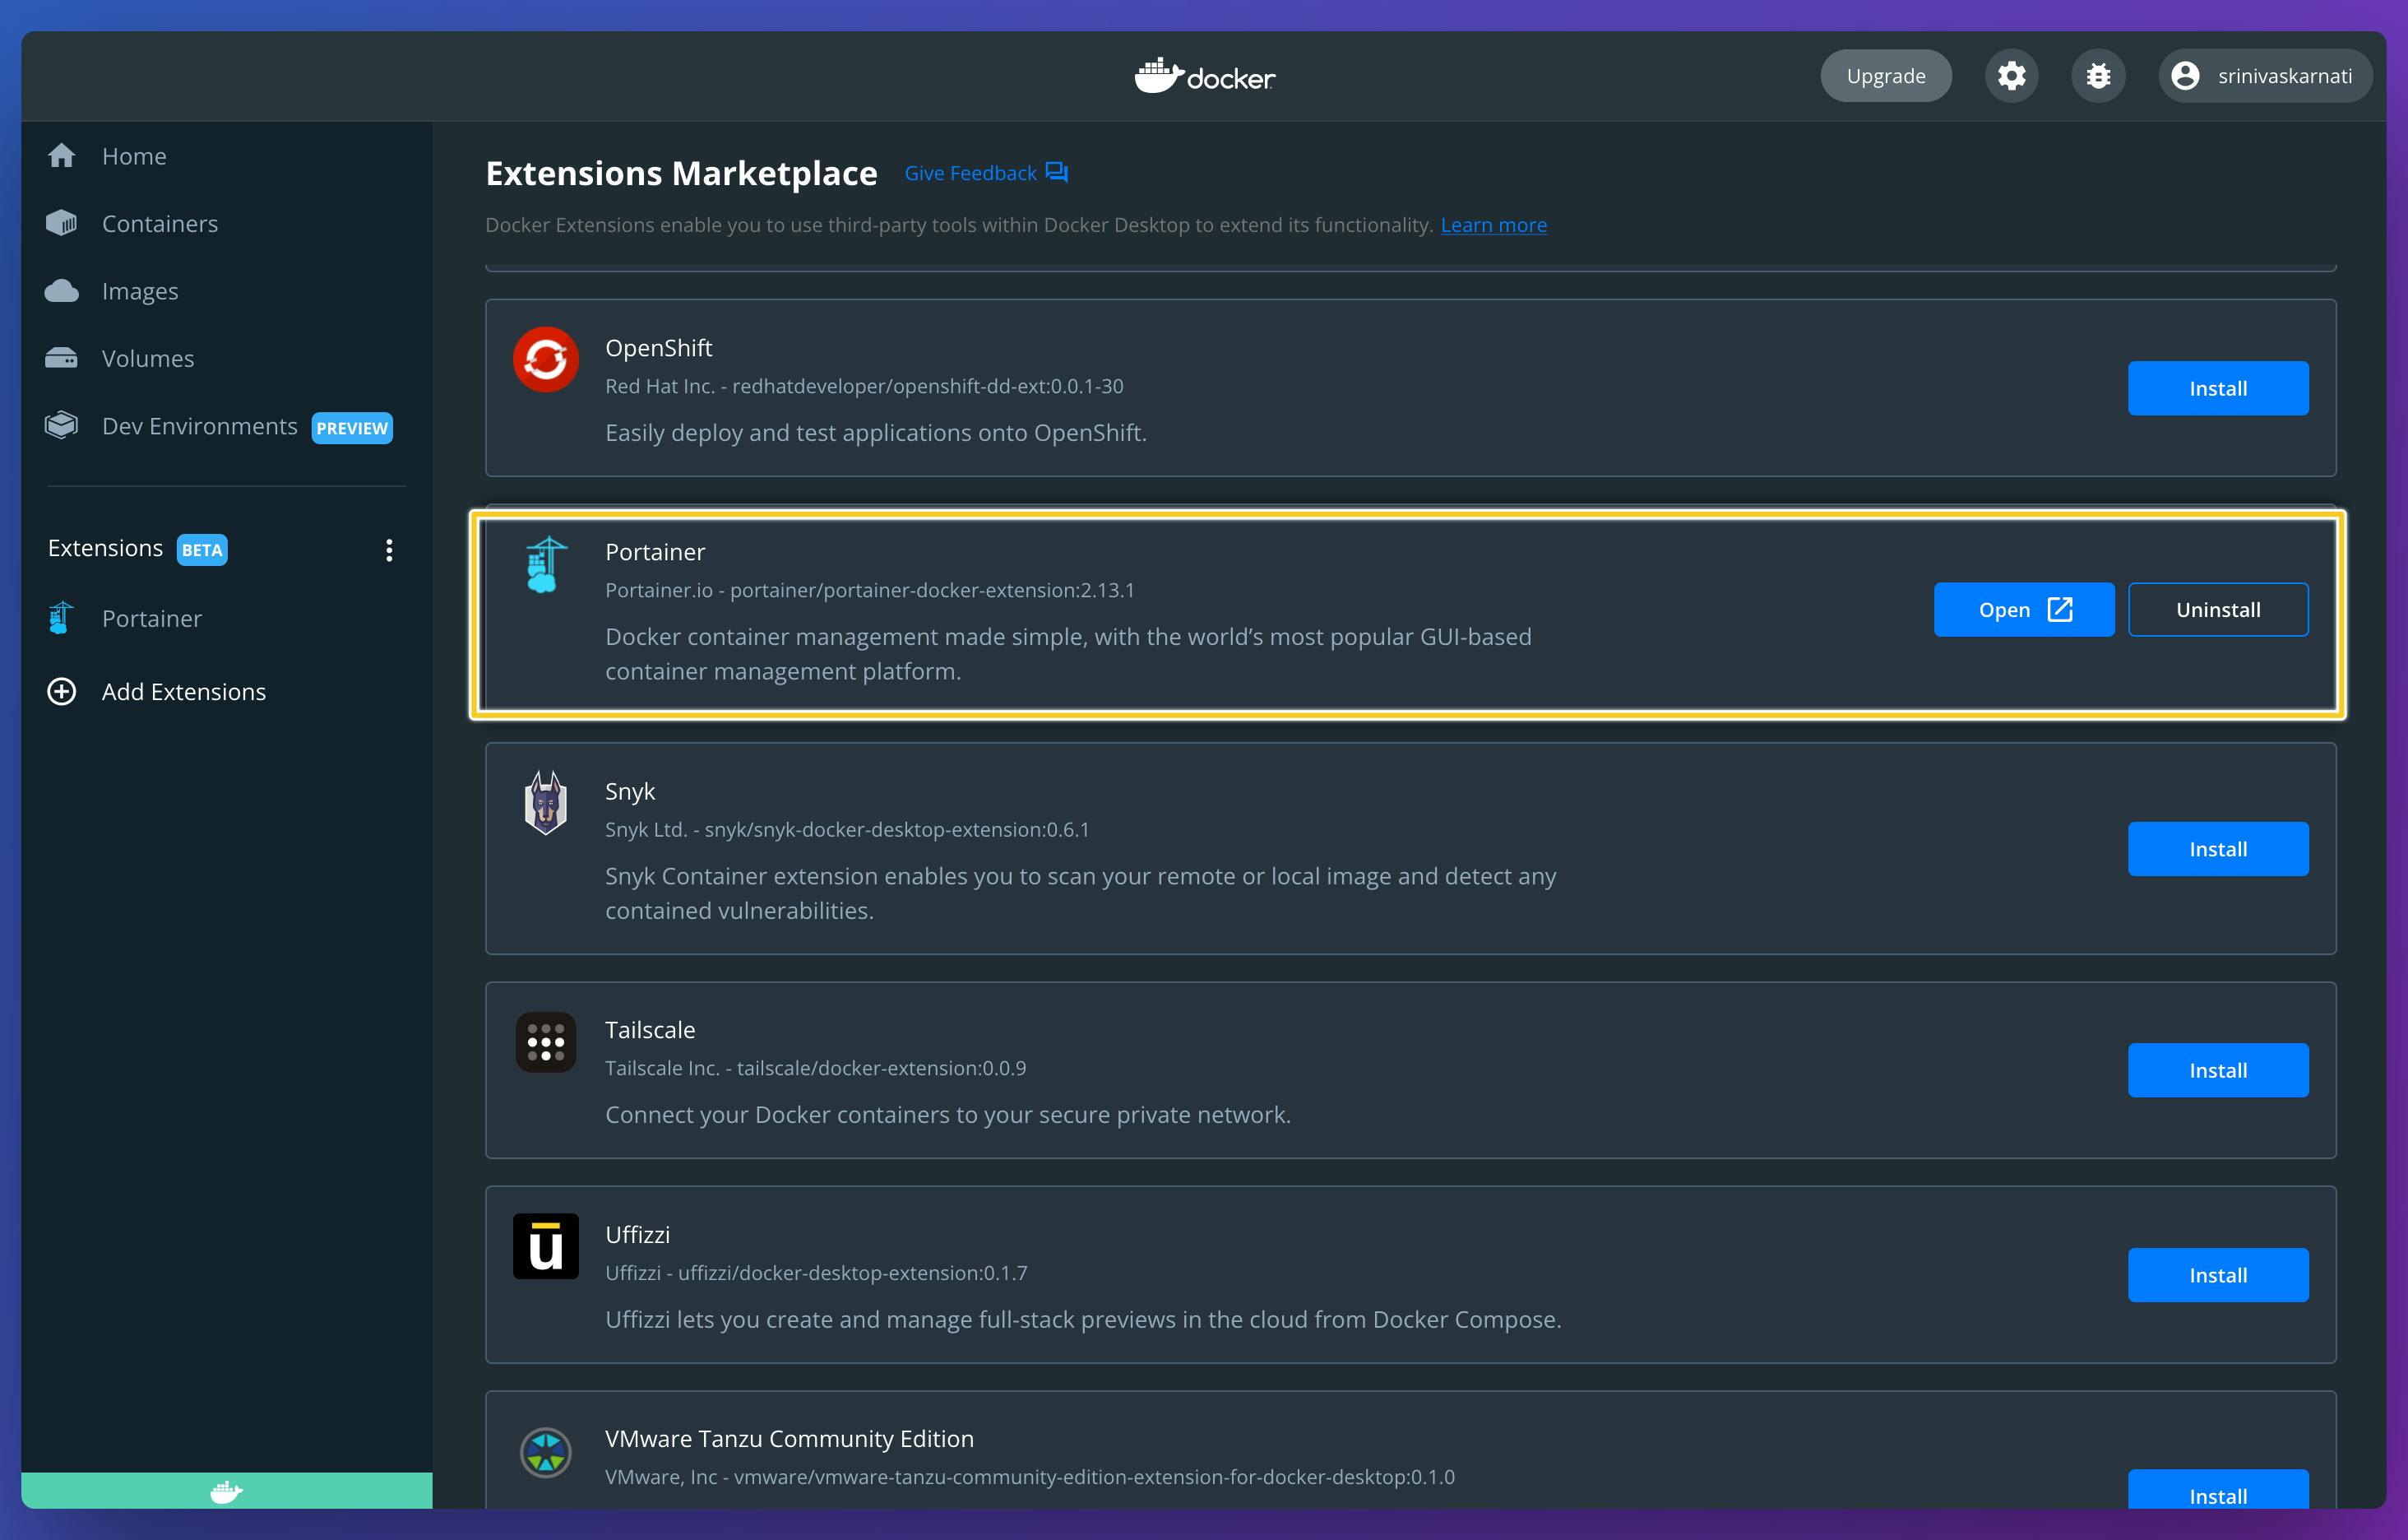
Manage your local Docker environment
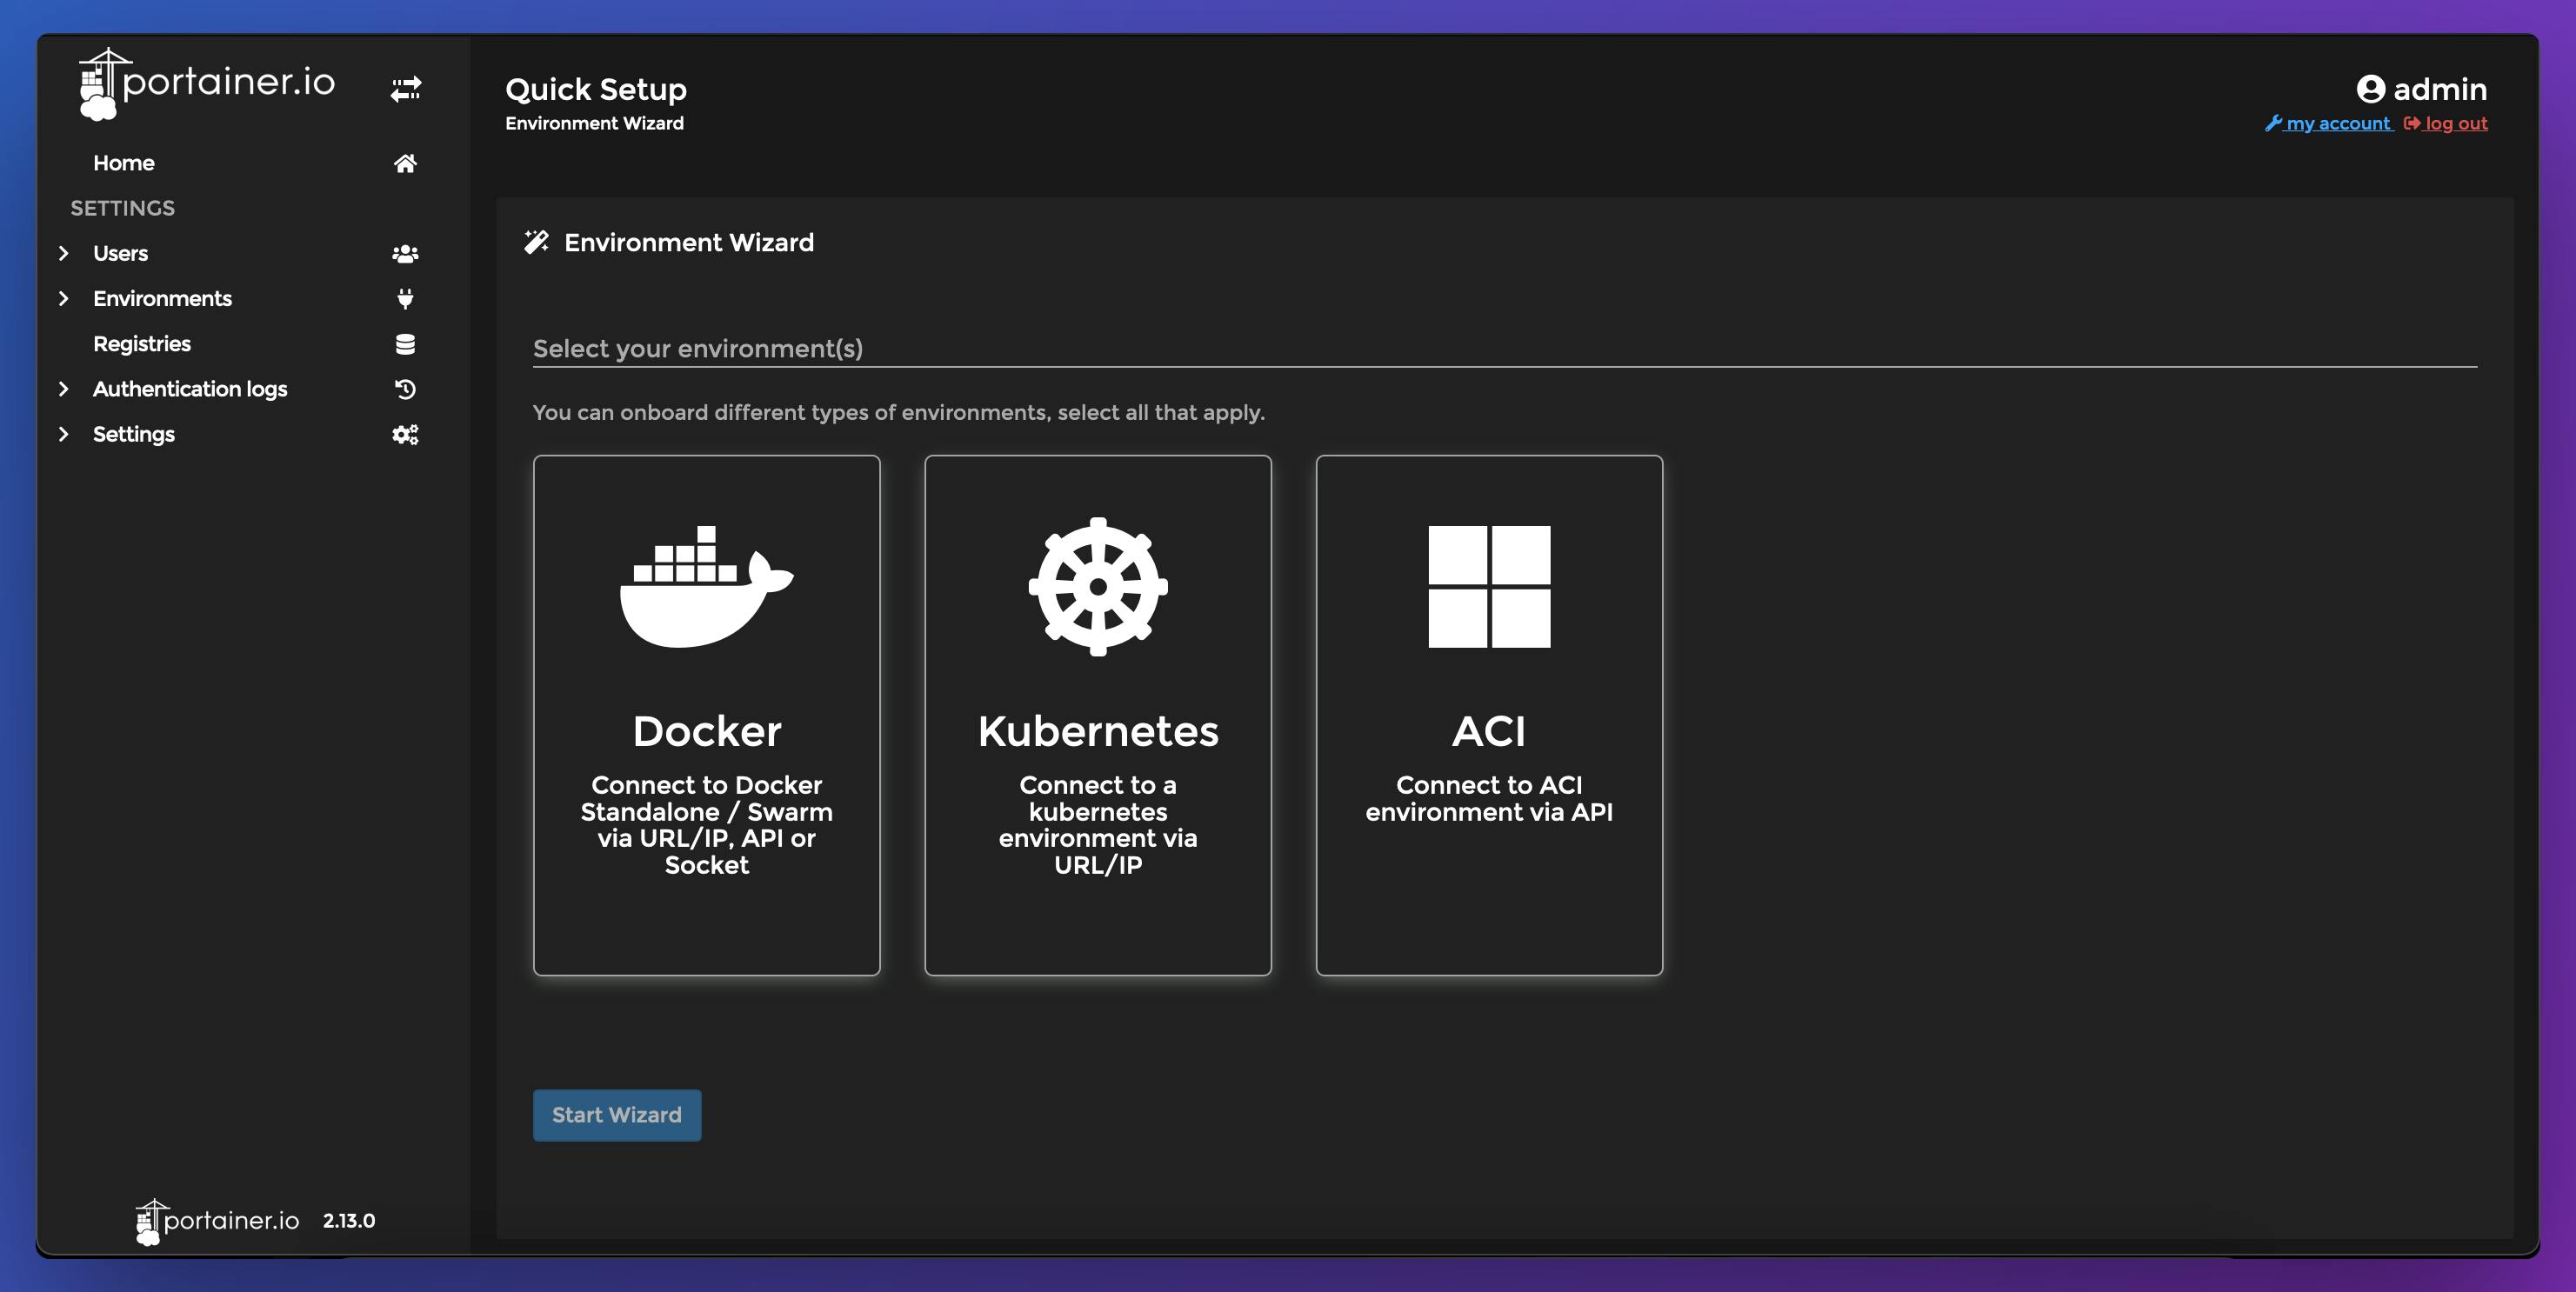
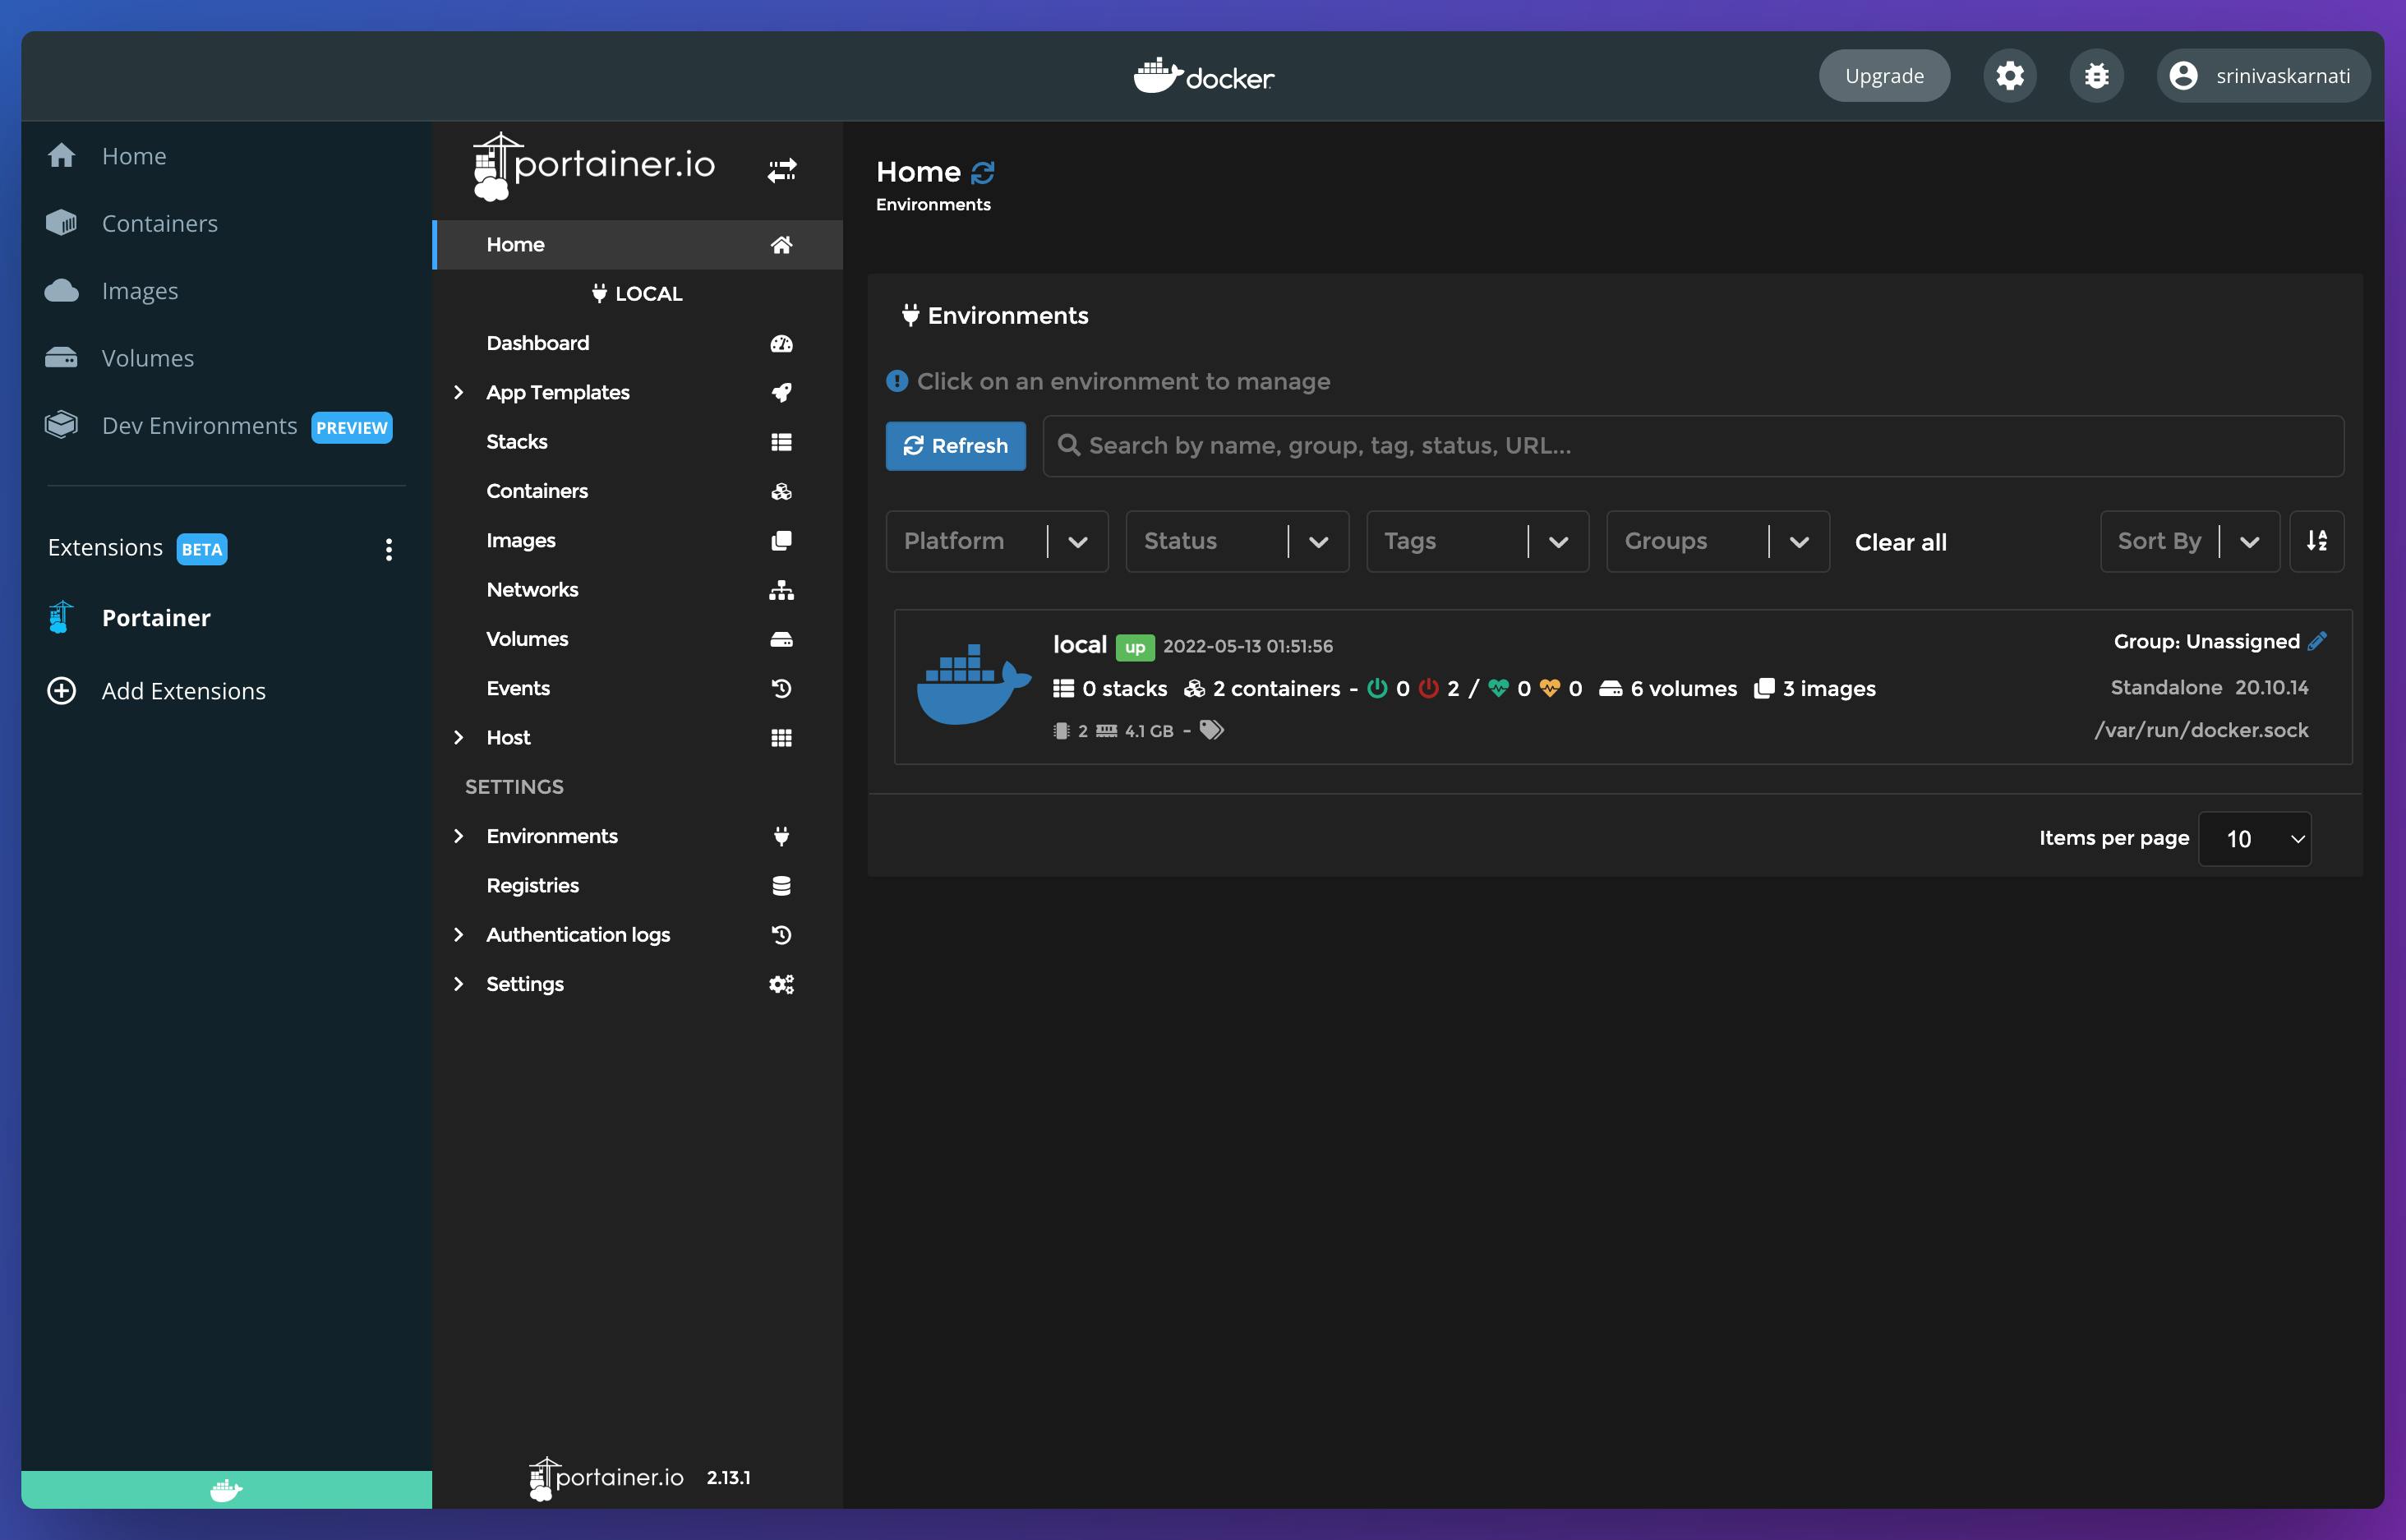
Once you install the portainer extension, the homepage would look like this.
 Click on "Get Started" to see your container environments. You can also add many environments with different properties.
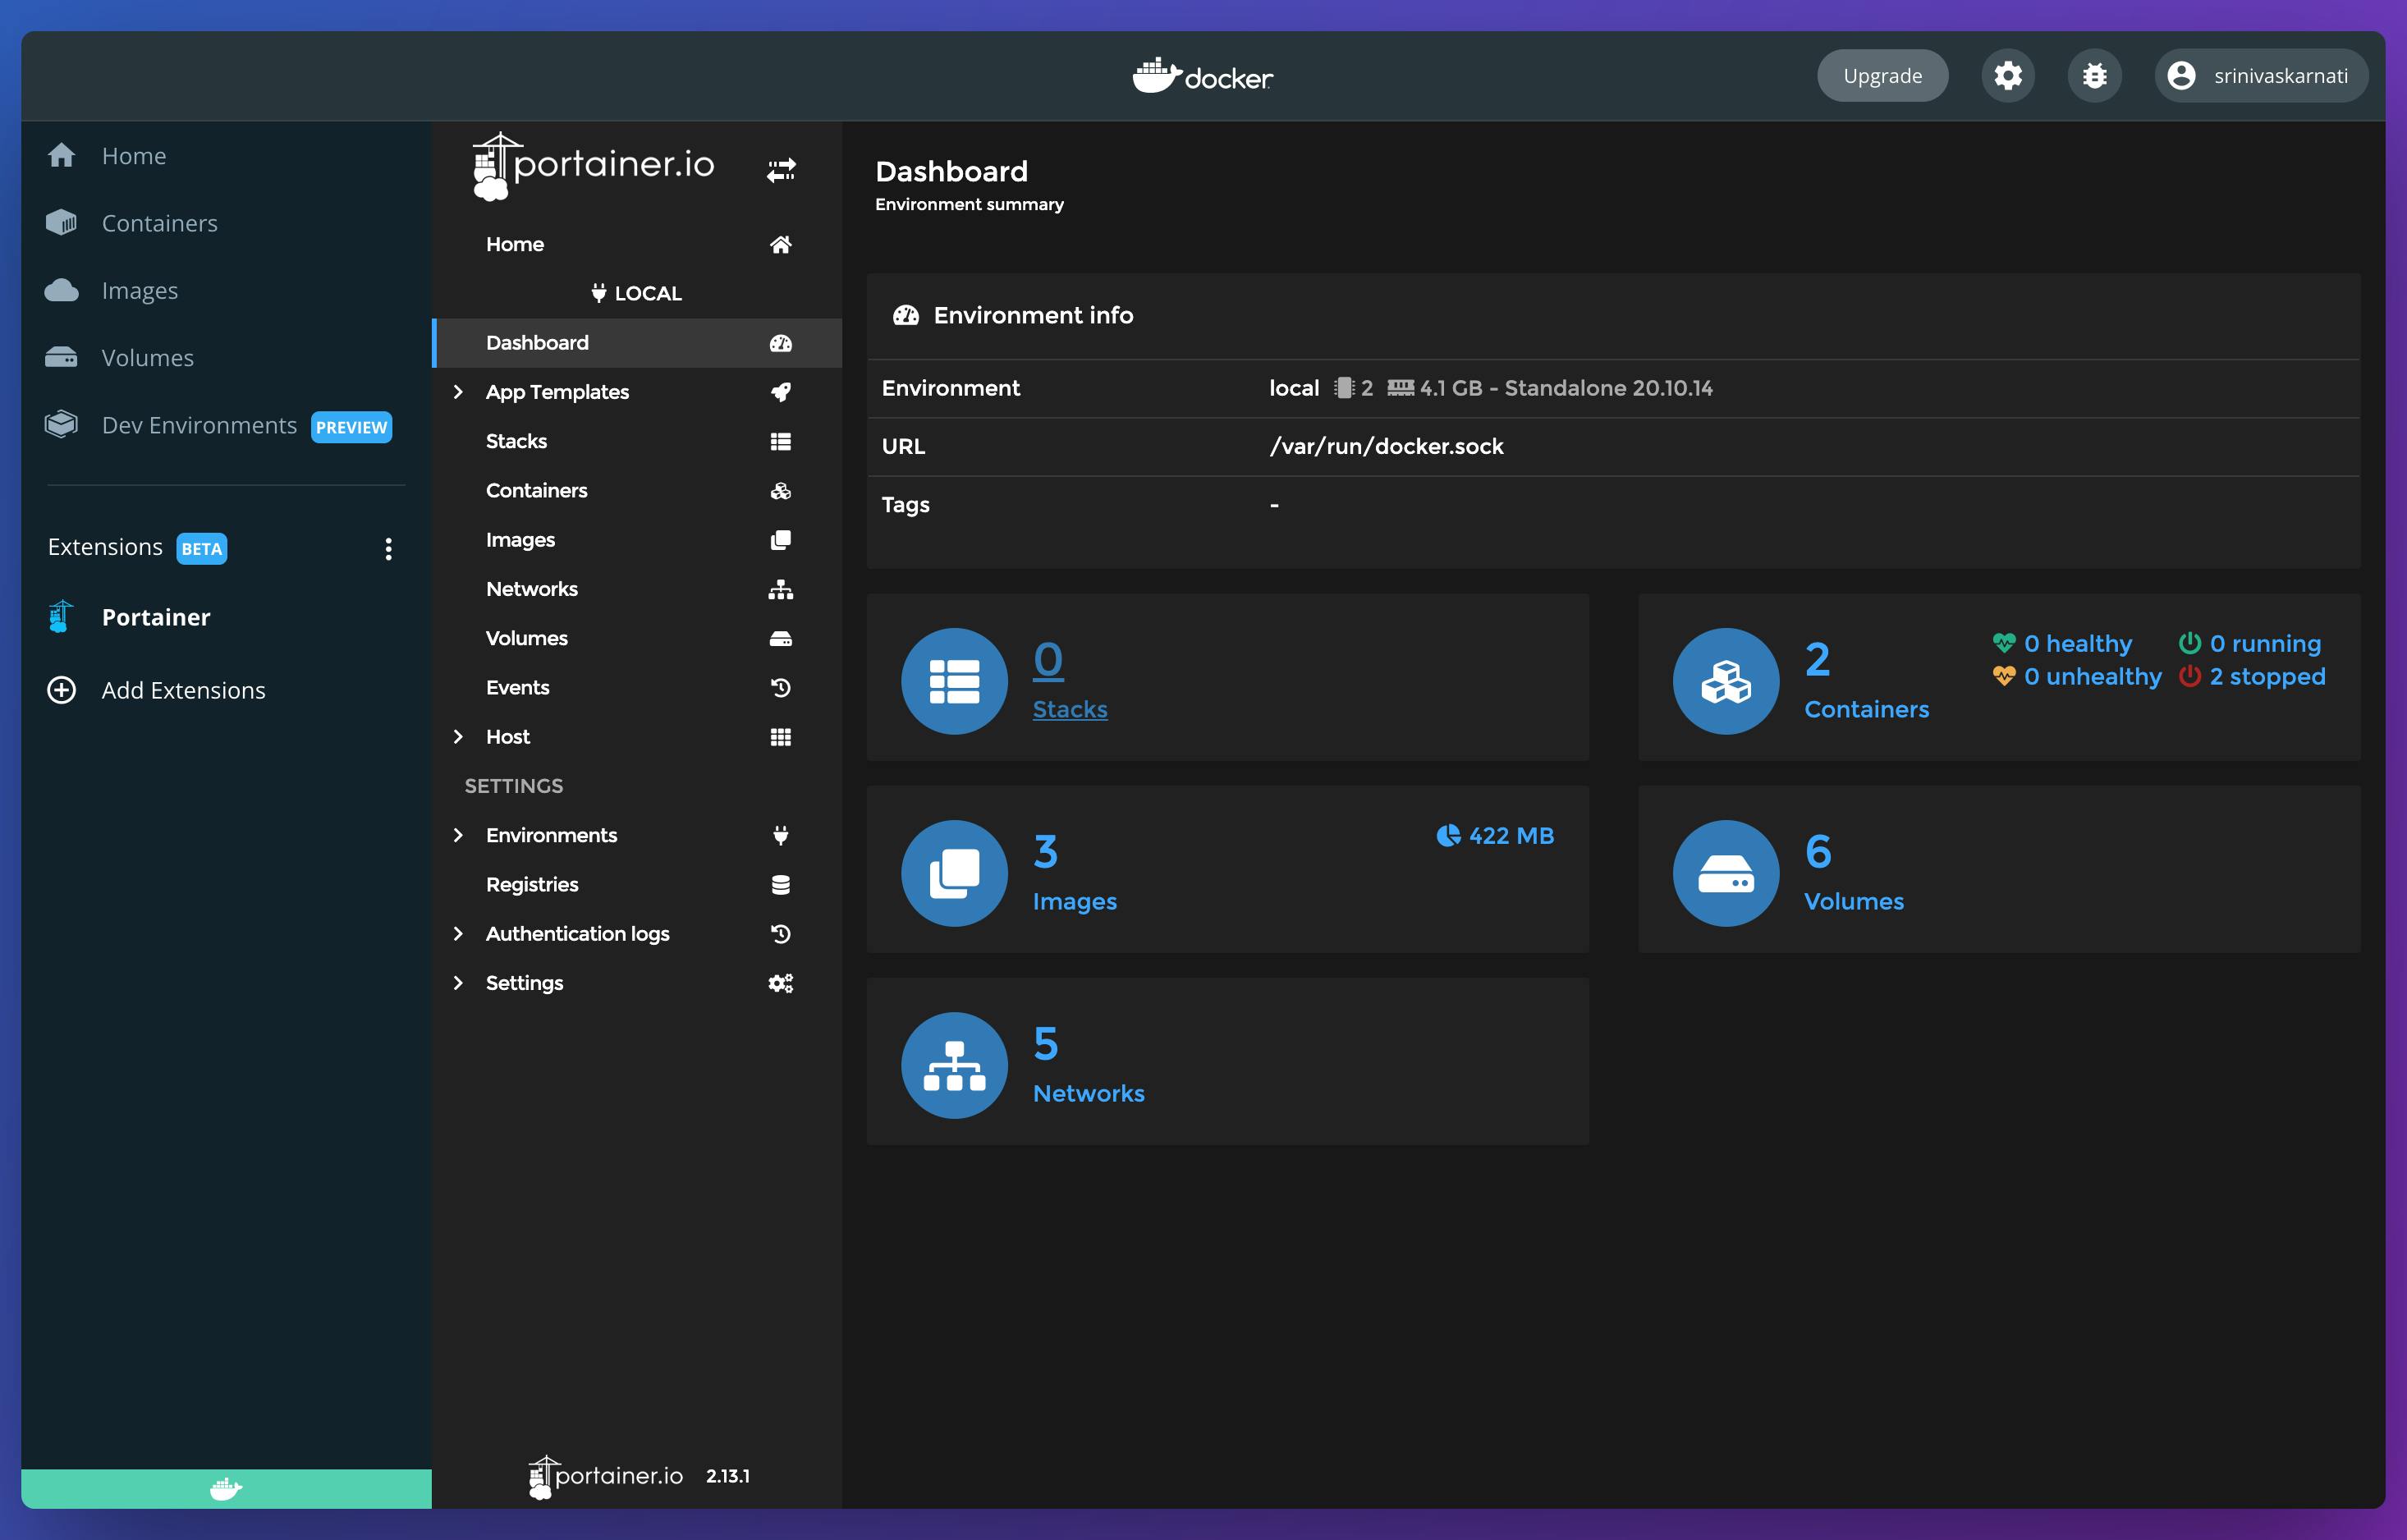
 When you click on the environment, you can get detailed information about the environment and it properties.
Deploy Nginx using Portainer Extension
Let's try to deploy the "nginx" using the GUI provided by Portainer. In Portainer GUI, click on 'Containers' and the click on 'Add Container'.
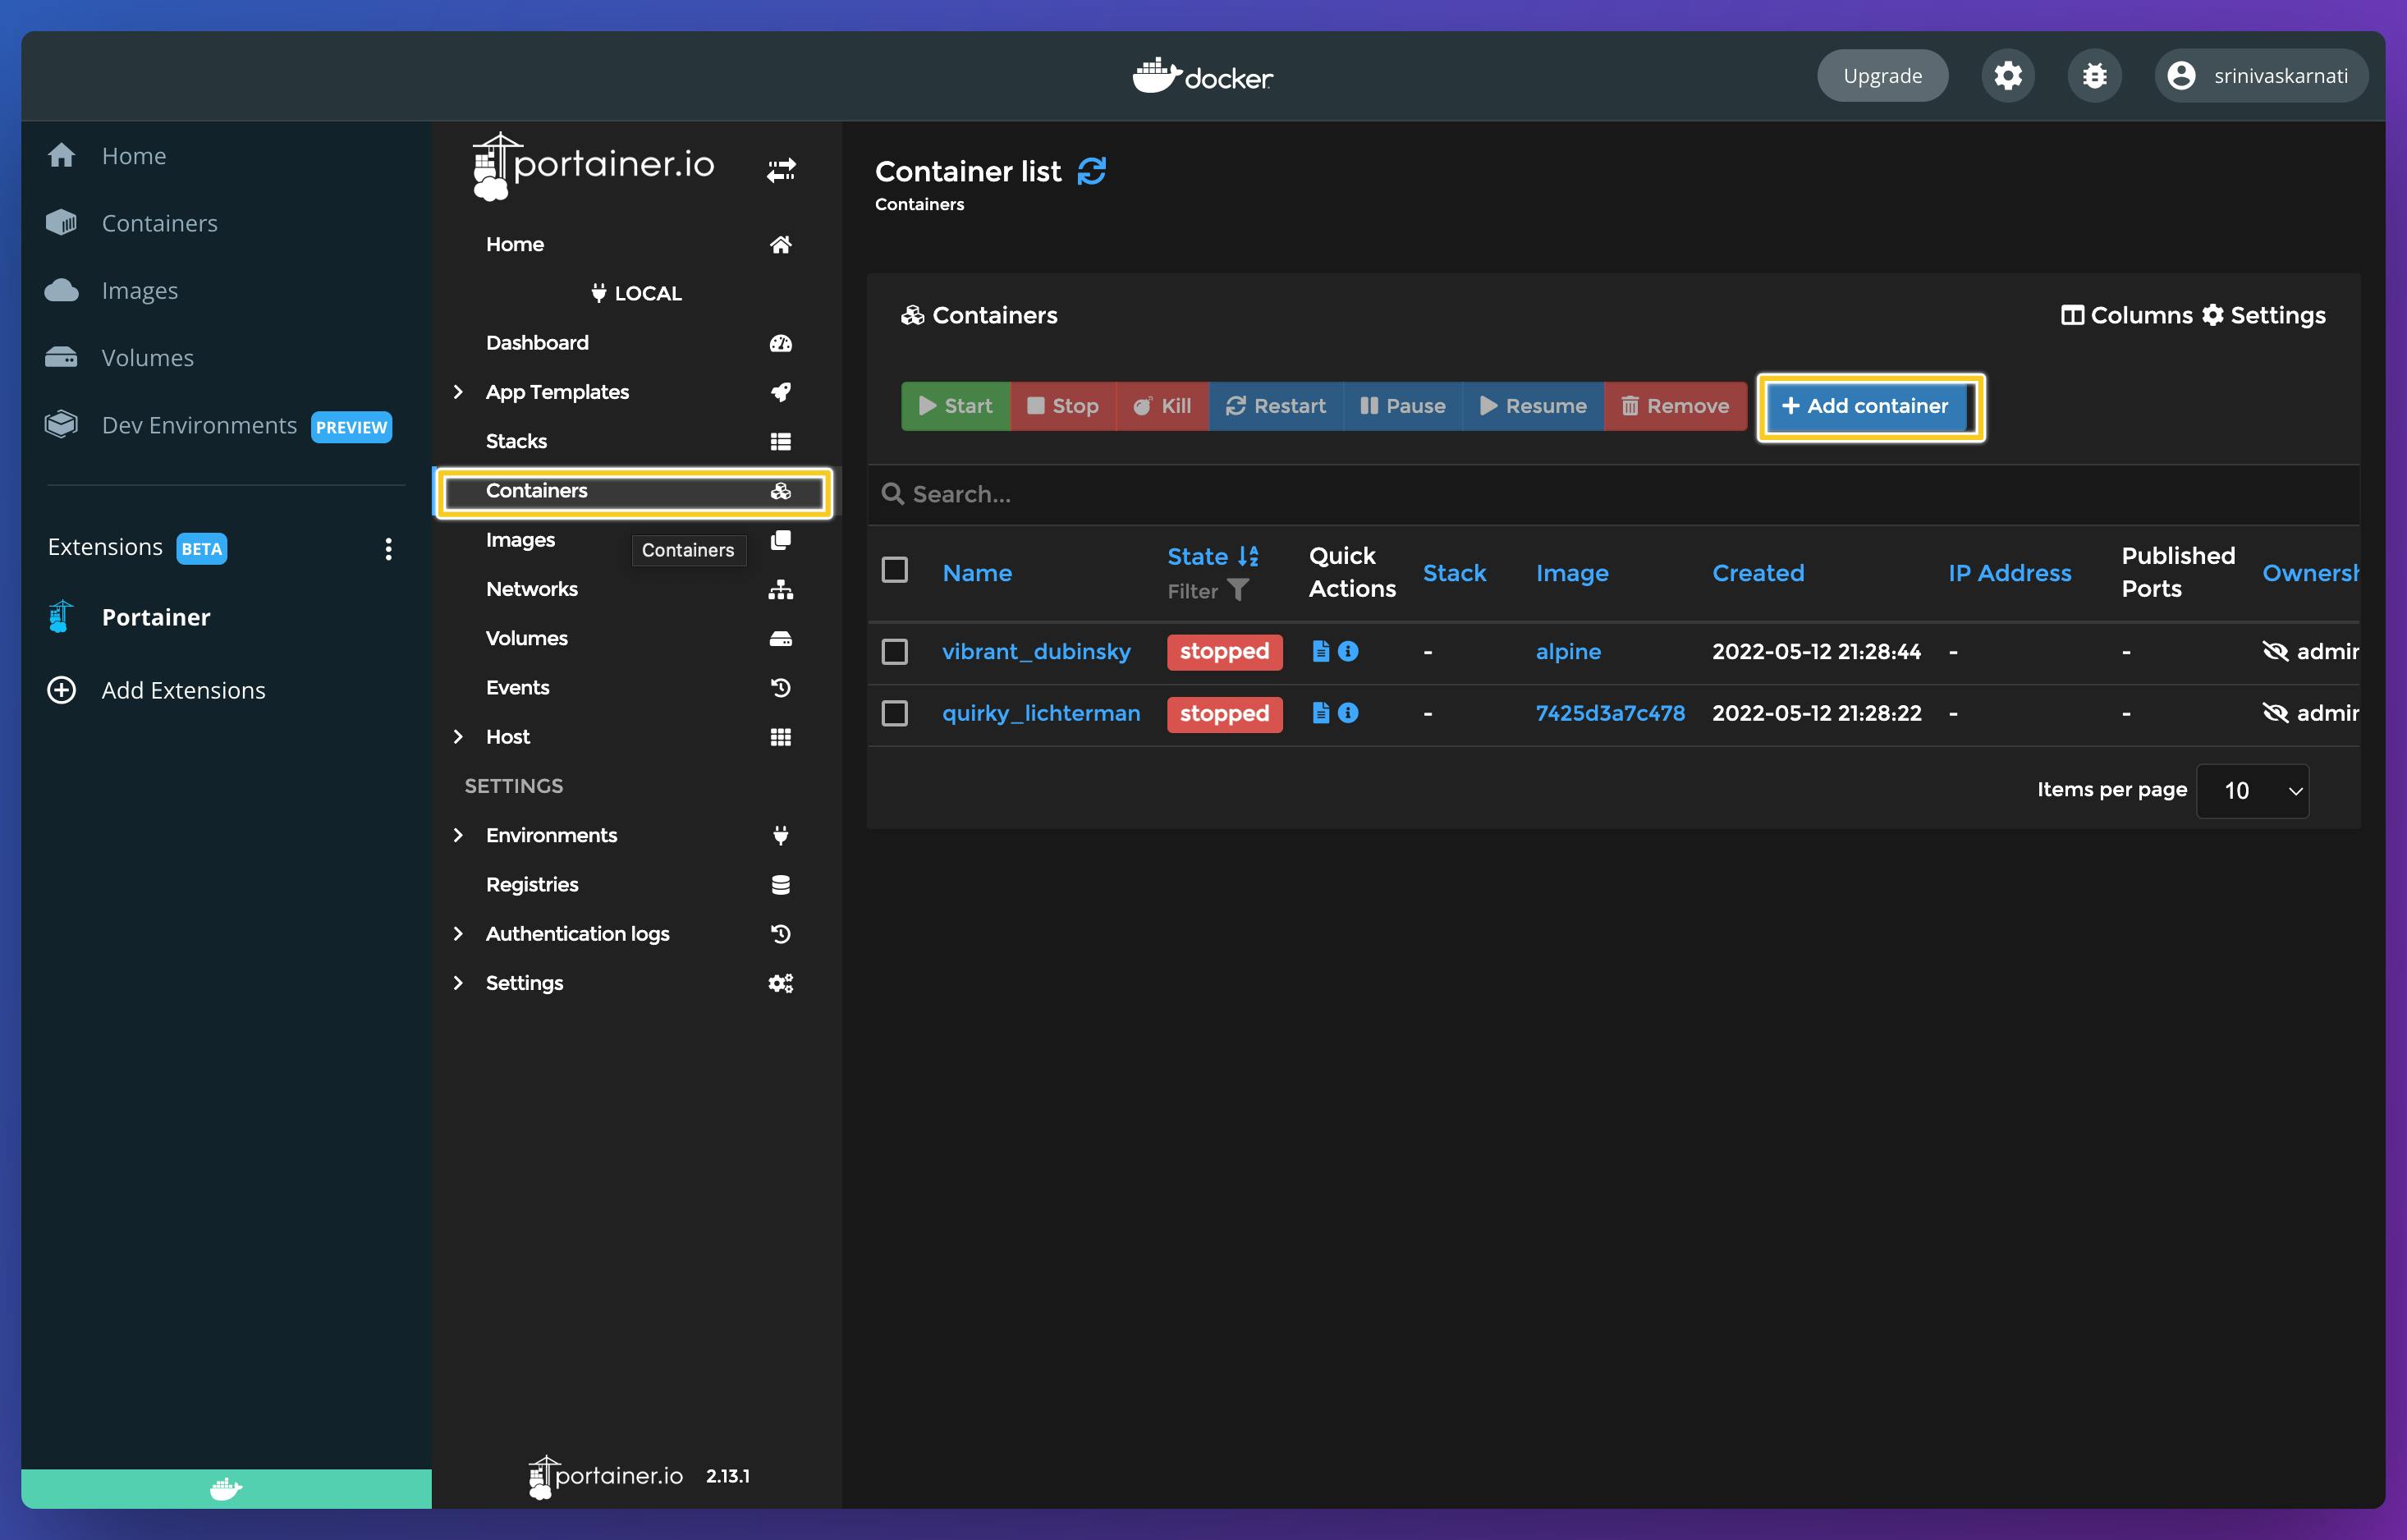
- Give your Container a name. Ex: my-nginx-server
- Specify the image you want to use. By default, Portainer use Docker Hub as image repository from which it fetches the images.
- We want is to access our nginx server from our browser and for that we need to expose a port. Here we exposed container Port 80 to external port 8080
- Deploy the container
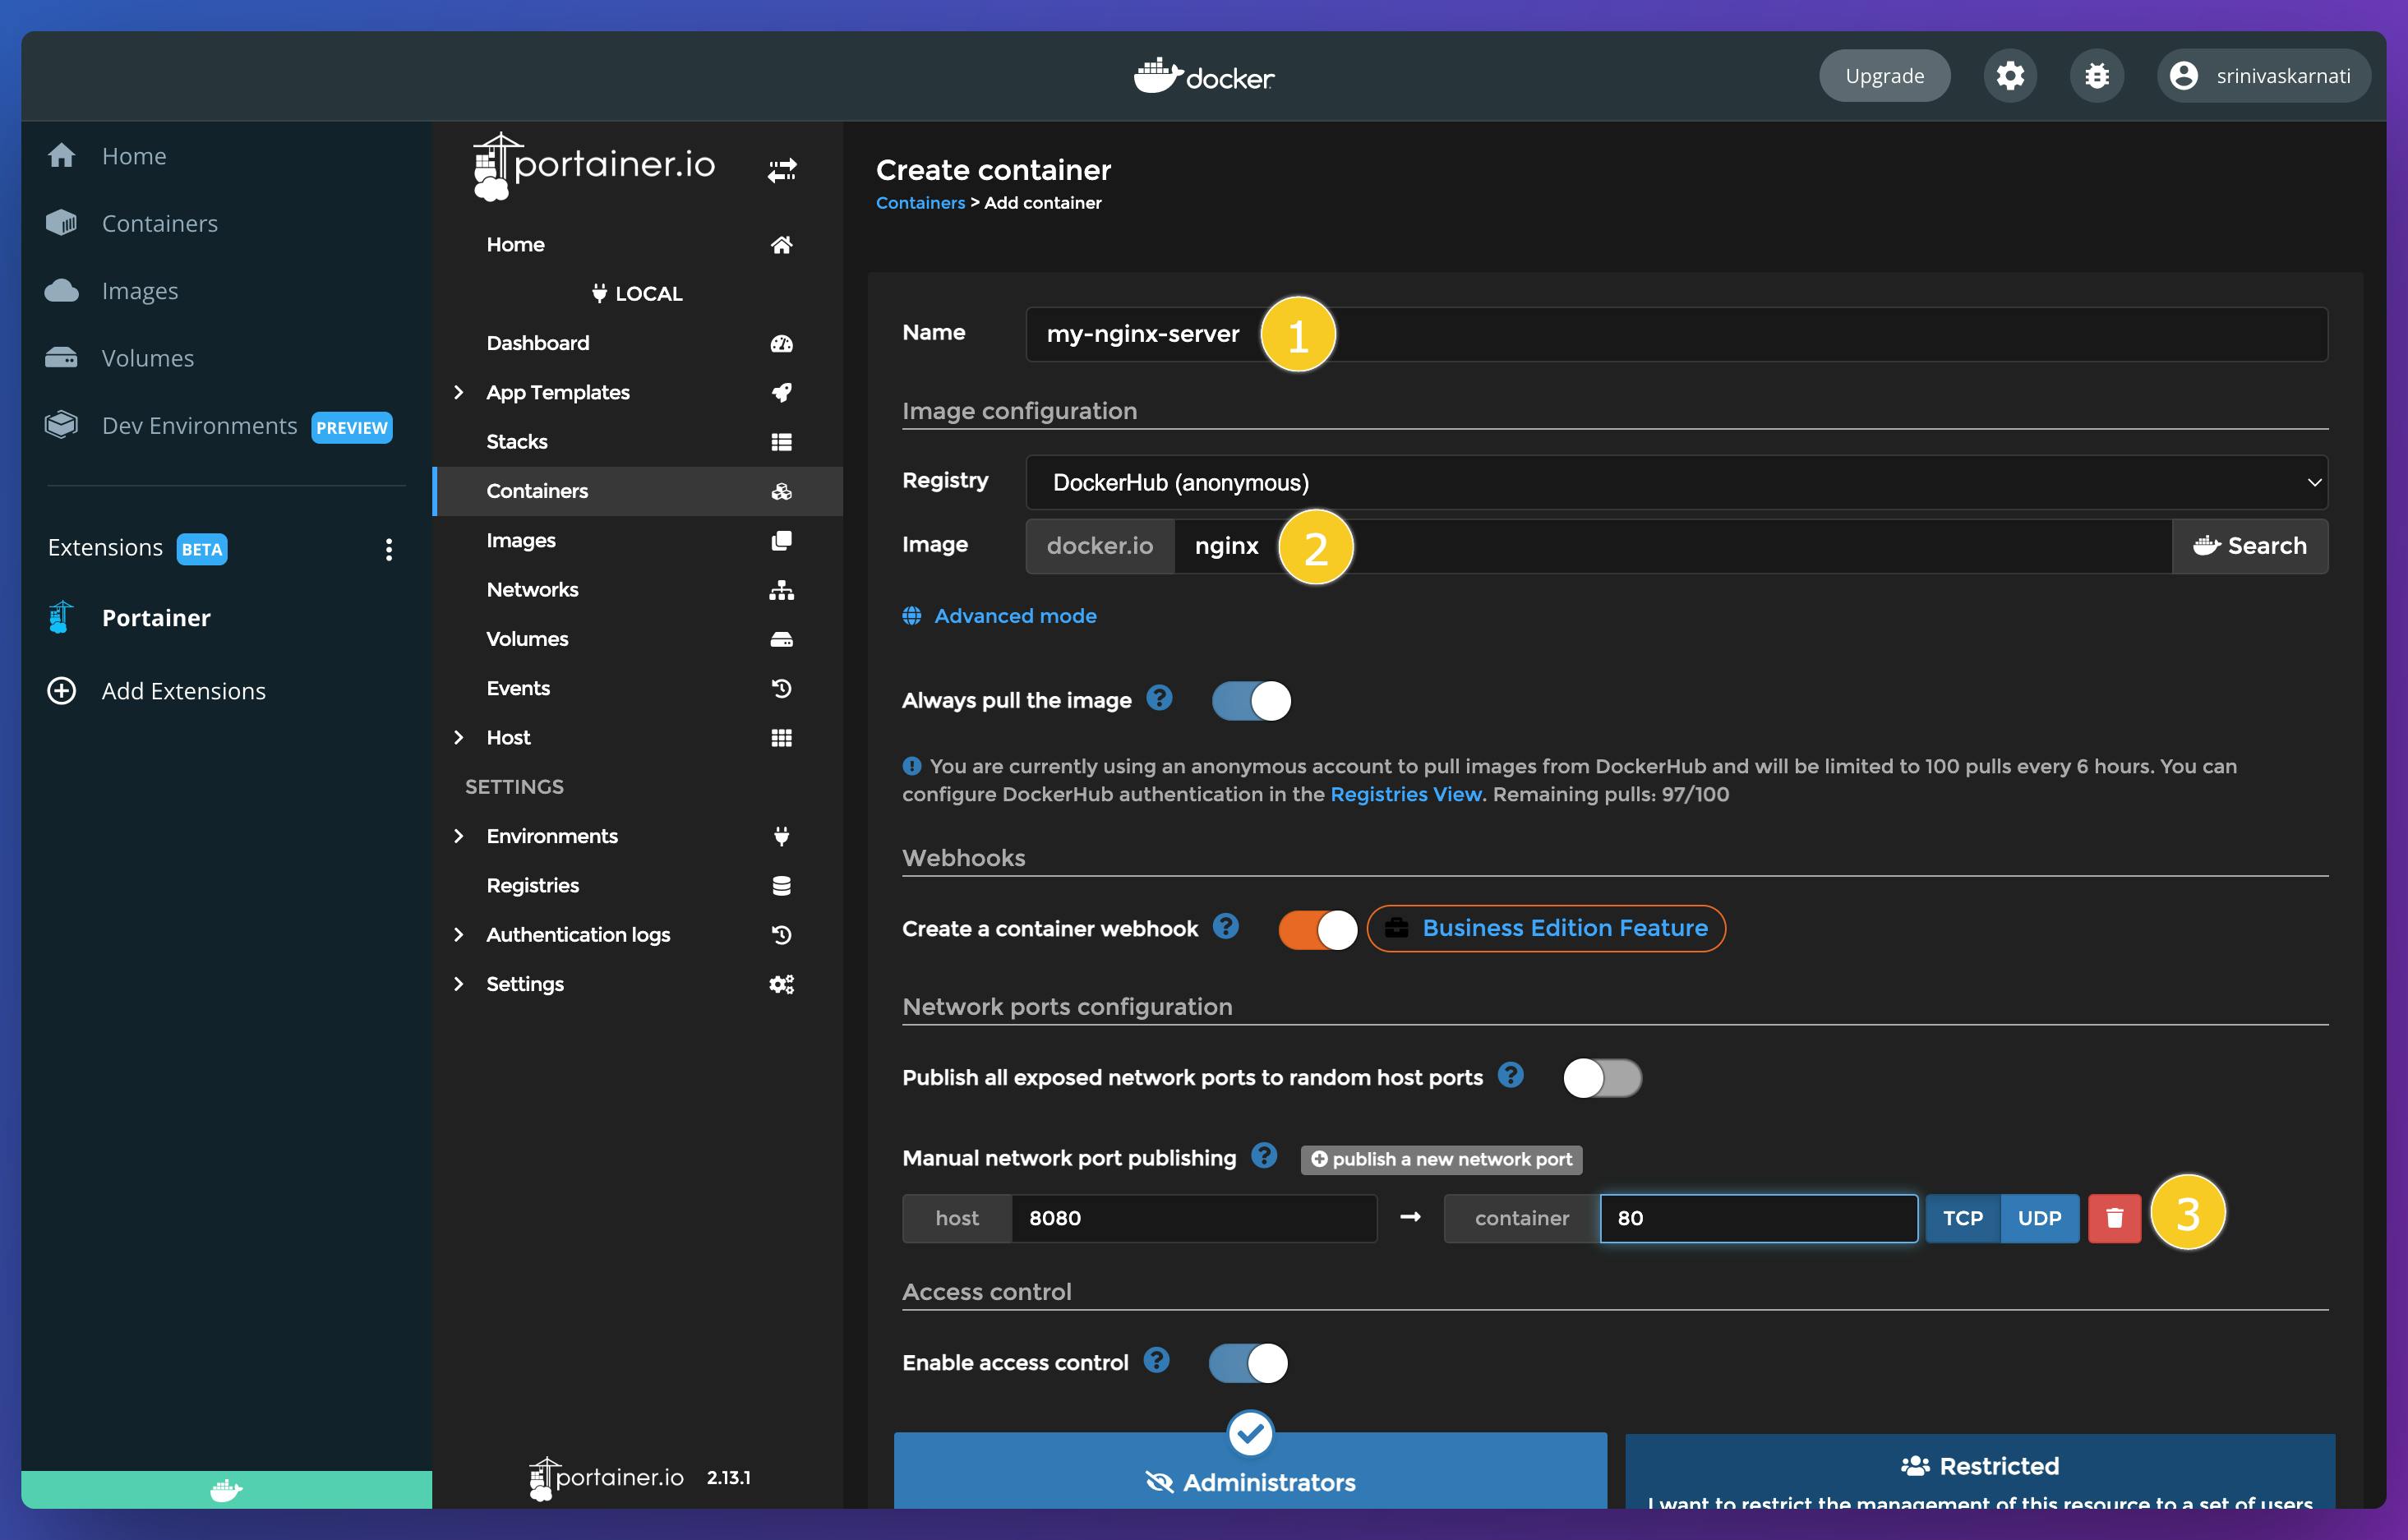
The above steps we performed is like the docker command
docker run --name my-nginx-server -p 8080:80 nginx
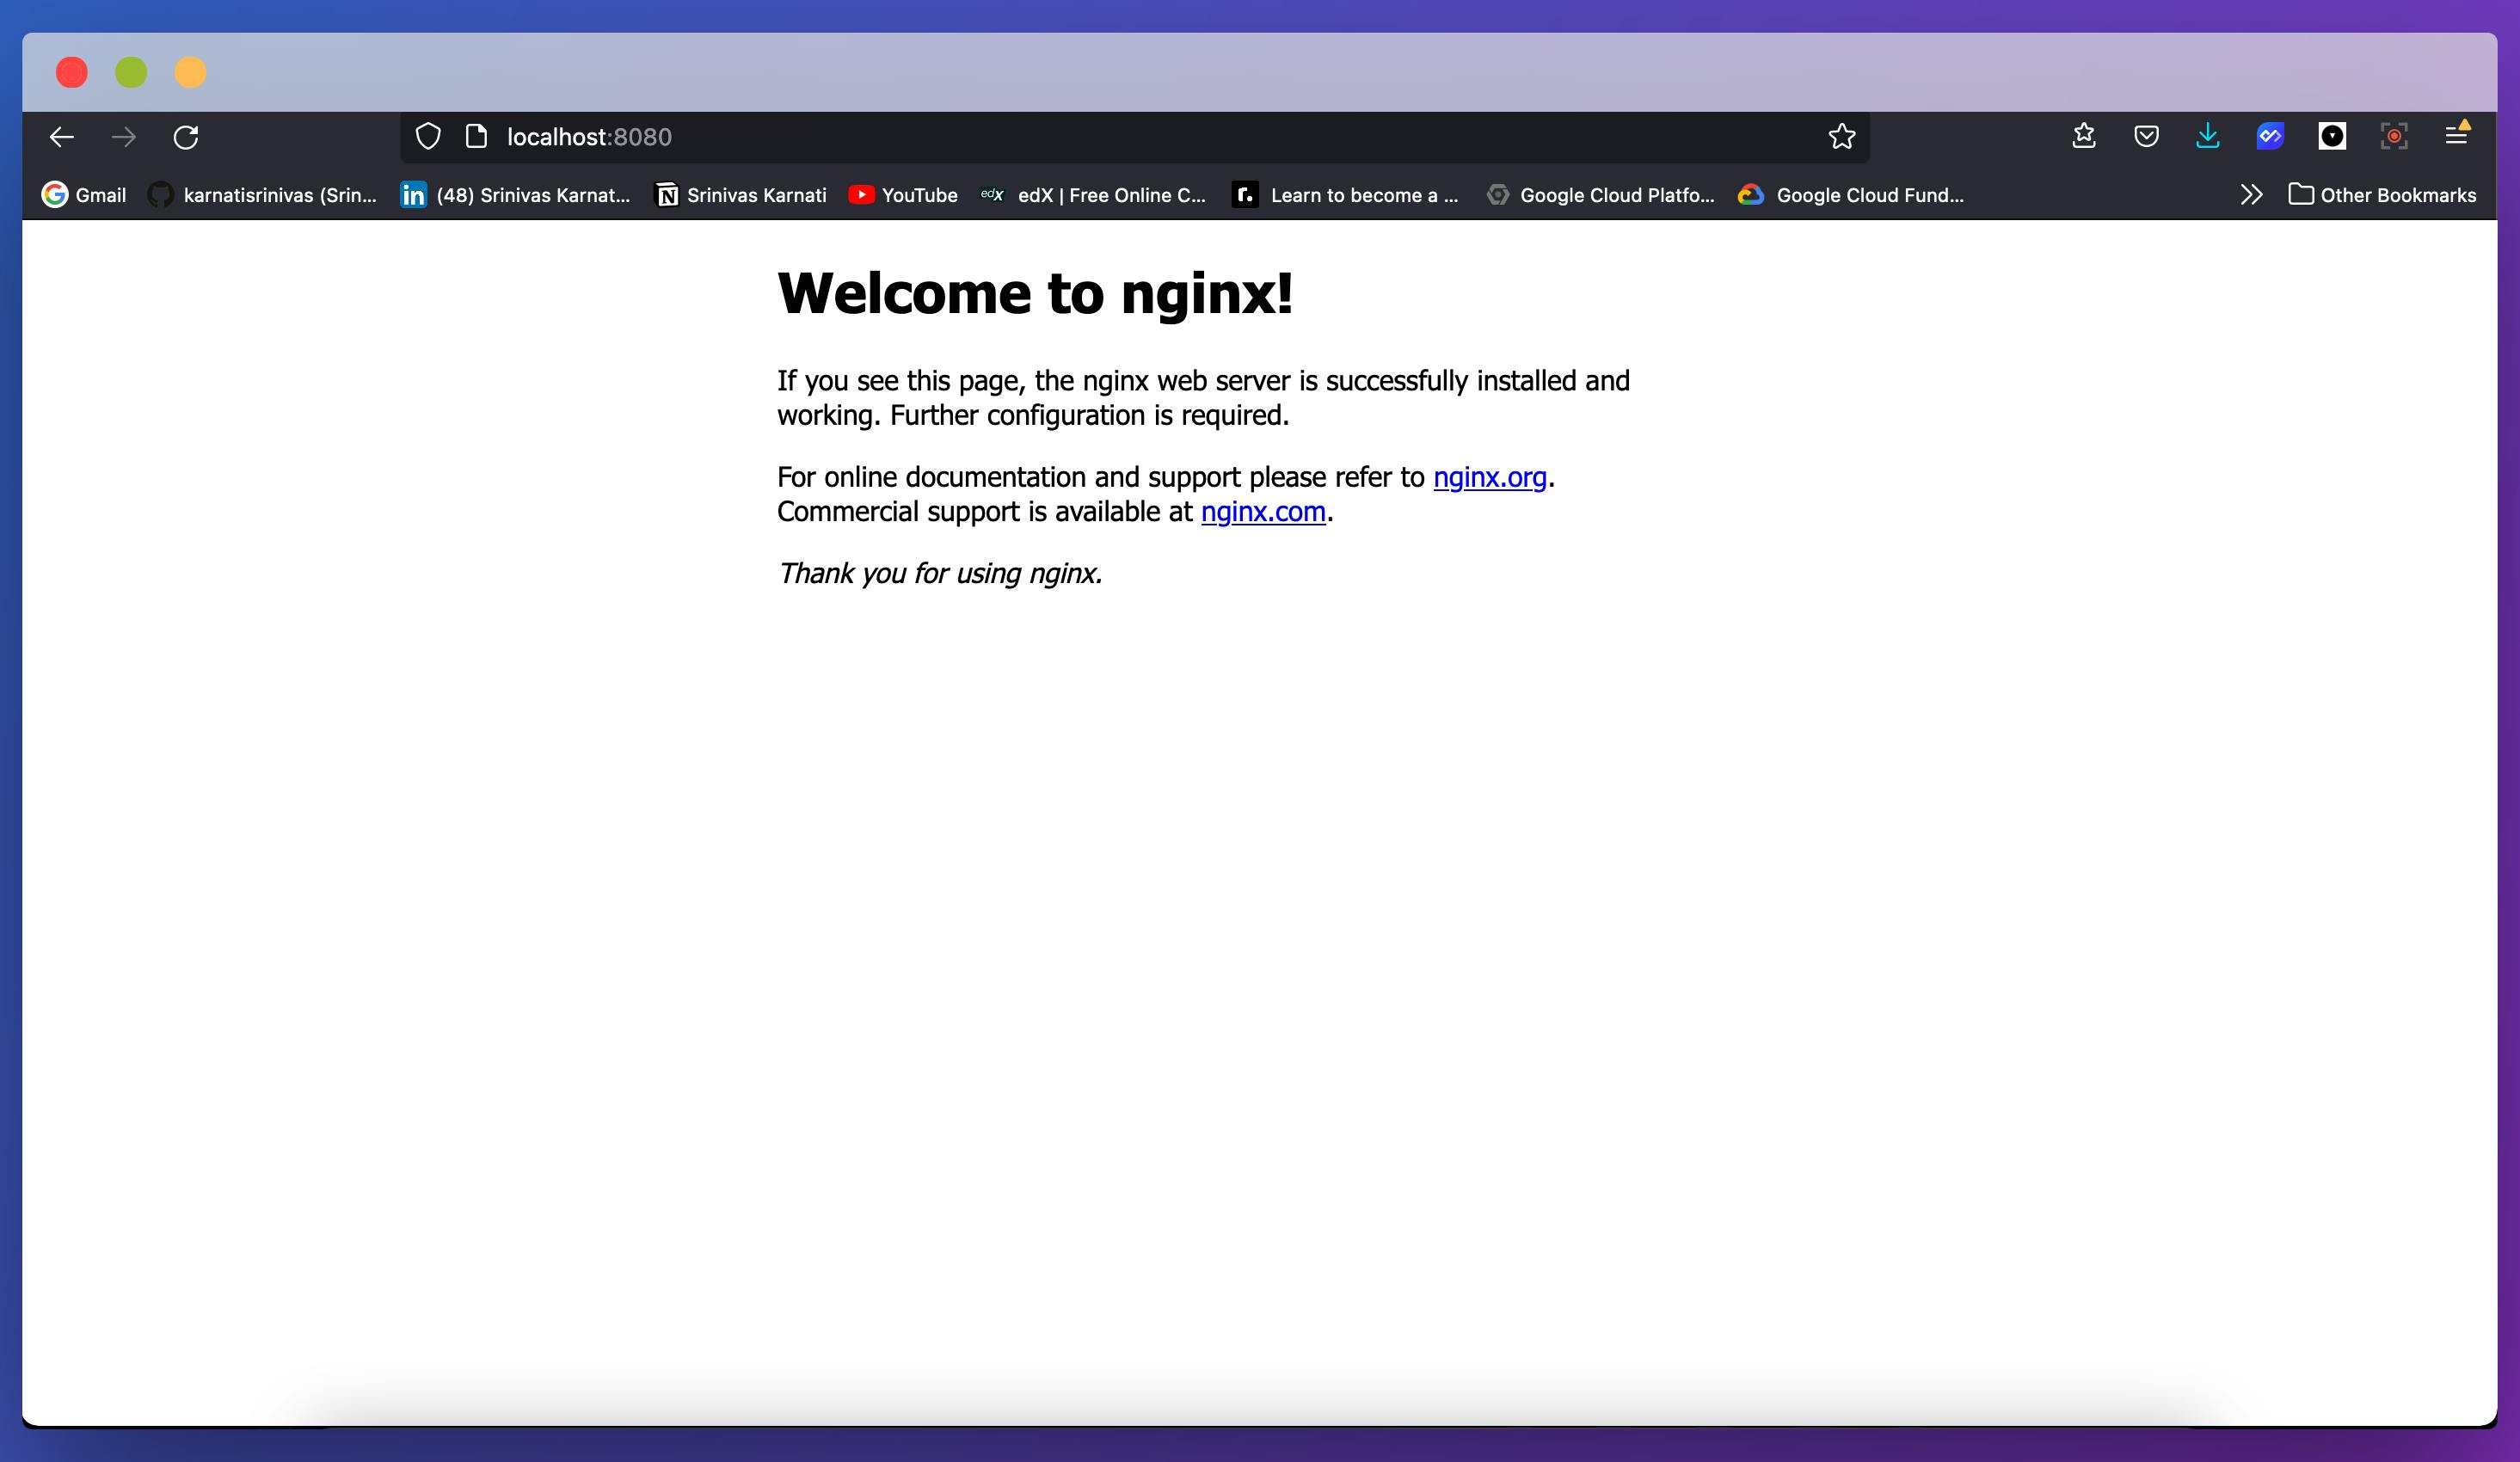
Nginx is now deployed and is exposing to port 8080. Now let us head over to the browser (localhost:8080) and see if our nginx is running or not.
Managing Docker Objects
By using Portainer GUI, We can start, stop, restart, remove one or more containers and create new ones.
You can also see the logs of the containers, Inspect them, stats and also access the console of the container.
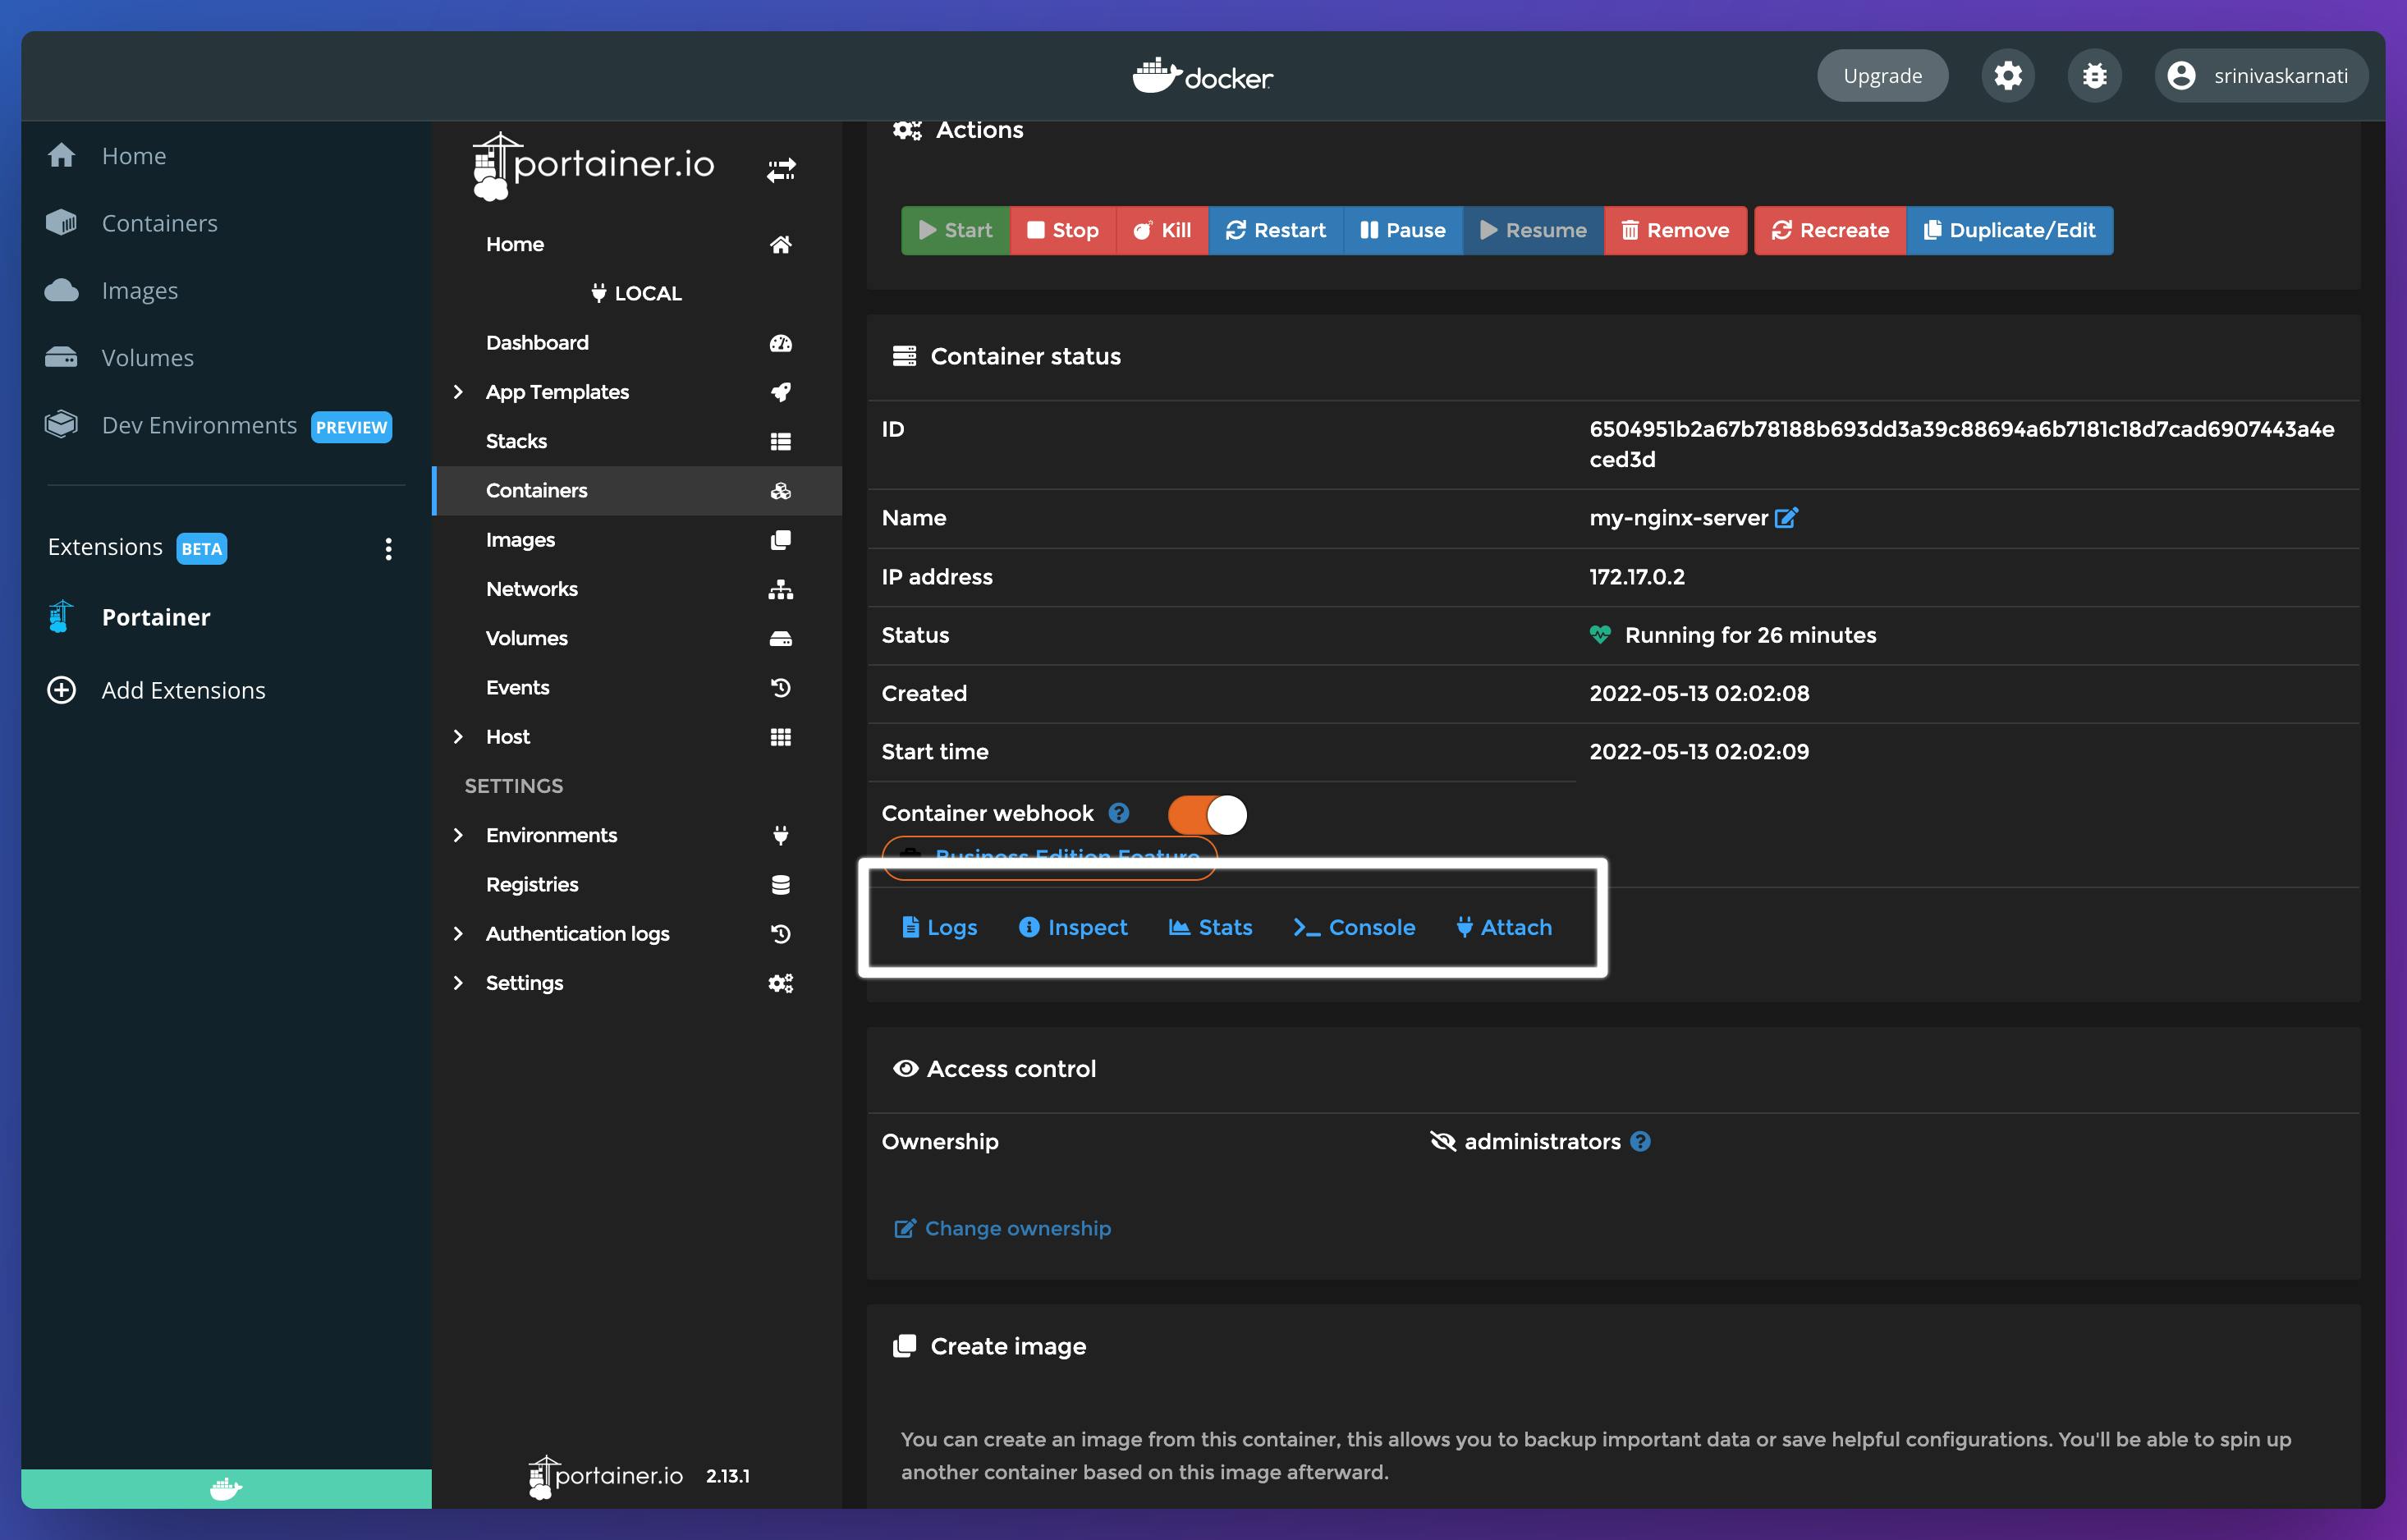
By using Portainer , you can manage all Docker Objects like Images, containers, networks, volumes.
Conclusion
Portainer is an awesome tool that is used to maintain Docker containers, Kubernetes, Azure ACI and other container environments with an easy-to-use interface. It simplifies the Container management by reducing the usage of complex commands by using its clickable interface. For more, visit Portainer.io
