What is Azure Virtual Network?
Azure Virtual Network (VNet) is the bulding block for establishing your private network in Azure. VNet enables many types of Azure resources, such as Azure Virtual Machines (VM), to securely communicate with each other. VNet is similar to a traditional network that you'd operate in your own data center, but brings with it additional benefits of Azure's infrastructure such as scale, availability, and isolation.
Azure virtual network enables Azure resources to communicate with each other.
Key scenarios that you can accomplish with a virtual network include - communication of Azure resources with the internet, communication between Azure resources, communication with on-premises resources, filtering network traffic, routing network traffic, and integration with Azure services.
Create a Virtual Network using Azure Portal
In this post, we will create a VNet ( Virtual network), we will add two subnets, and create two VMs, one in each subnet.
Create a Virtual network
- To access azure portal, go to https://portal.azure.com
- Click on create resource -> Networking -> Virtual Network
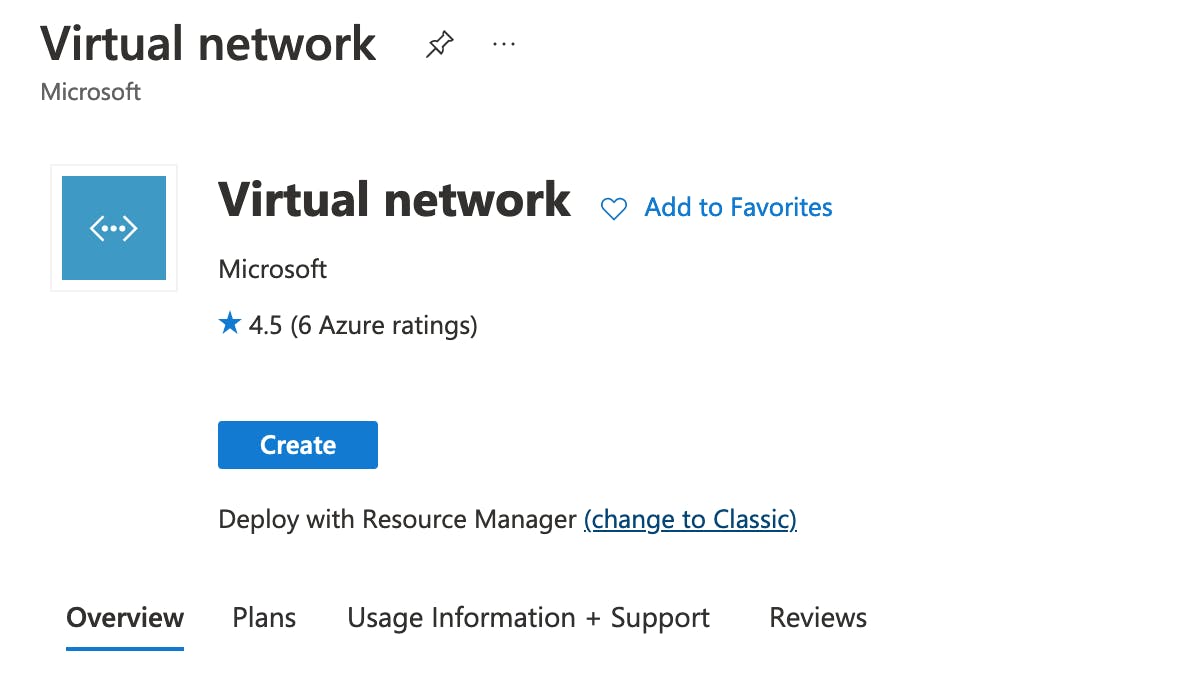
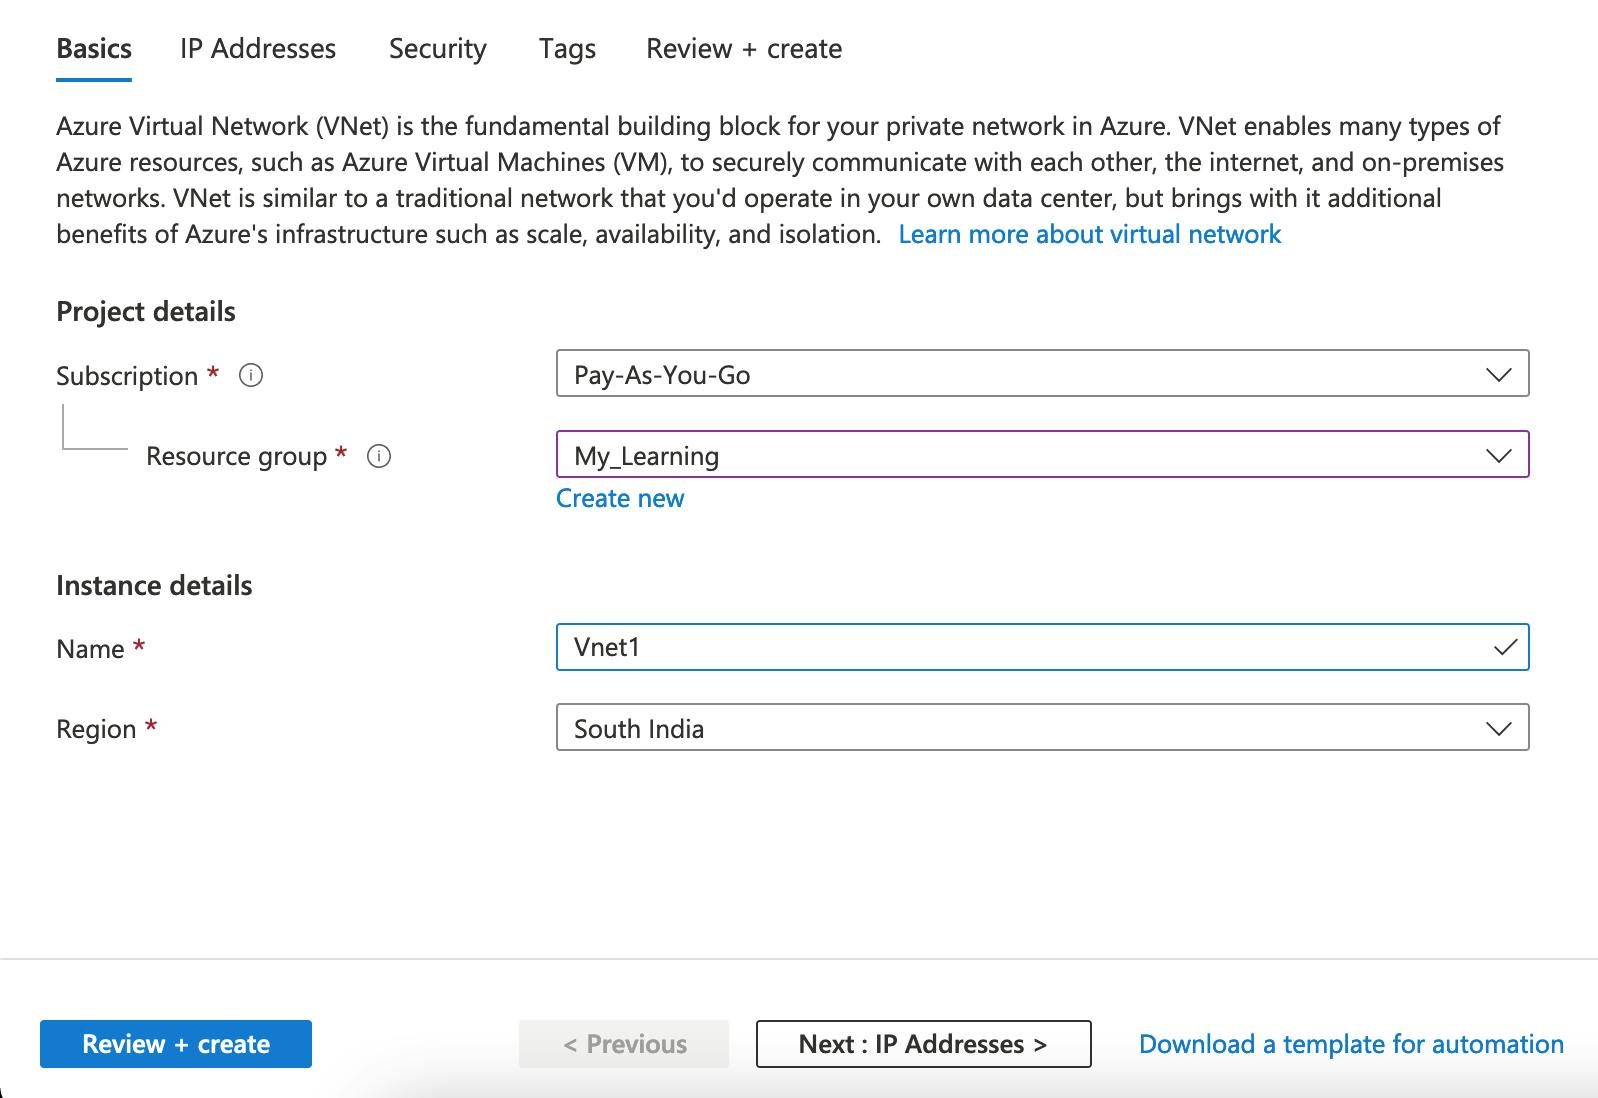
- In Create virtual network, enter or select this information in the Basics tab:
- Subscription - Select your subscription.
- Resource group - Select your Resource group. ( or create new)
- Instance details - enter Name and the Region for your Vnet
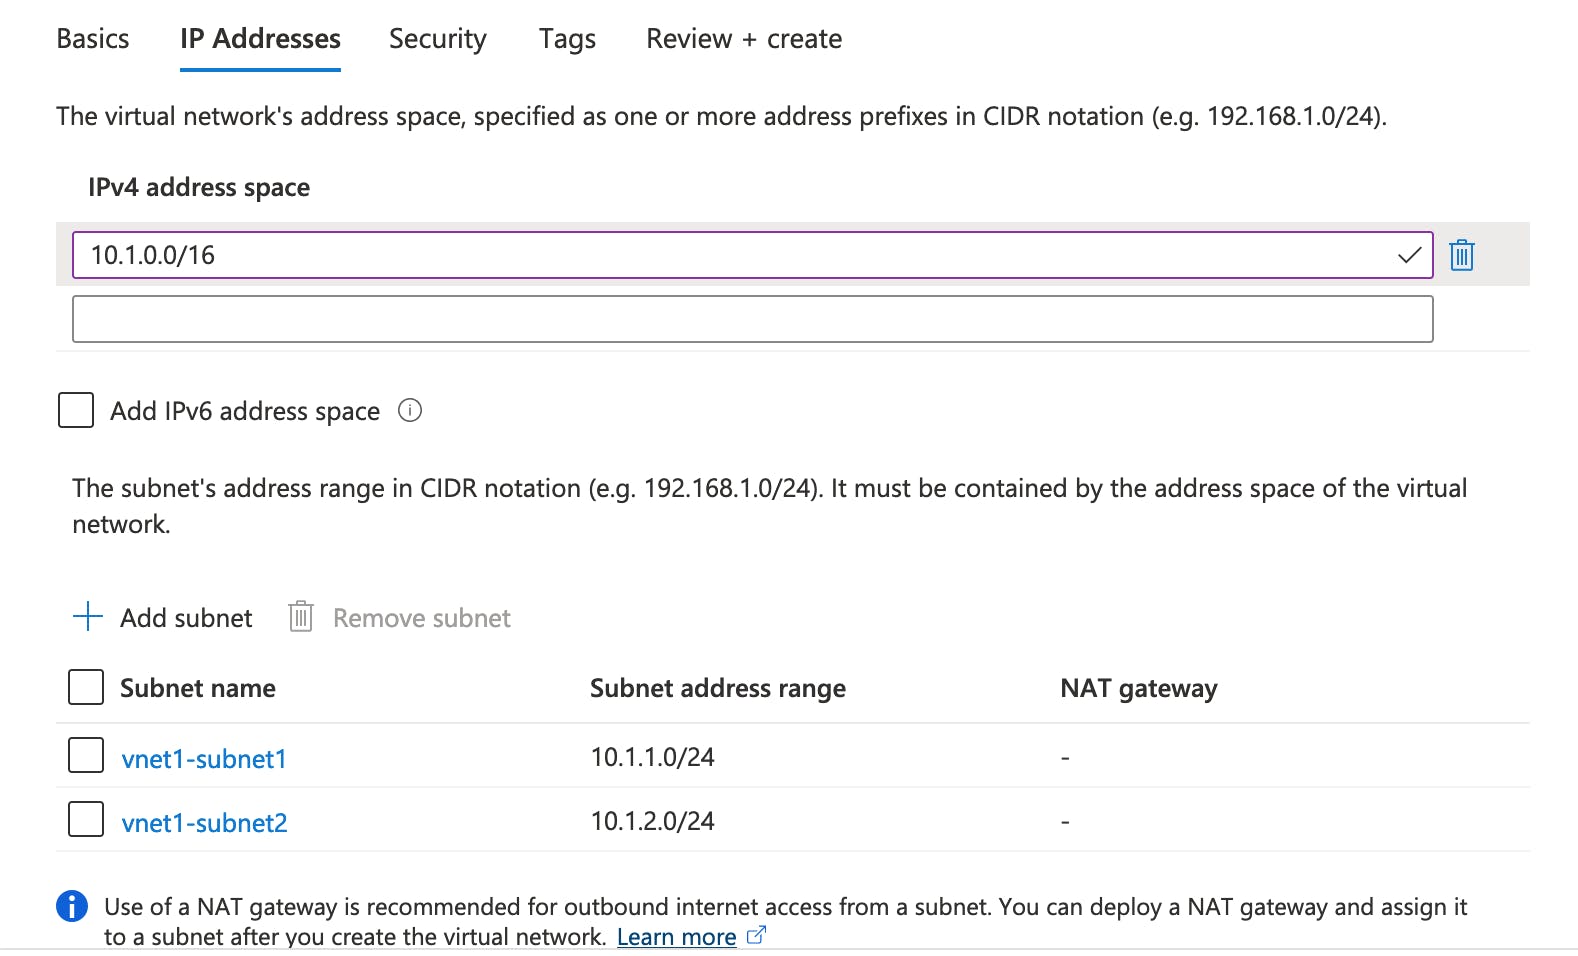
Select the IP Addresses tab, or select the Next: IP Addresses button at the bottom of the page.
In IPv4 address space, select the existing address space and change it to 10.1.0.0/16.
Select + Add subnet, then enter Subnet name and 10.1.1.0/24 for Subnet address range.
Select Add.
- Repeat previous two steps to add one more subnet as follows:
- We will leave the rest as default and select Review + Create. Once the validation is passed, click on Create.
- Once the deployment is completed, you will see your deployed Virtual Network on your resources.

Create Virtual Machines
We will create two VMs in our virtual network:
Create the first VM
On the upper-left side of the portal, select Create a resource > Compute > Virtual machine.
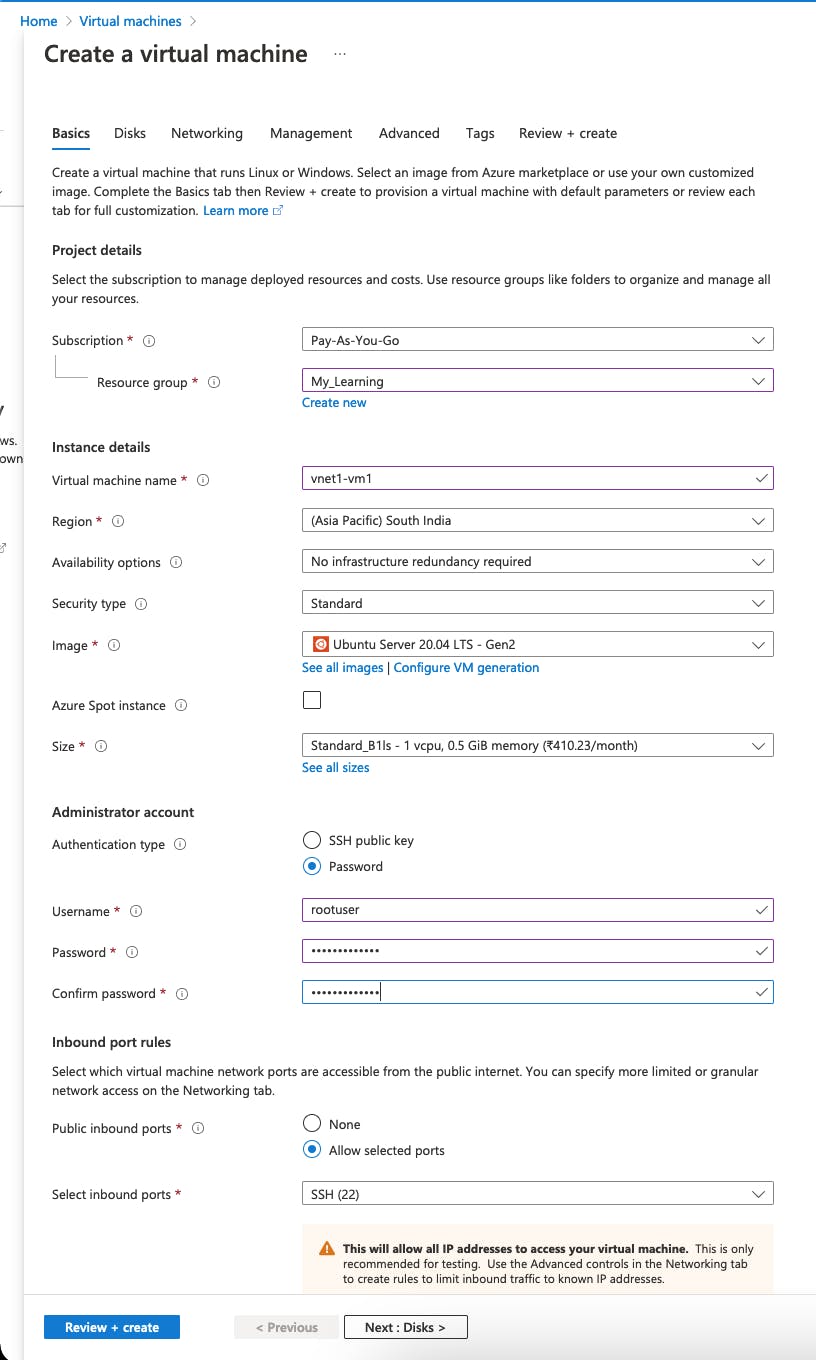
In Create a virtual machine, type or select the values in the Basics tab:
- Subscription - Select your Azure subscription
- Resource Group - Select the Resource group, you've created.
- Instance details
- Virtual machine name Enter name for your VM
- Region Select the Region( I select South India)
- Availability Options Select No infrastructure redundancy required
- Image - I selected Ubuntu 20.04.
- Azure Spot instance Select No
- Size Choose VM size or take default setting
- Administrator account
- Username Enter a username
- Password Enter a password
- Confirm password Reenter password
- Select the Disks tab, select the preferred disk type or leave defaults.
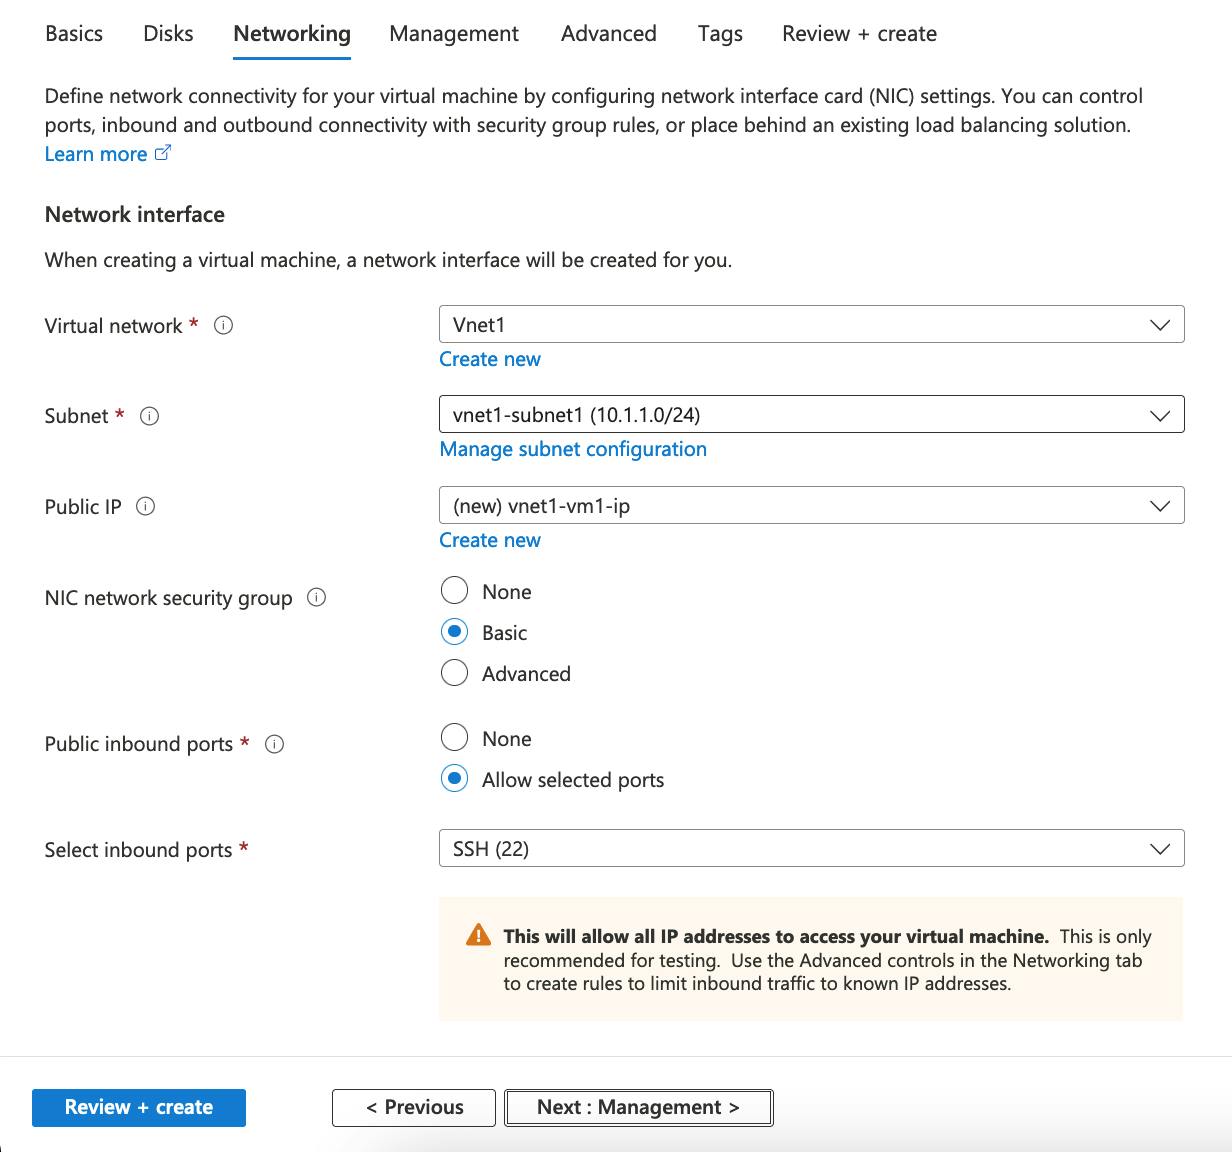
- In the Networking tab, select or enter:
- Virtual network - Select Vnet1 ( the name of Virtual network you created).
- Subnet Select vnet1-subnet1 (The first subnet)
- Public IP Leave the defaults
- Select Review + Create. You will be taken to Review page where Azure checks your VMs Configuration.
- Once the validation is passed, Select Create. Once the deployment is completed, you will see the VM in your resources list.
Create the Second VM
Repeat the above steps to create a New Virtual Machine with following Networking Configuration. - Virtual Network - Vnet1
- Subnet - select vnet1-subnet2 ( second subnet) Keep the rest as similar to first VM, and create the virtual machine.
Communicate between VMs
- To Connect to your VM (vnet1-vm1), you can either use Connect button, or you can access using public IP via SSH
ssh username@IPaddress - enter the username and password you created for the virtual machine previously.
- Once you are in the VM, enter
ping vnet1-vm2( to check the second VM's reachability). You'll receive a message similar to this output:

- Repeat the same steps for VM2 to test if VM1 is accessible or not.

